Hey! I’m Emi, welcome to my site.
I enjoy tinkering with (sometimes old) computers and cameras. Thus many of the blog posts and projects you find on here are related to these. If you are interested in photography you might also enjoy my photo blog.
I enjoy tinkering with (sometimes old) computers and cameras. Thus many of the blog posts and projects you find on here are related to these. If you are interested in photography you might also enjoy my photo blog.
About a year ago I stumbled upon the 1kb club and found the idea of a super small website intriguing. So I set about to make a small landing page linking to this blog and my photo blog. Initially I put it on GitHub Pages (which I was tinkering with at the time anyways). When putting this together I initially crafted the html by hand and then quickly moved to using minify to strip out the white space and such. (Hilariously the node_modules folder for this 1kb website is about 60Mb at the time of writing.) The whole thing is open source and available on GitHub if you are interested! For a while I left it at that.
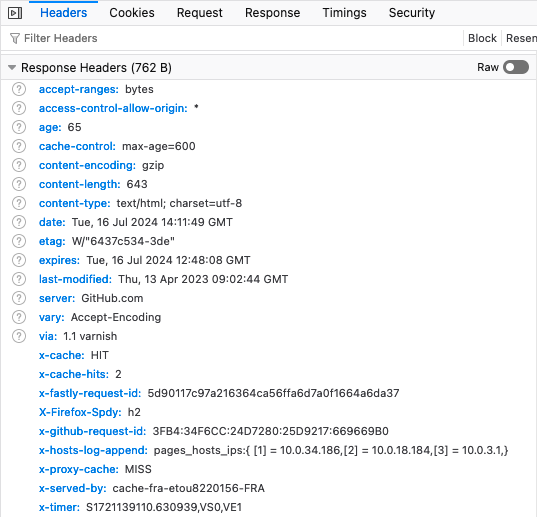
But then I finally got around to submitting my page to join the illustrious 1kb club for real! However my hosting solution on GitHub pages got in the way: Turns out the CDN that GitHub pages uses puts about 750 bytes of headers in the response. Together with the 990 bytes of HTML that I came up with this was well above the 1 kilobyte limit, even with the gzip content encoding:
So I had to move to a more custom hosting solution. Luckily I run an nginx server for my blog already and I moved the small website over there. But nginx, by default, also sends a bunch of headers that are not strictly needed. However it’s easy enough to turn off most of them on a per server (in nginx config terms) basis. Specifically I turned off the following features fot this:
server_tokens off;
if_modified_since off;
expires off;
etag off;
And finally (configured on a per location basis) I also turned off the Last-Modified header by setting it to an empty string:
add_header Last-Modified '';
The resulting configuration looks something like this (plus something similar for SSL):
server {
  listen 80;
  listen [::]:80;
  server_name hi.emi.industries;

  # Disable various headers for minimal response size:
  server_tokens off;
  if_modified_since off;
  expires off;
  etag off;

  root ~/sites/hi.emi.industries/;

  location / {
    # Disable last-modified header for minimal response size:
    add_header    Last-Modified '';

    # First attempt to serve request as file, then
    # as directory, then fall back to displaying a 404.
    try_files $uri $uri/ /index.html;
  }
}
(I maintain the actual config as a template via Ansible.)
With all of this in place I got the headers down to 136 bytes:
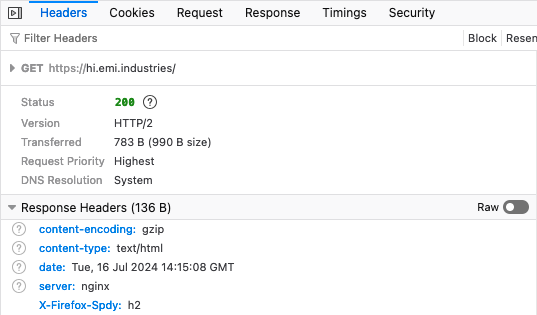
The overall transferred data is now even down to 783 bytes, well within the 1 kilobyte limit. And thus you can find my site linked on 1kb.club with a bunch of other, very small, websites!
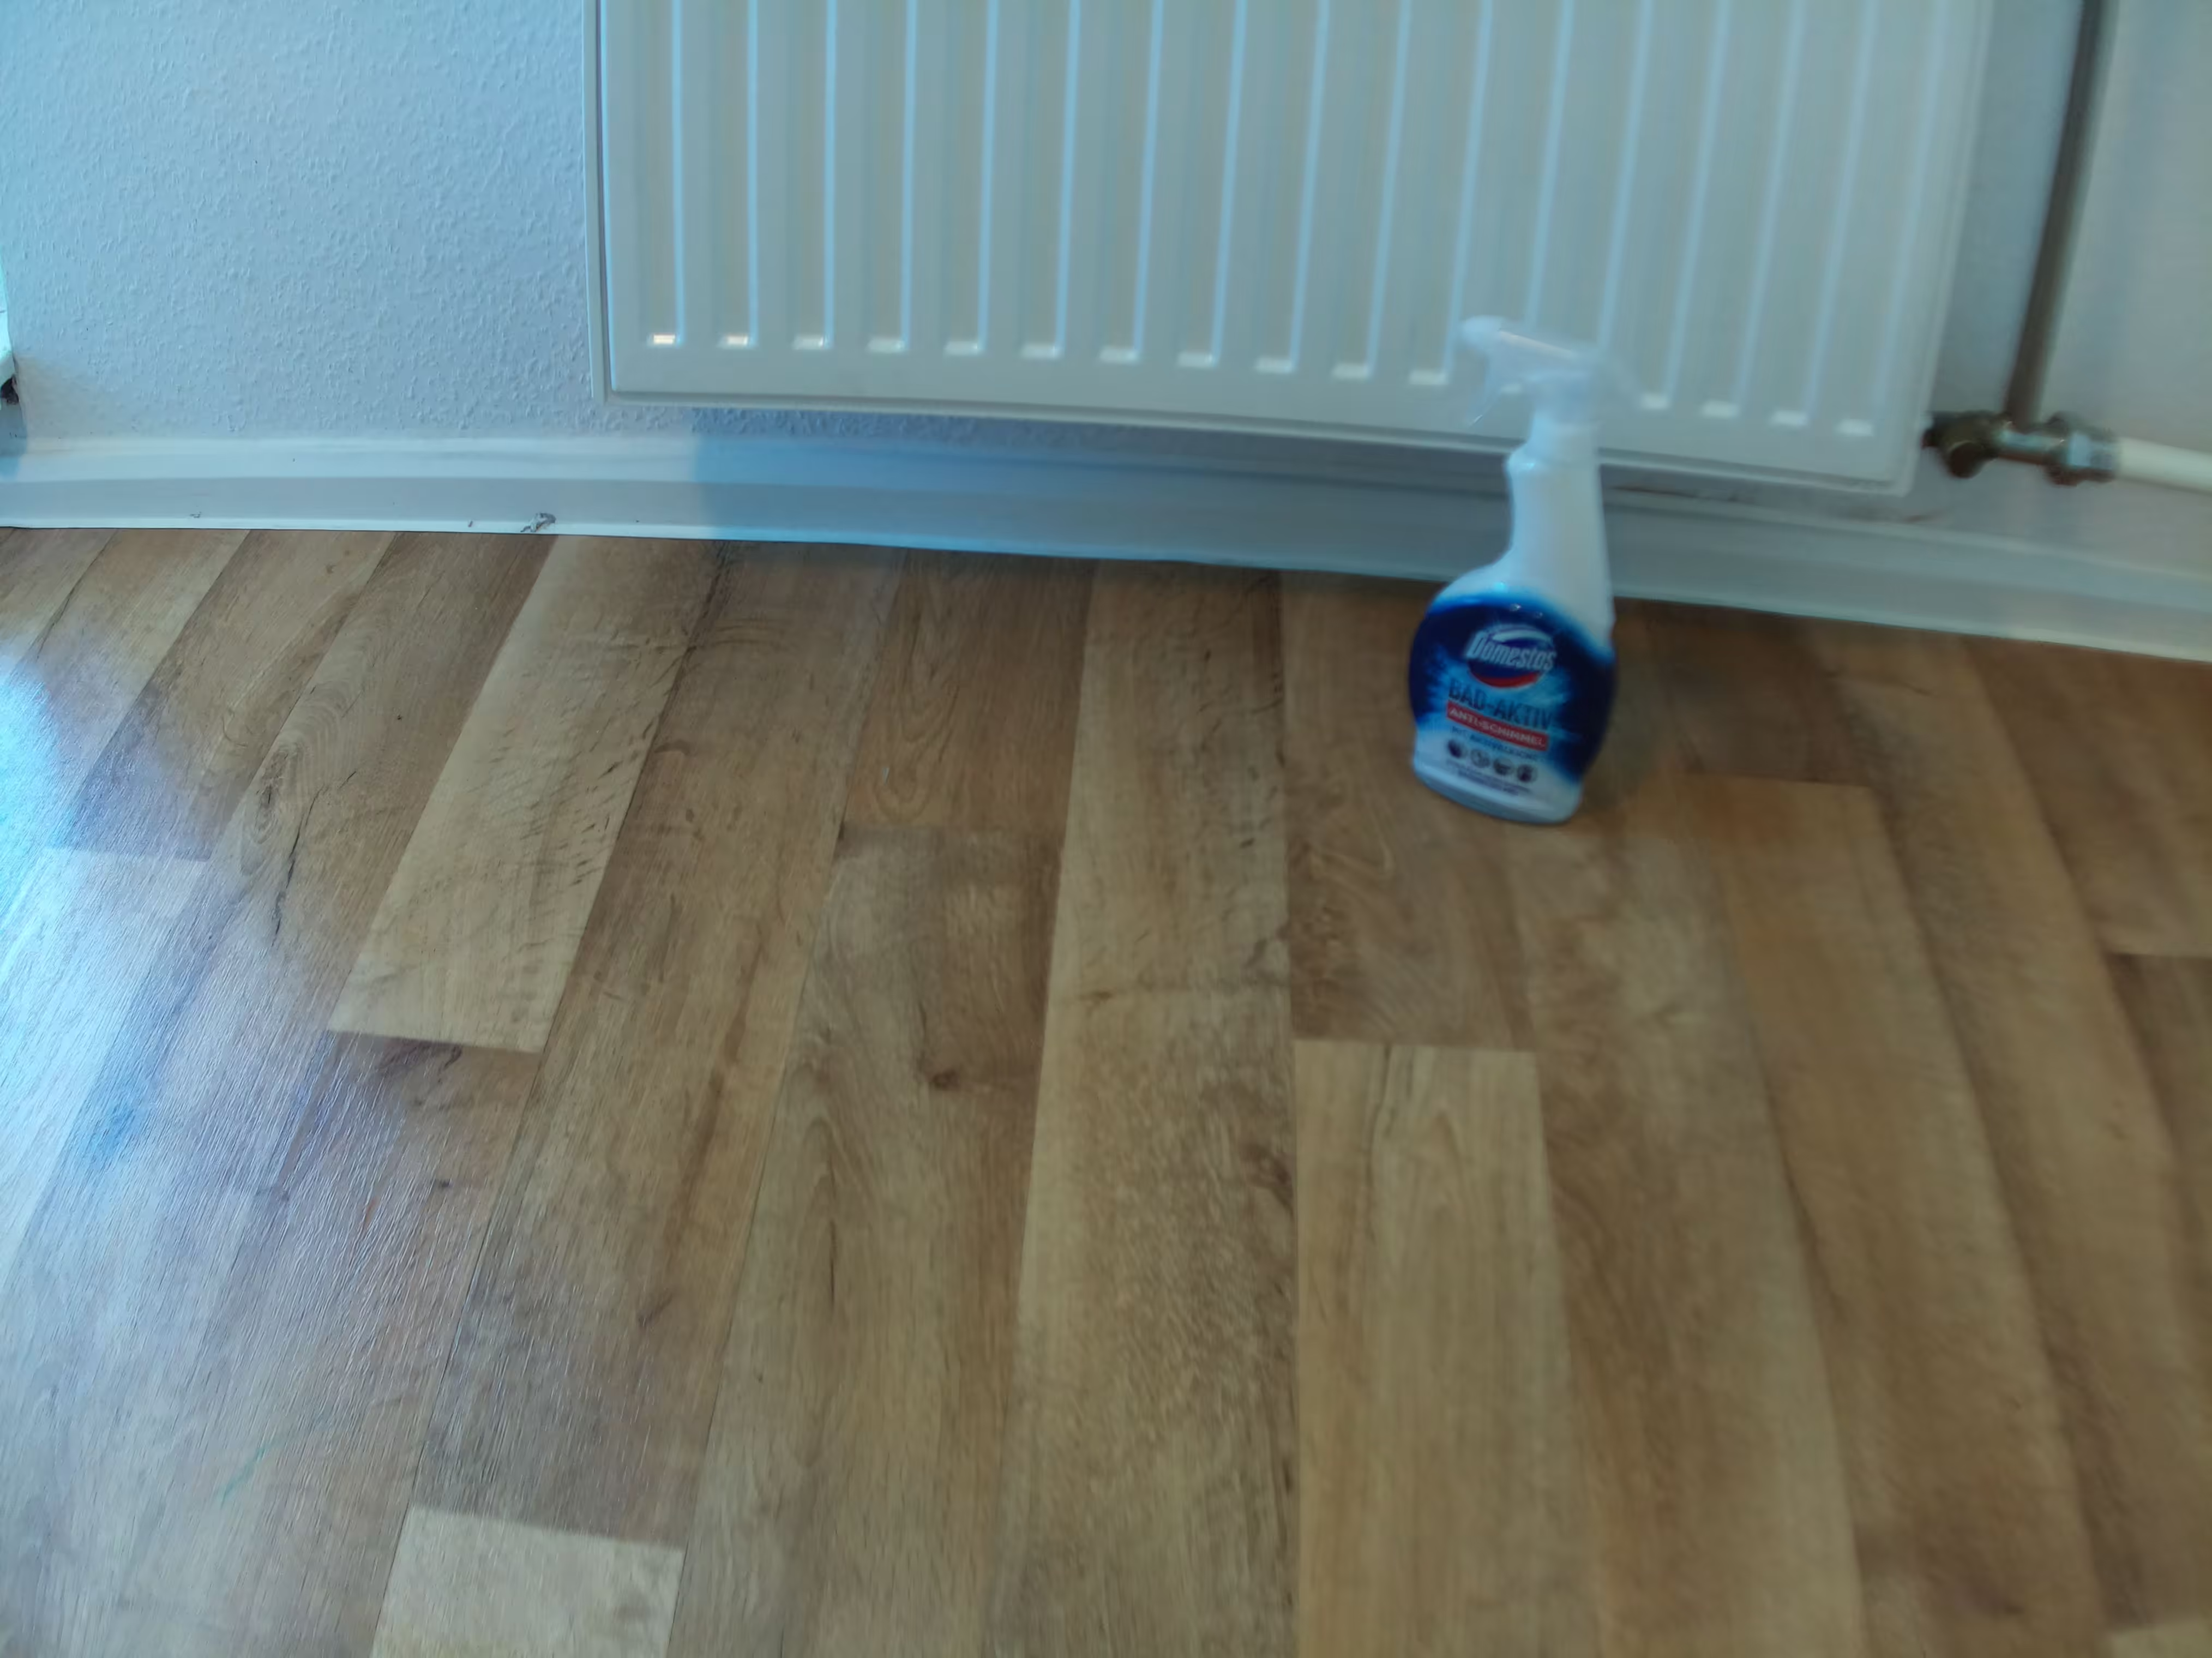
I’ve had an issue with the heating in my flat since August. One of the heaters had rusted through (it was made in the 1980s in the GDR) and was dripping water. The whole thing started slowly and with fits and starts got worse until it was finally resolved in November by replacing the heater altogether.
Needless to say that was way too much time for such a small repair and there is a story about sub-sub contractors here that I will spare you except for a small statistic: I total it took 4 companies and about 10 people until someone with the right tools and the right knowledge showed up and got it done in under two hours. The road to that was over two months and lots of waiting while there was the worlds slowest flooding taking place in my living room. Since I had two vacations in the mean time I had to get friends to empty buckets in my absence (thanks again to everyone who did that!).
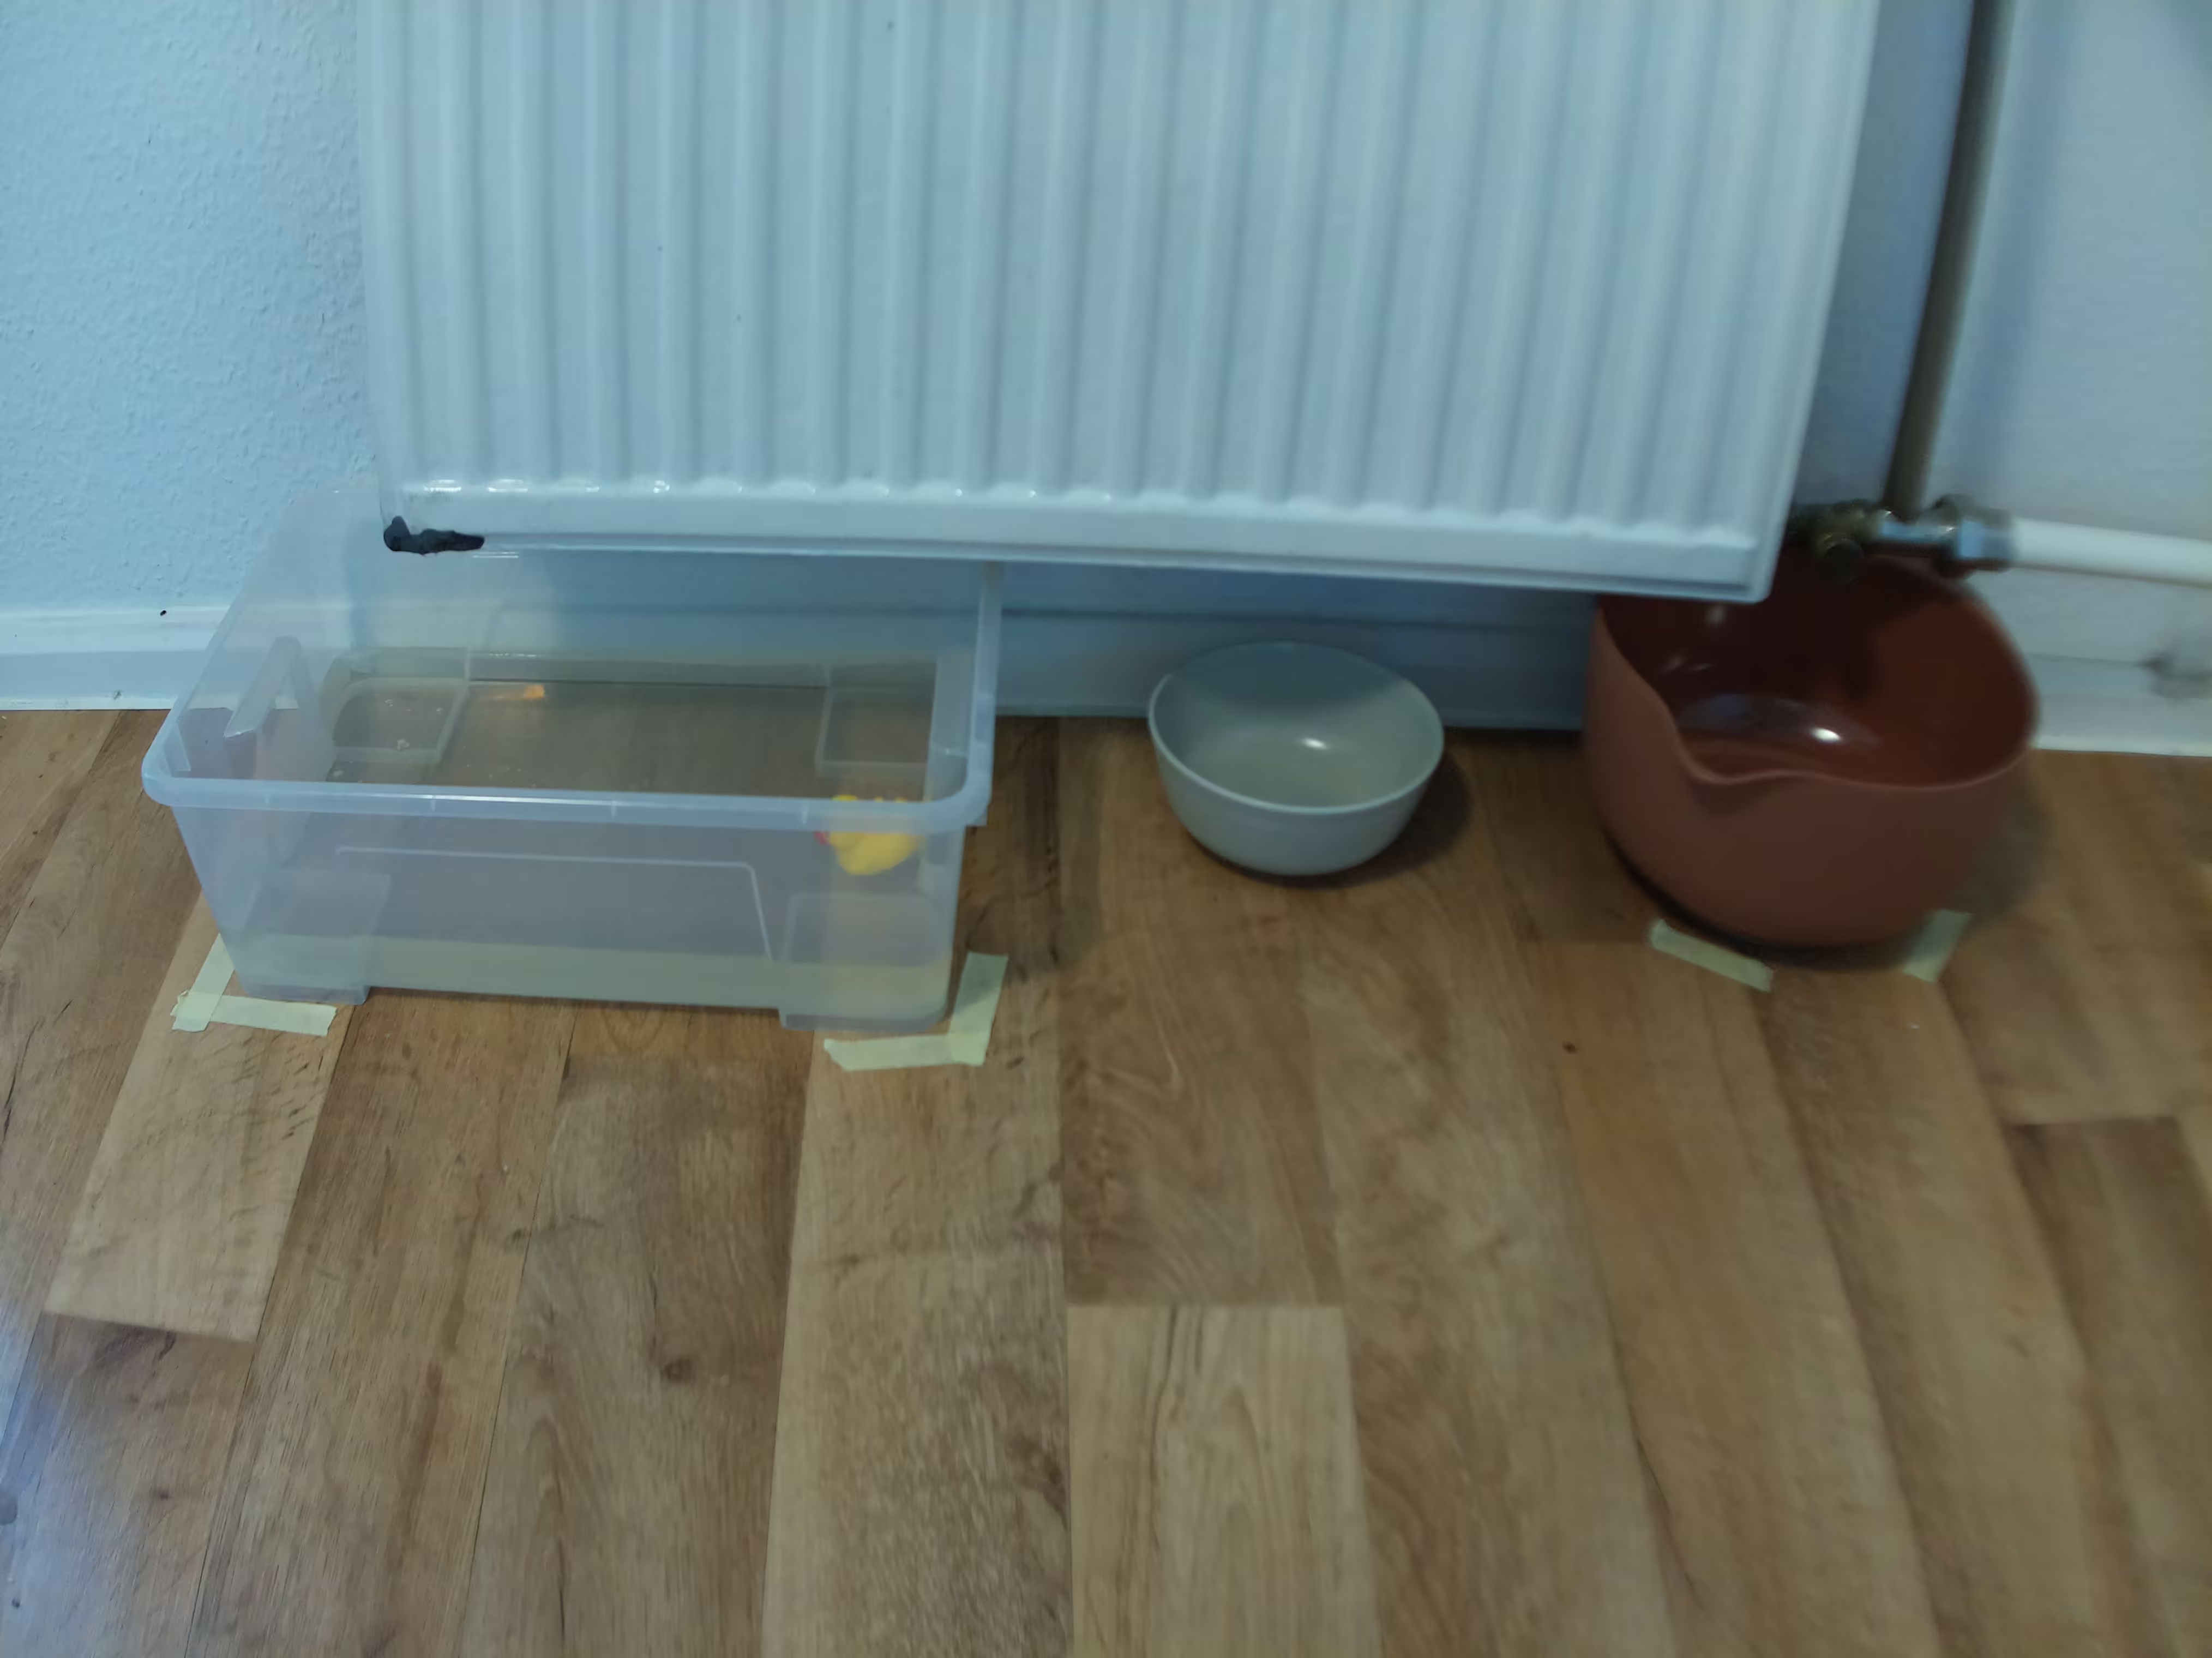
And that brings me to the actual topic of this blog post! As a nerd I obviously needed to throw a bit of technology at this problem. I wanted too get a sense of how full those buckets were in order to let my friends (and the internet!) know how bad things were so they could come over when needed instead of showing up super often.
So, as someone with:
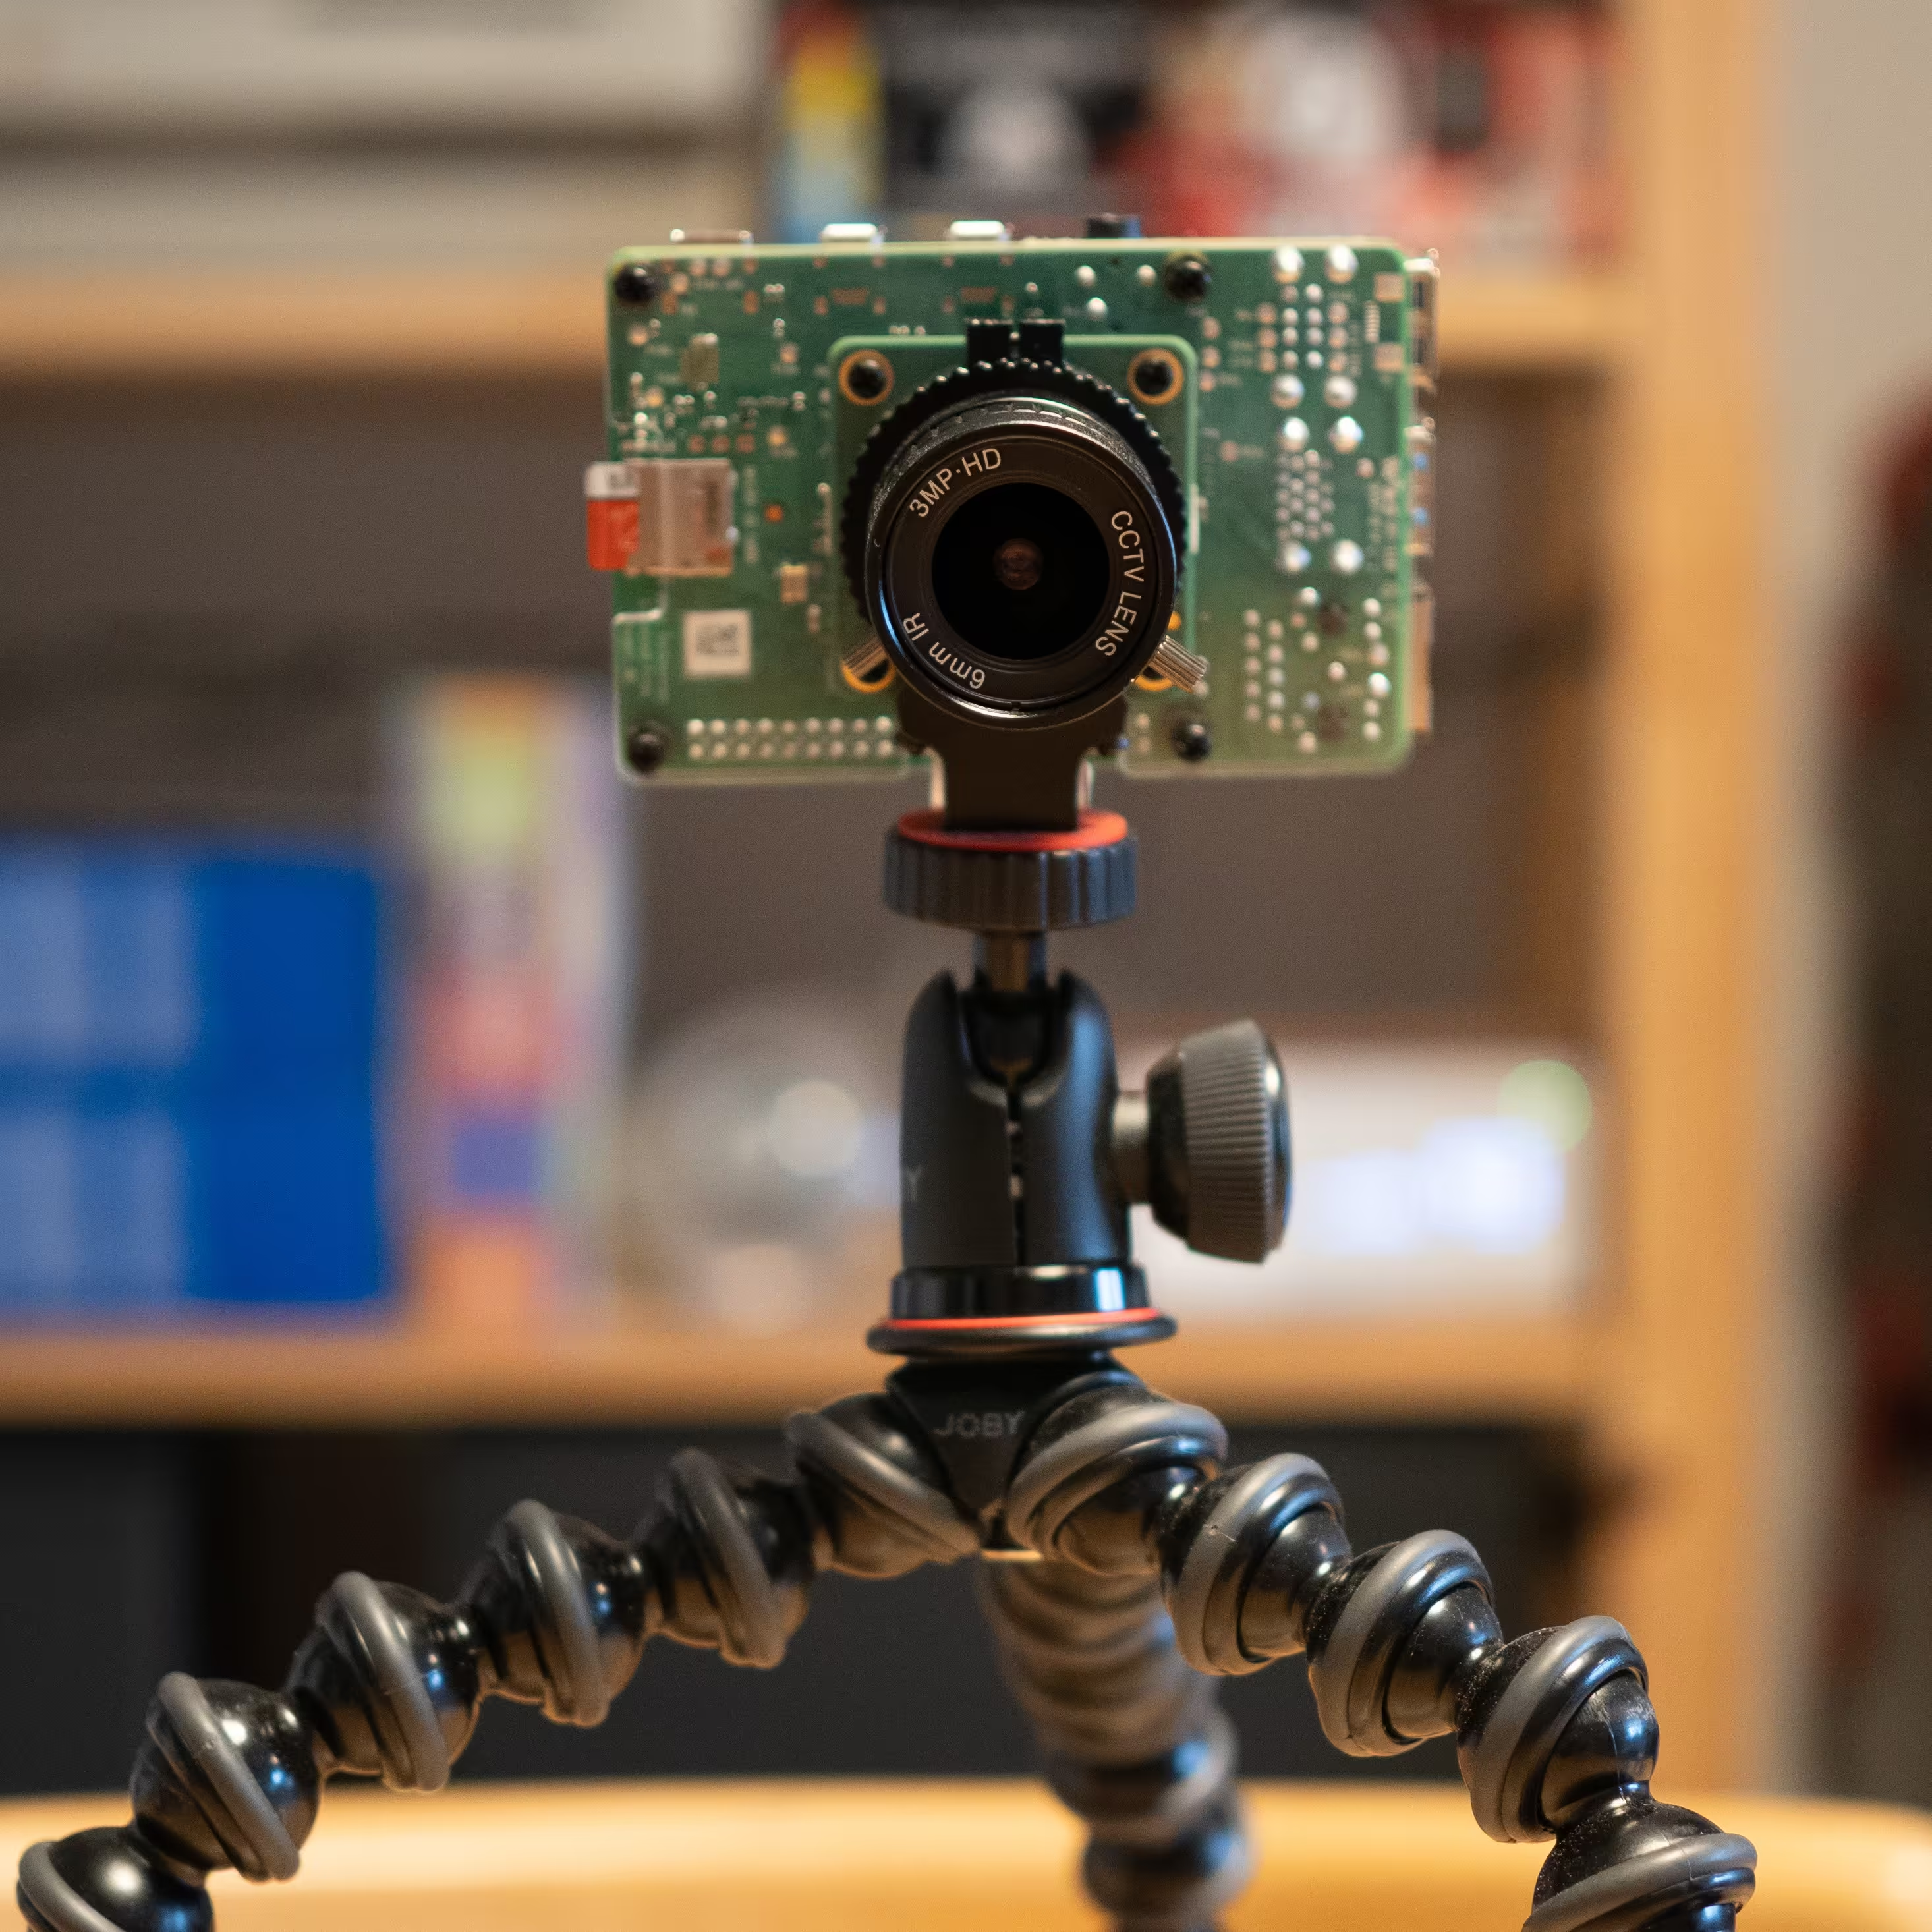
I quickly realized that what this called for: a live camera on the internet! Also this provided a convenient excuse to buy a High Quality Camera module for the Pi!
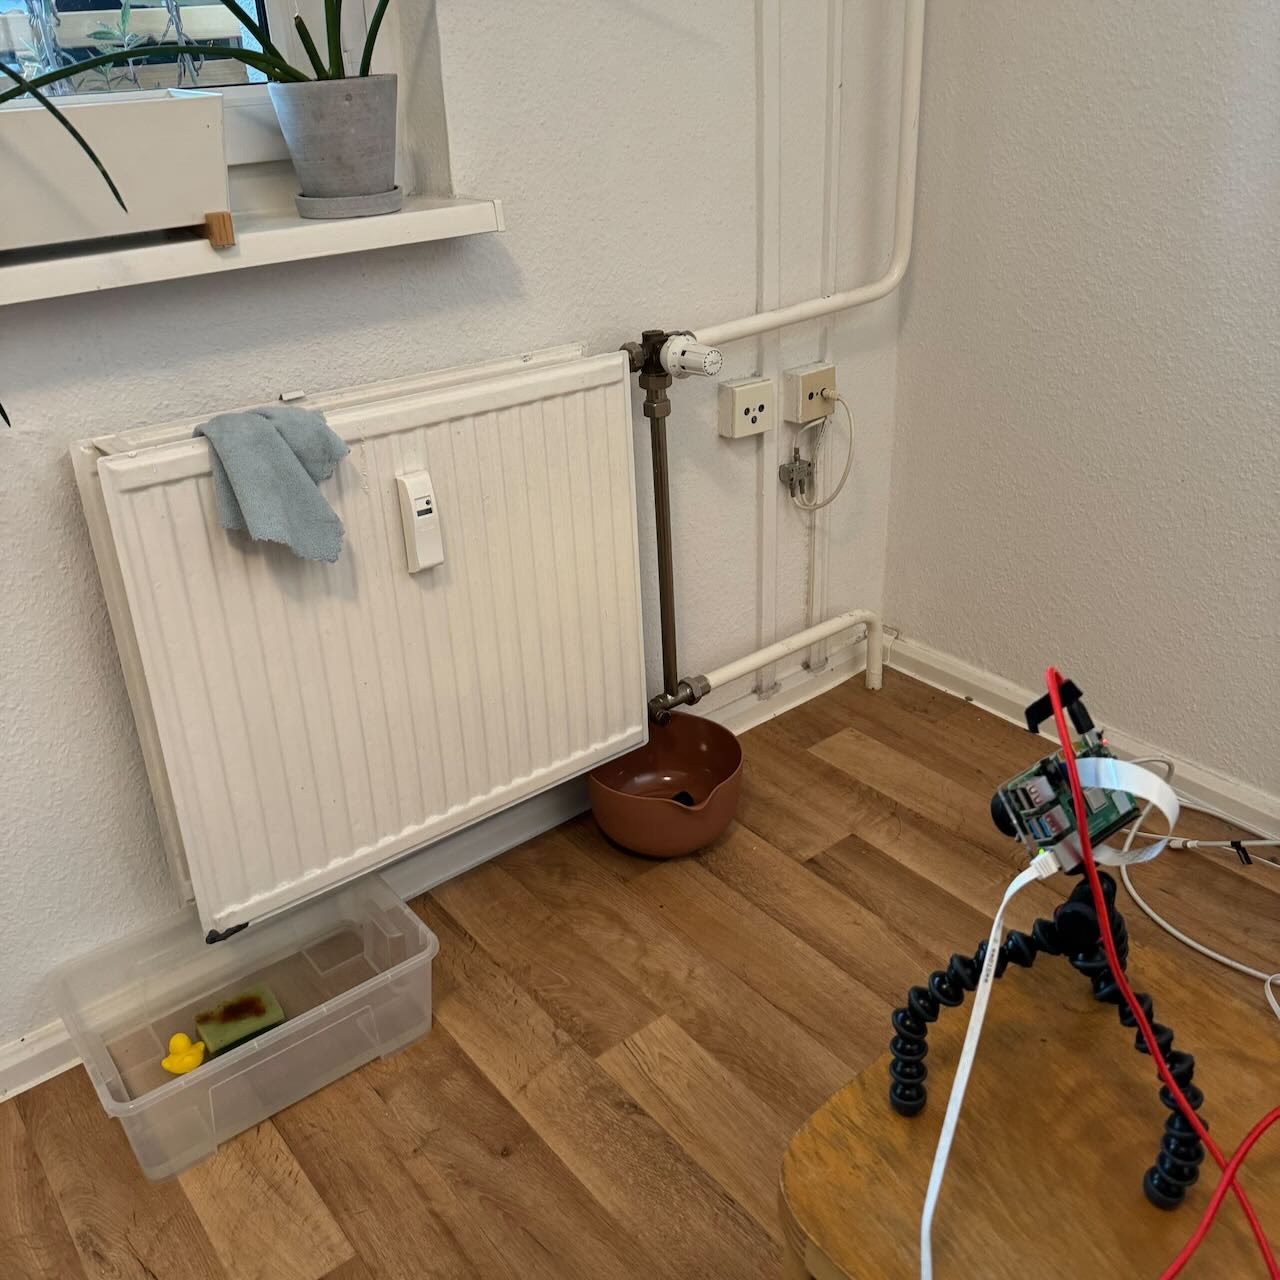
So, here is the setup I came up with:
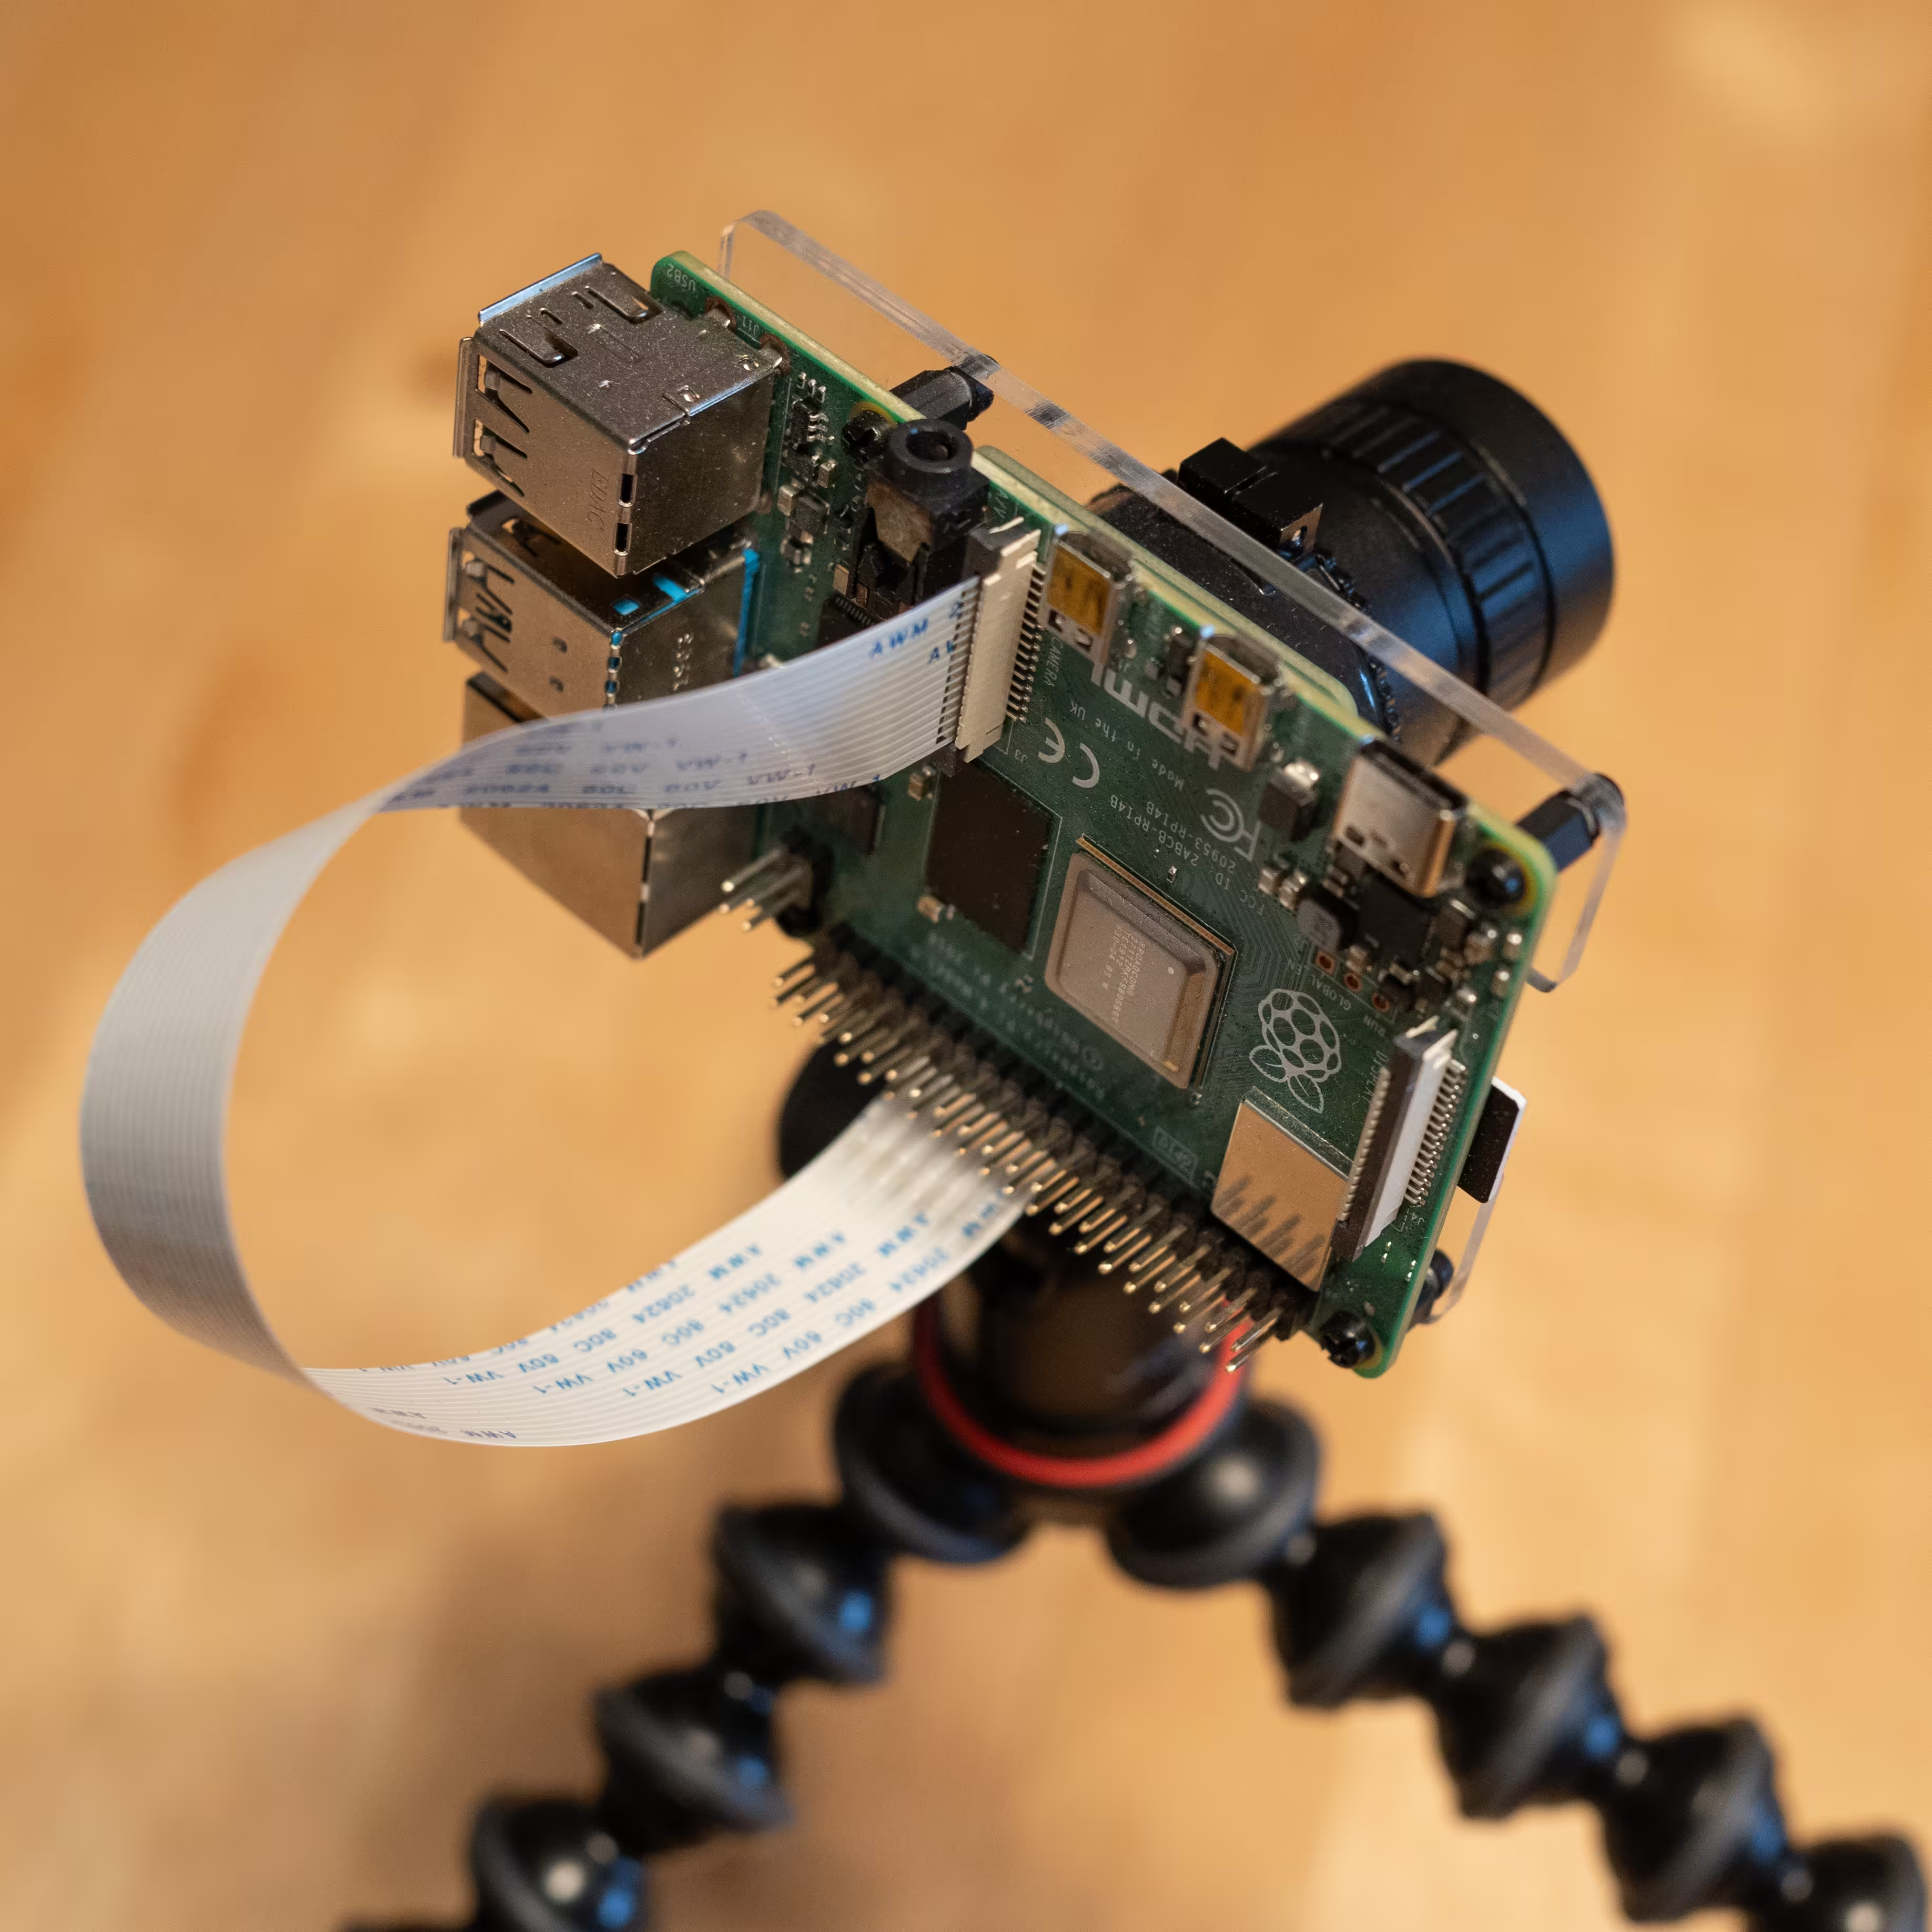
Hardware wise I wanted that all to be on a small tripod to point it at the bucked that needed monitoring. The HQ Camera has a tripod mounting point already and I found a little mounting bracket that allowed me to mount the Pi on the back of the camera. The assembled system looks like this:
In order to capture and upload the photos on the Raspberry Pi side I put together this tiny bash script:
#!/bin/bash

FILENAME=$(date -u +"%Y-%m-%dT%H:%M:%SZ").jpg

libcamera-still -q 80 -o $FILENAME --framerate 4
libcamera-still -q 80 -o latest.jpg --framerate 4

scp ~/$FILENAME frogeye@drilling.emi.industries:/home/frogeye/
scp ~/latest.jpg frogeye@drilling.emi.industries:/home/frogeye/

rm $FILENAME
rm latest.jpg
This then gets run in a cronjob every 15 minutes:
*/15 * * * *The authentication between the Pi and the VM hosting the website is handled by ssh key pairs.
On the server side I have a nginx and dehydrated configuration in place to allow the static site with the images to be available via https.
The HTML on the webserver was so small that I just wrote it by hand:
<!DOCTYPE html>
<html lang="en">
  <head>
    <meta charset="utf-8" />
    <title>frogeye.emi.industries</title>
    <style>
      @font-face {
        font-family: "AlphaProta";
        src: url("./AlphaProta.ttf") format("truetype");
      }

      h1 {
        font-family: AlphaProta;
        text-align: center;
      }
      #container {
        display: flex;
        justify-content: center;
        align-items: center;
      }

      #camera {
        max-width: 100%;
        border-radius: 10%;
        max-height: 100vh;
      }
    </style>
  </head>
  <body>
    <h1>BUCKET WATCH</h1>
    <div id="container">
      <div>
        <img id="camera" src="latest.jpg" />
      </div>
    </div>
  </body>
</html>
The final website looks something like this:
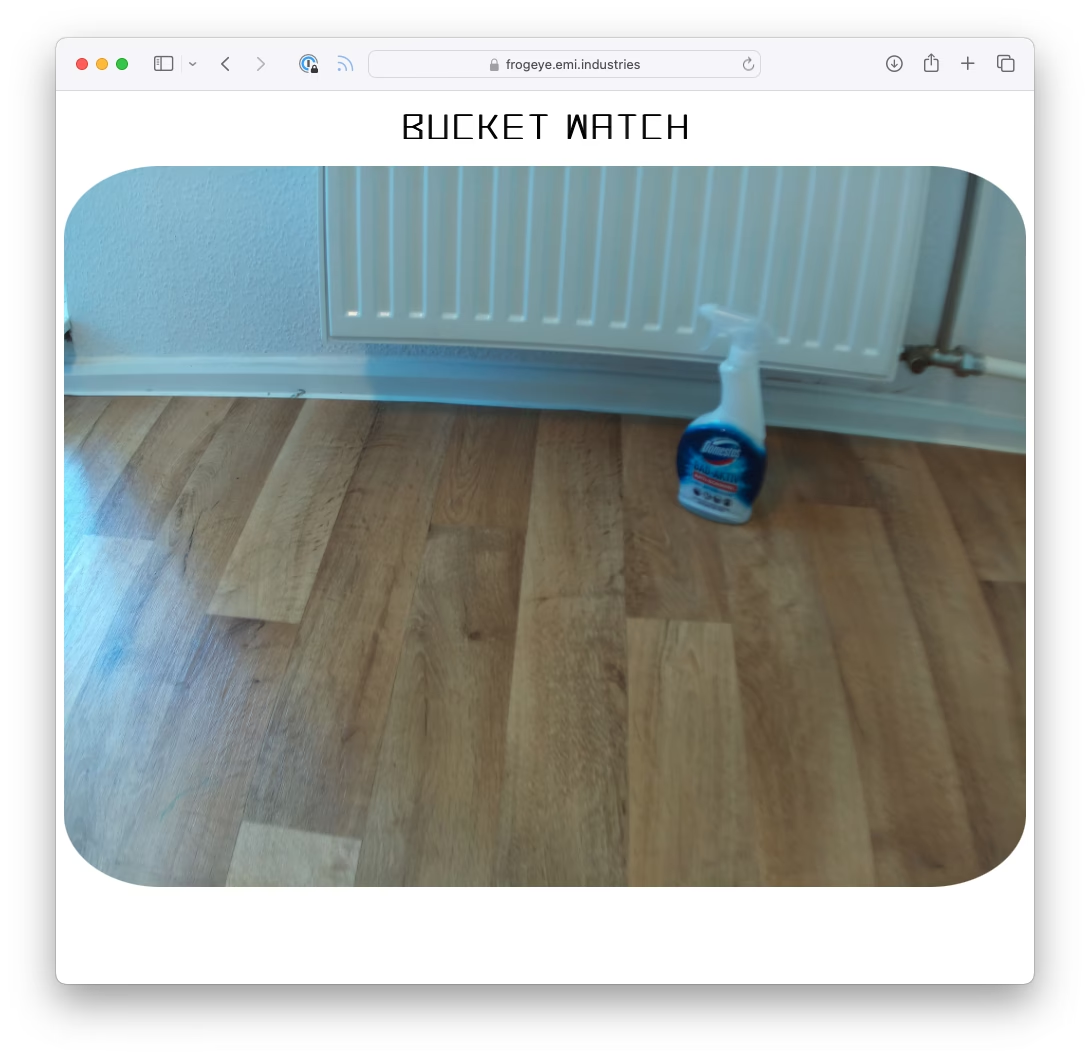
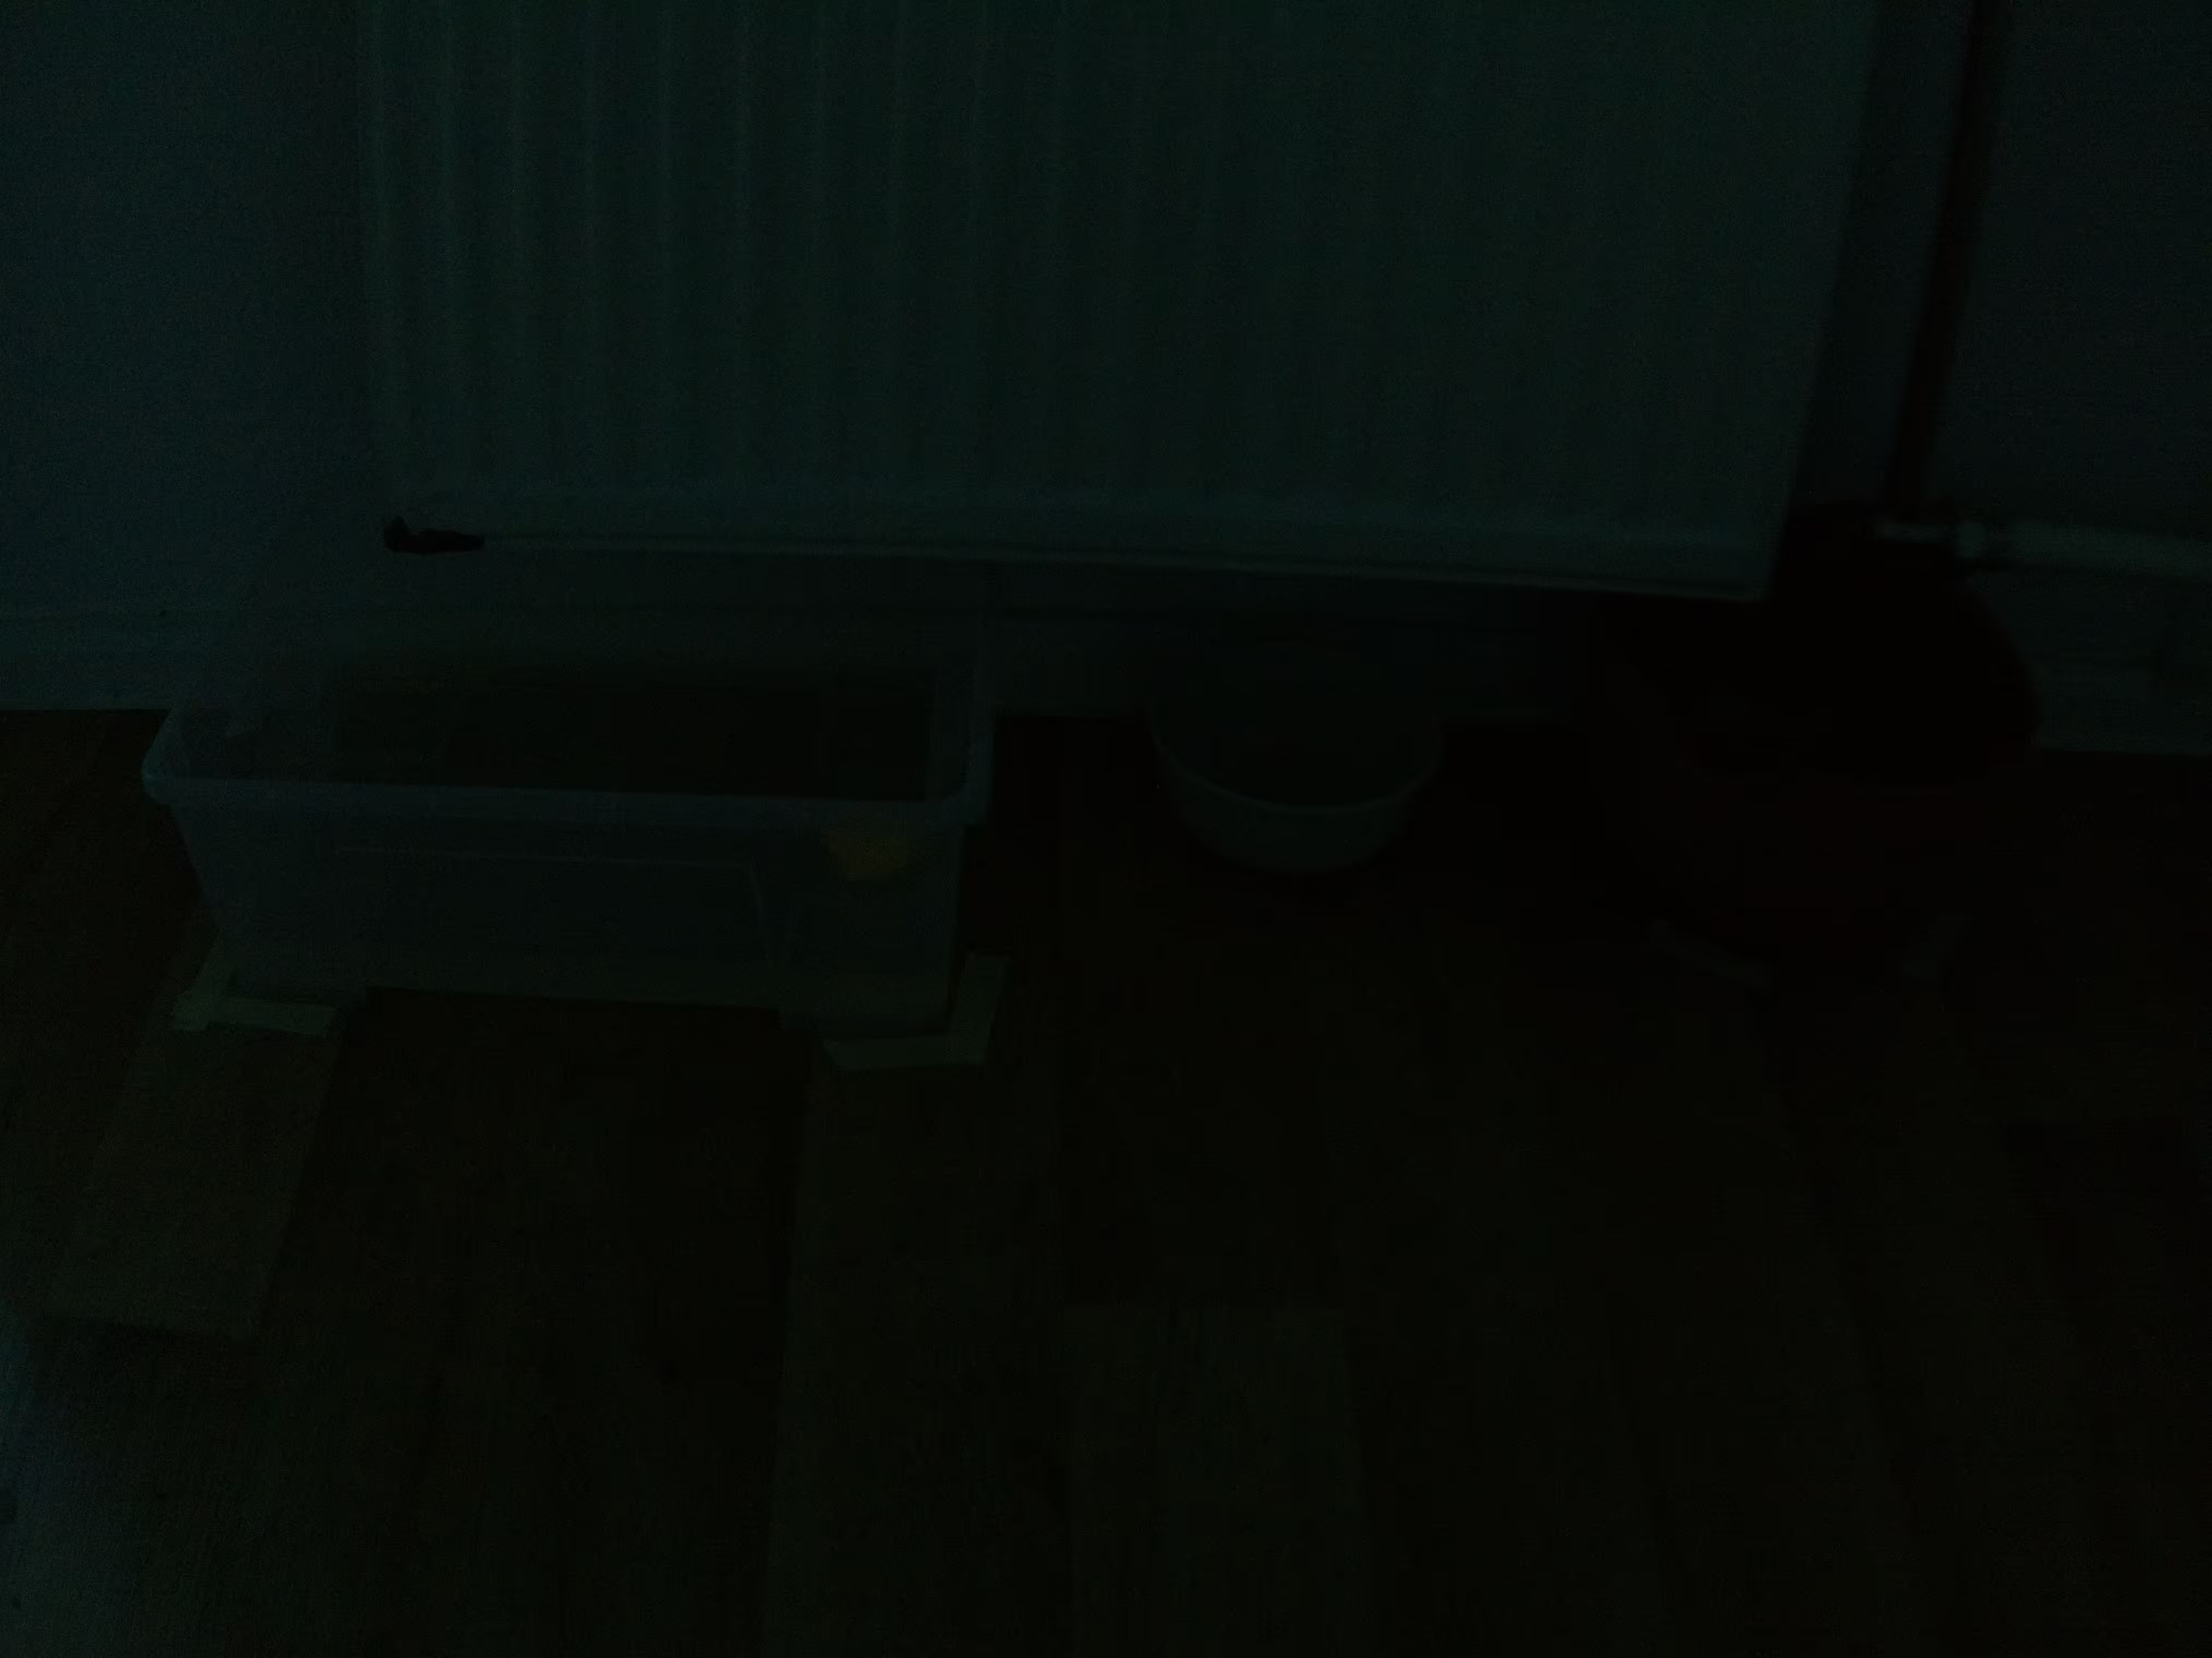
Of course this could have been made to look a bit nicer but at that point I decided that this was enough spare time spent on questionable projects. Finally I’ll leave you with a few highlights form the captured images:
And that’s all the insight I have to offer on how to build a fairly resilient bucket monitoring system. If you have any questions about the other parts of my setup (nginx config and such) feel free to hit me up on mastodon!
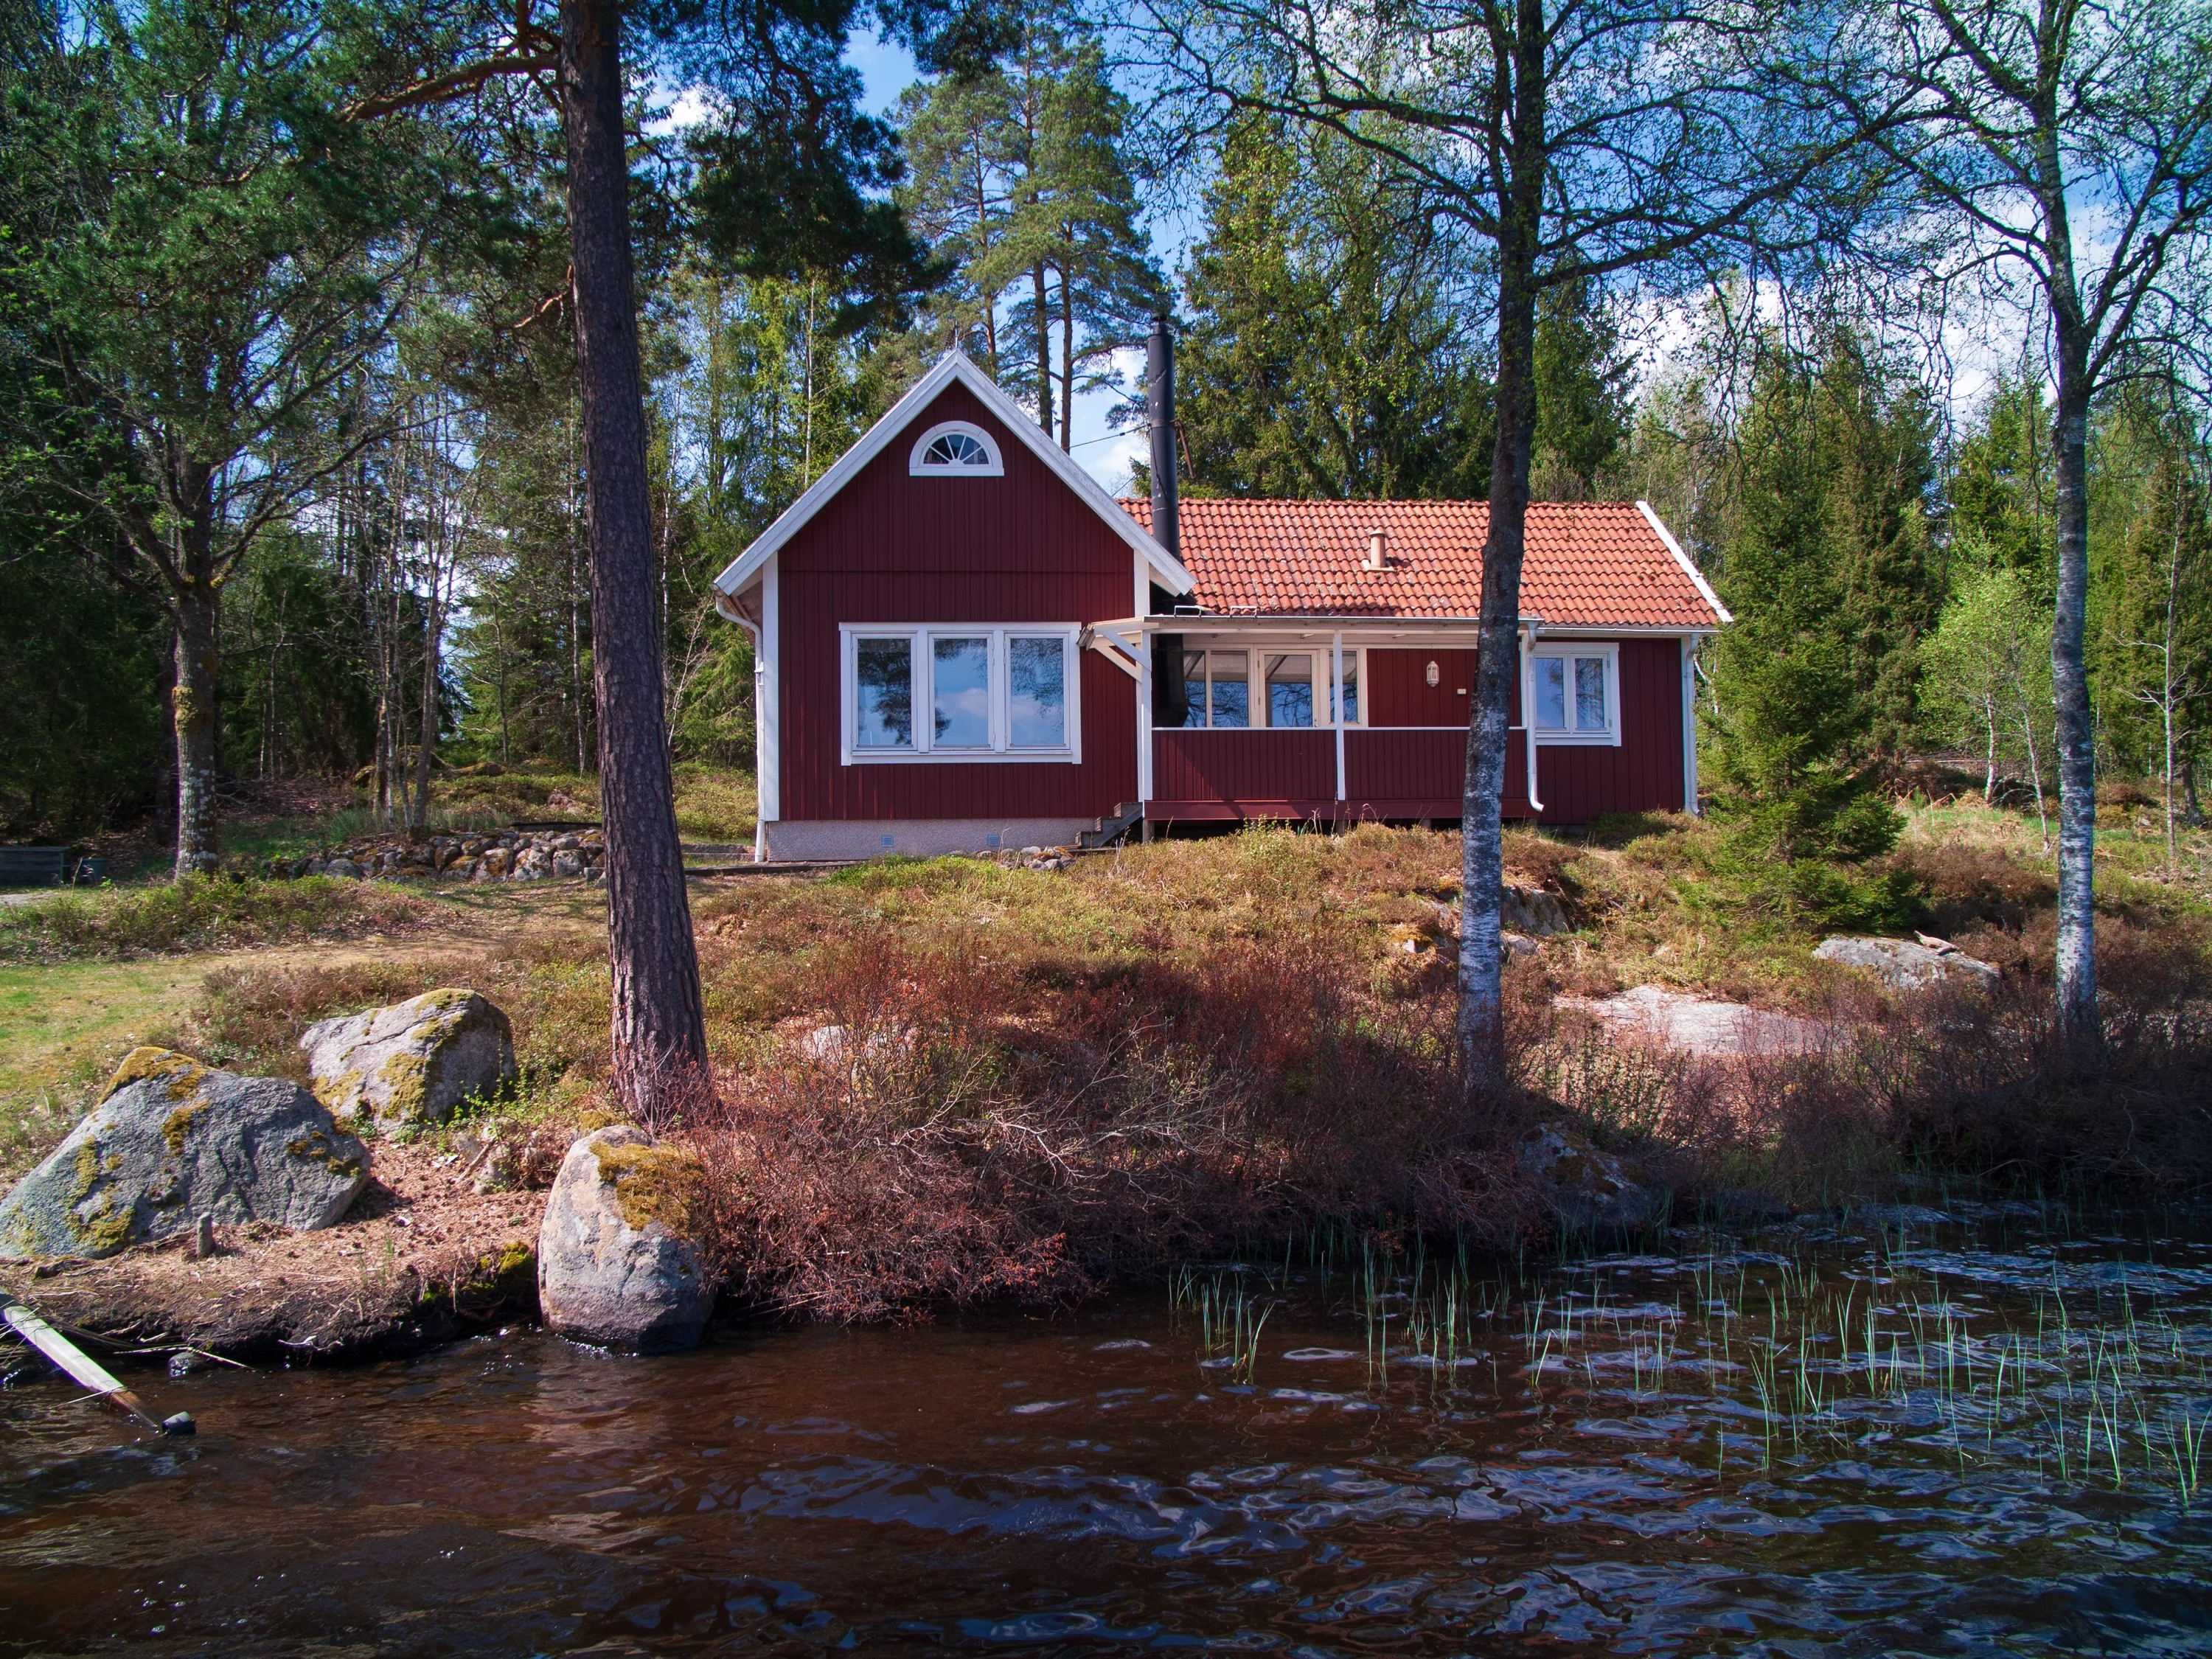
I’m by no means the first amateur photographer in my family. My father is a passionate photographer and has been one almost his entire life. And, one generation earlier, my grandfather also was documenting a lot of their family life on photographic film. Since he spent most of his lifetime before the advent of digital photography most of his work is on slide film (which preferred to prints since it was cheaper overall and easier to store). I actually remember watching (at times a tad lengthy) slide shows of my grandparents travels as a kid!
Since my grandfather passed away in the late 2010s my parents have kept his photographic archive in their attic. Sometime during the stay-at-home years of the pandemic I got interested to take a look at what is in that very archive. After talking with my father I picked up two of the many boxes of slides to see if I could scan them on my Nikon scanner. I definitely underestimated how much work that would entail!
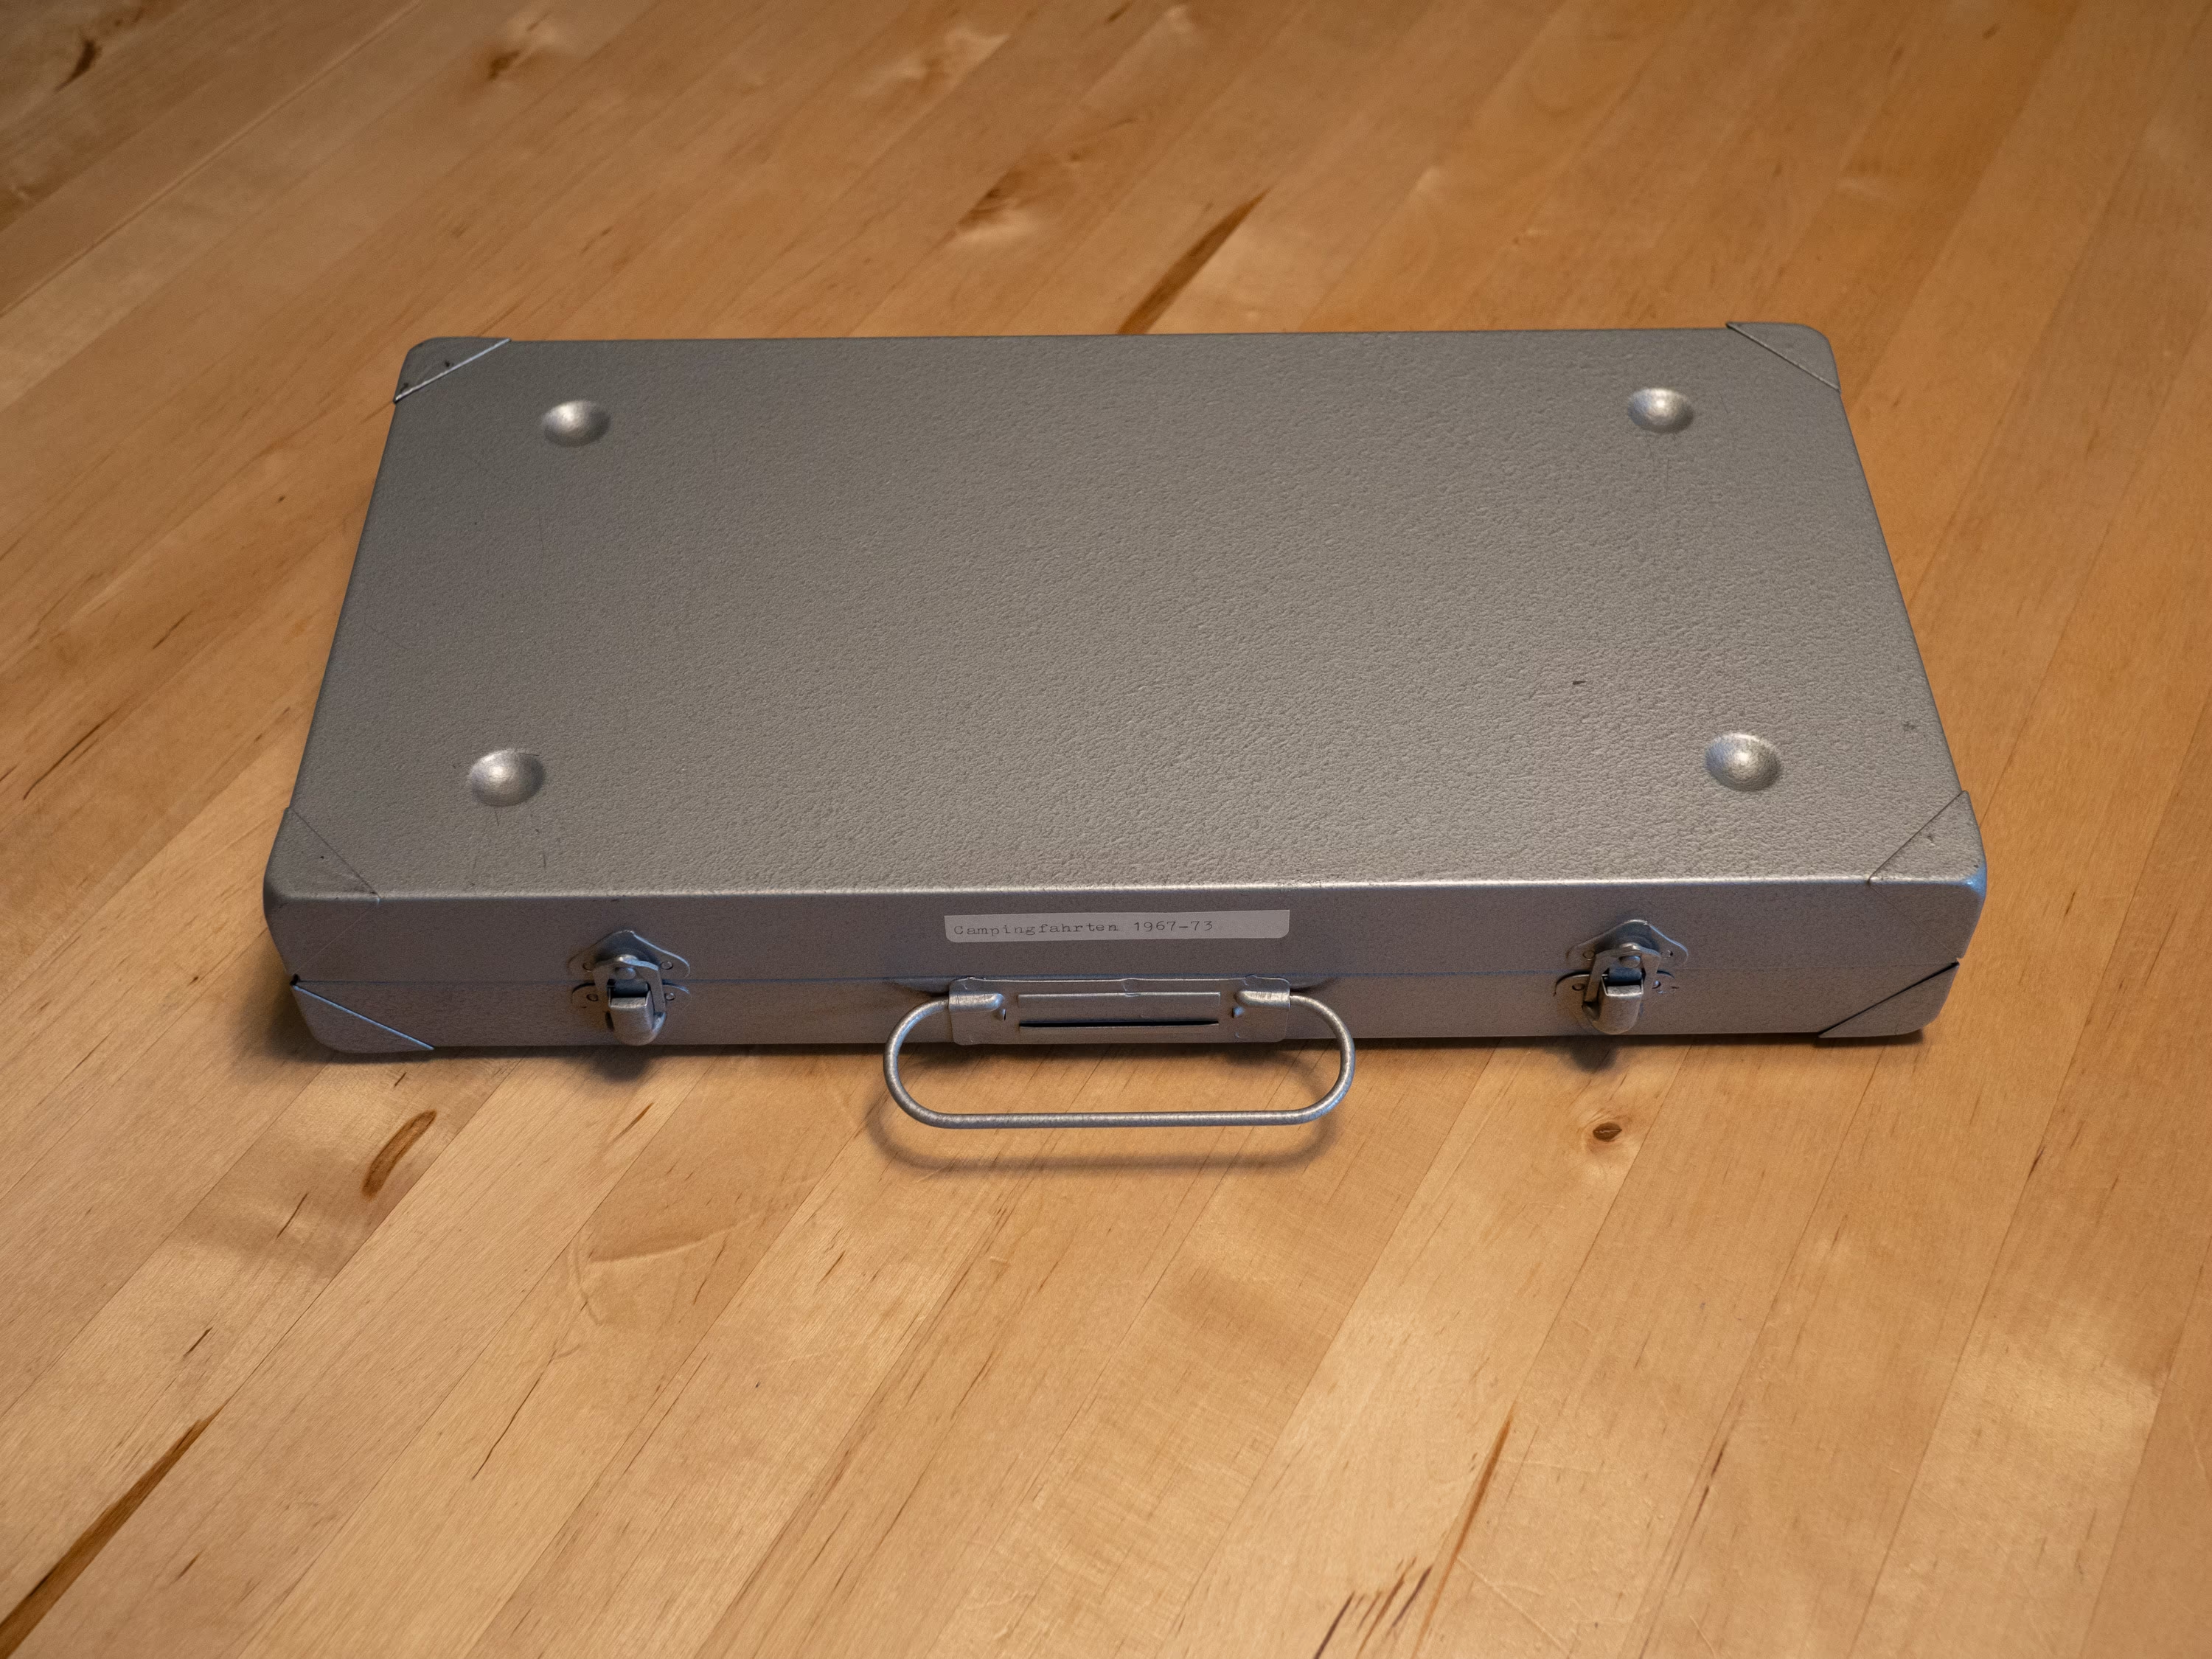
The box I’m showing here is from the 1960s and contains about half a decade of travel photos. Here you can see what I got form the attic on the outside:
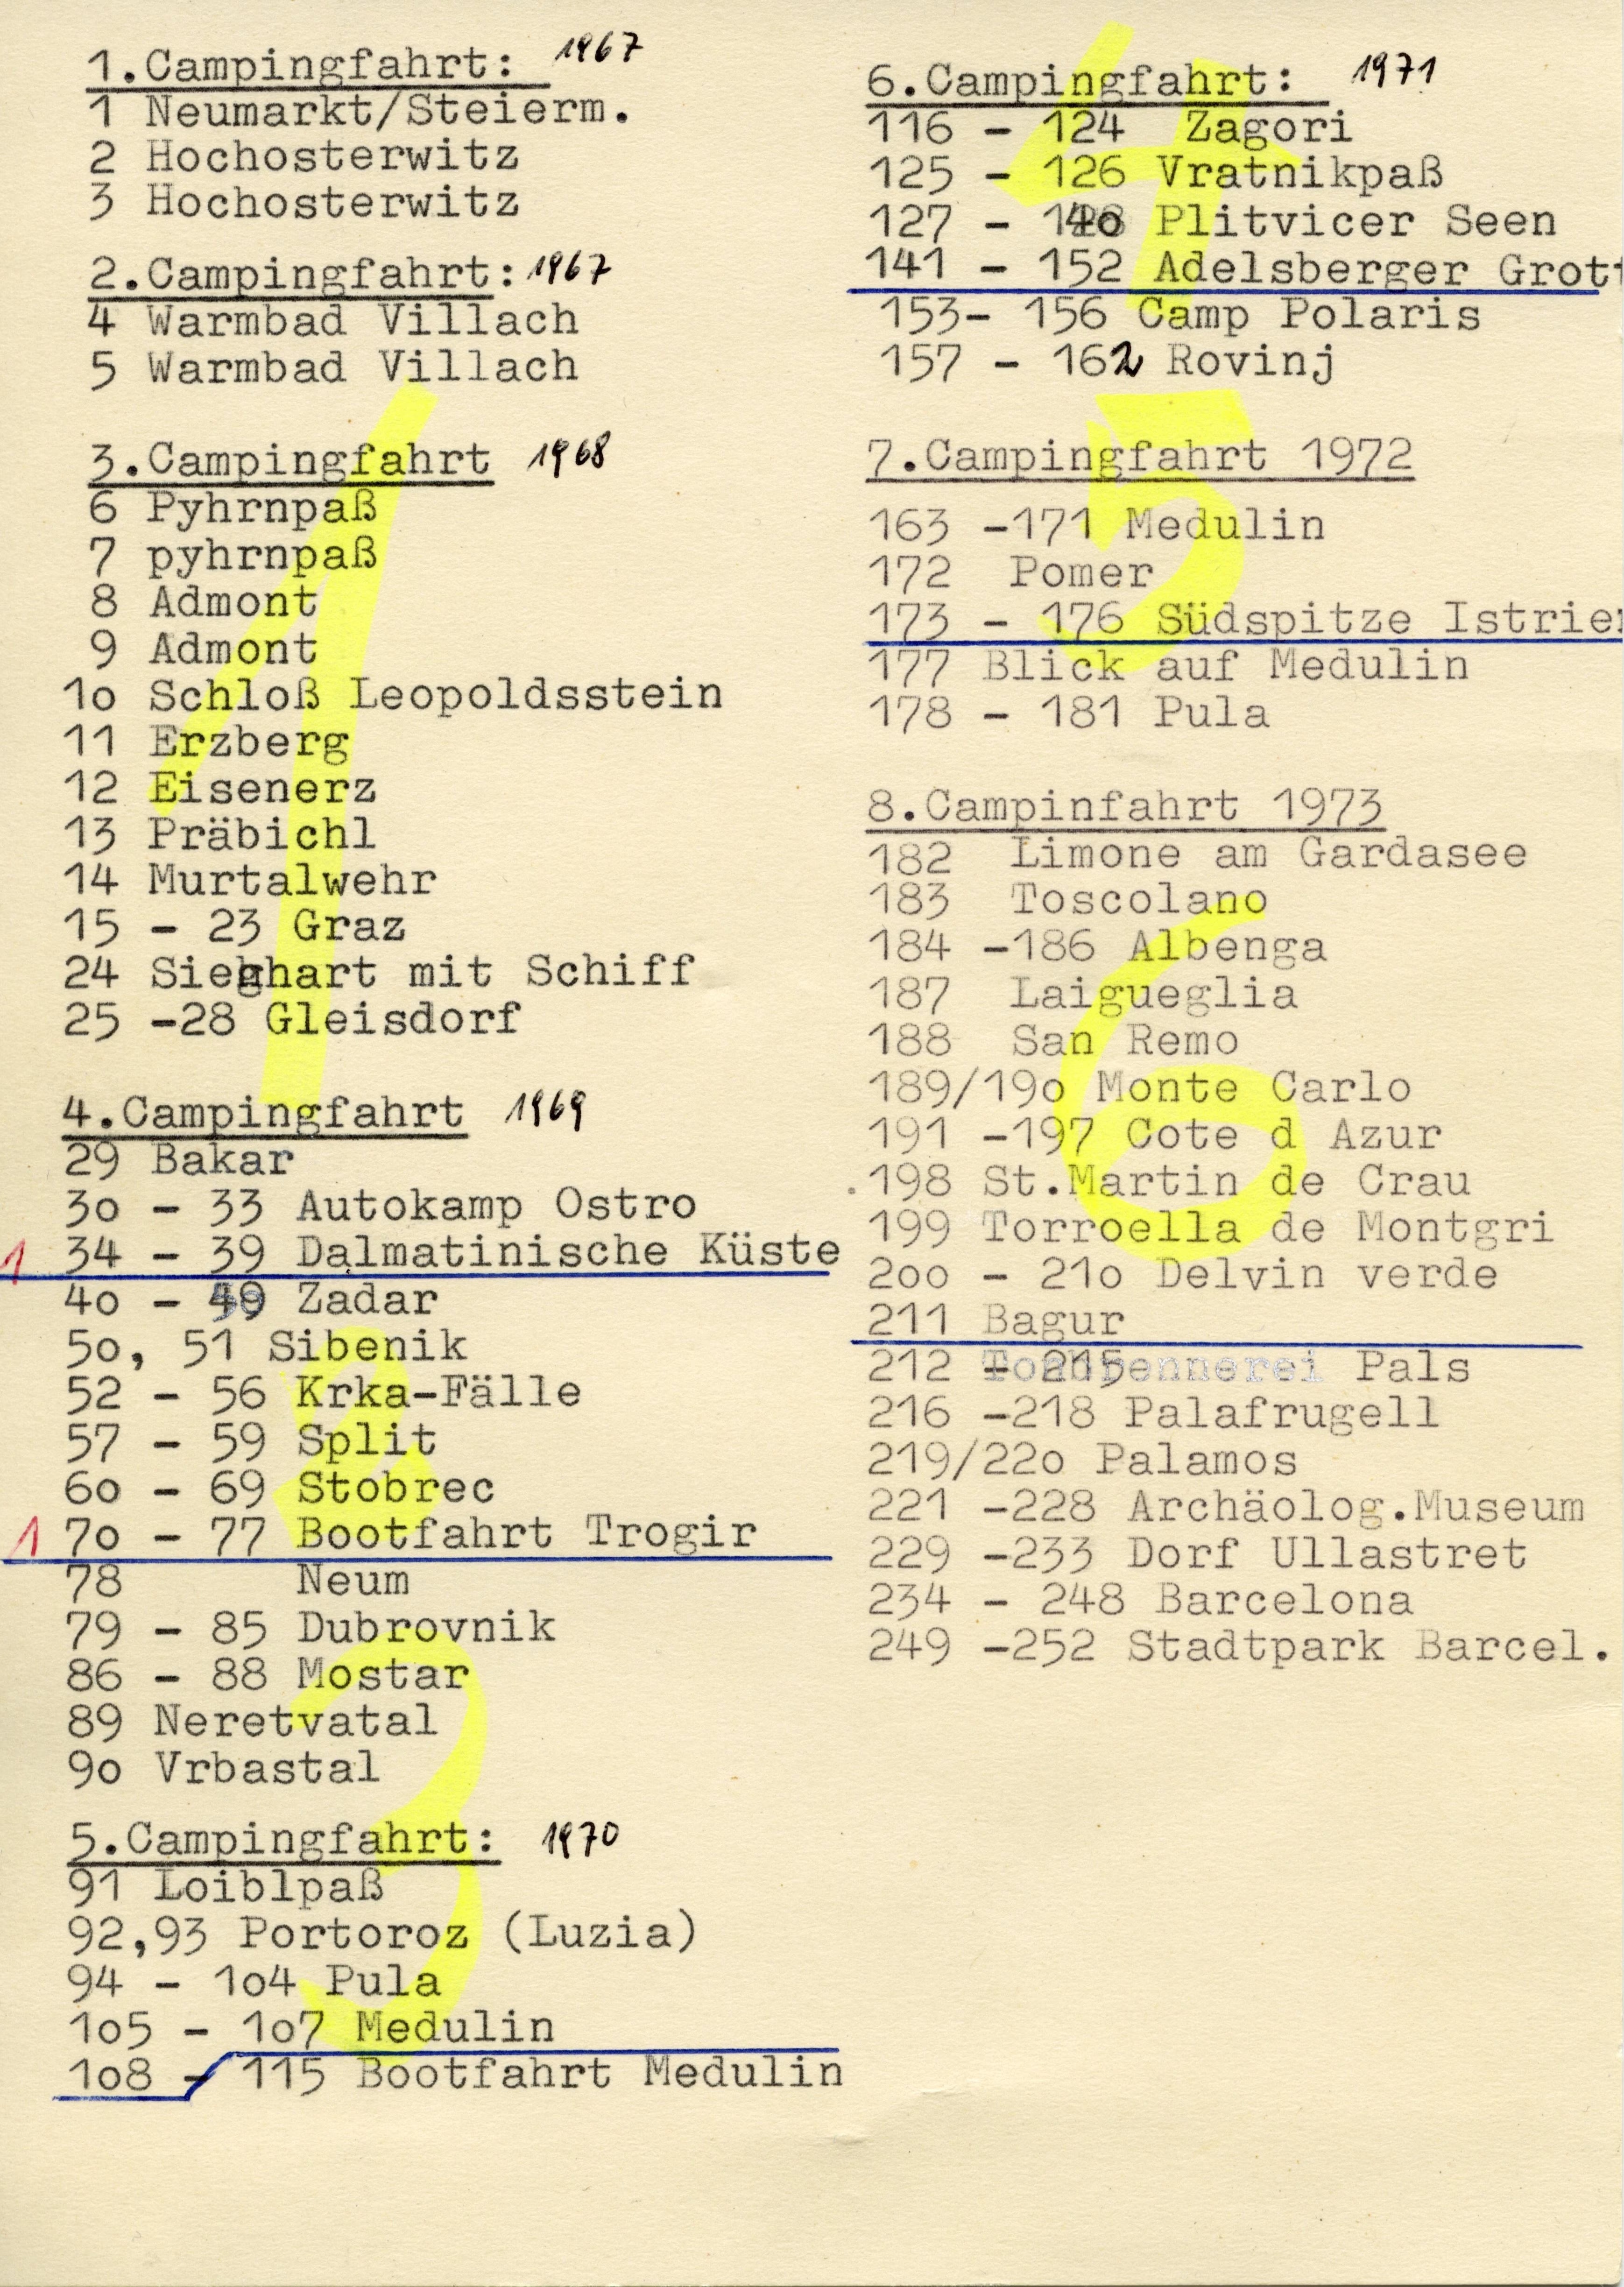
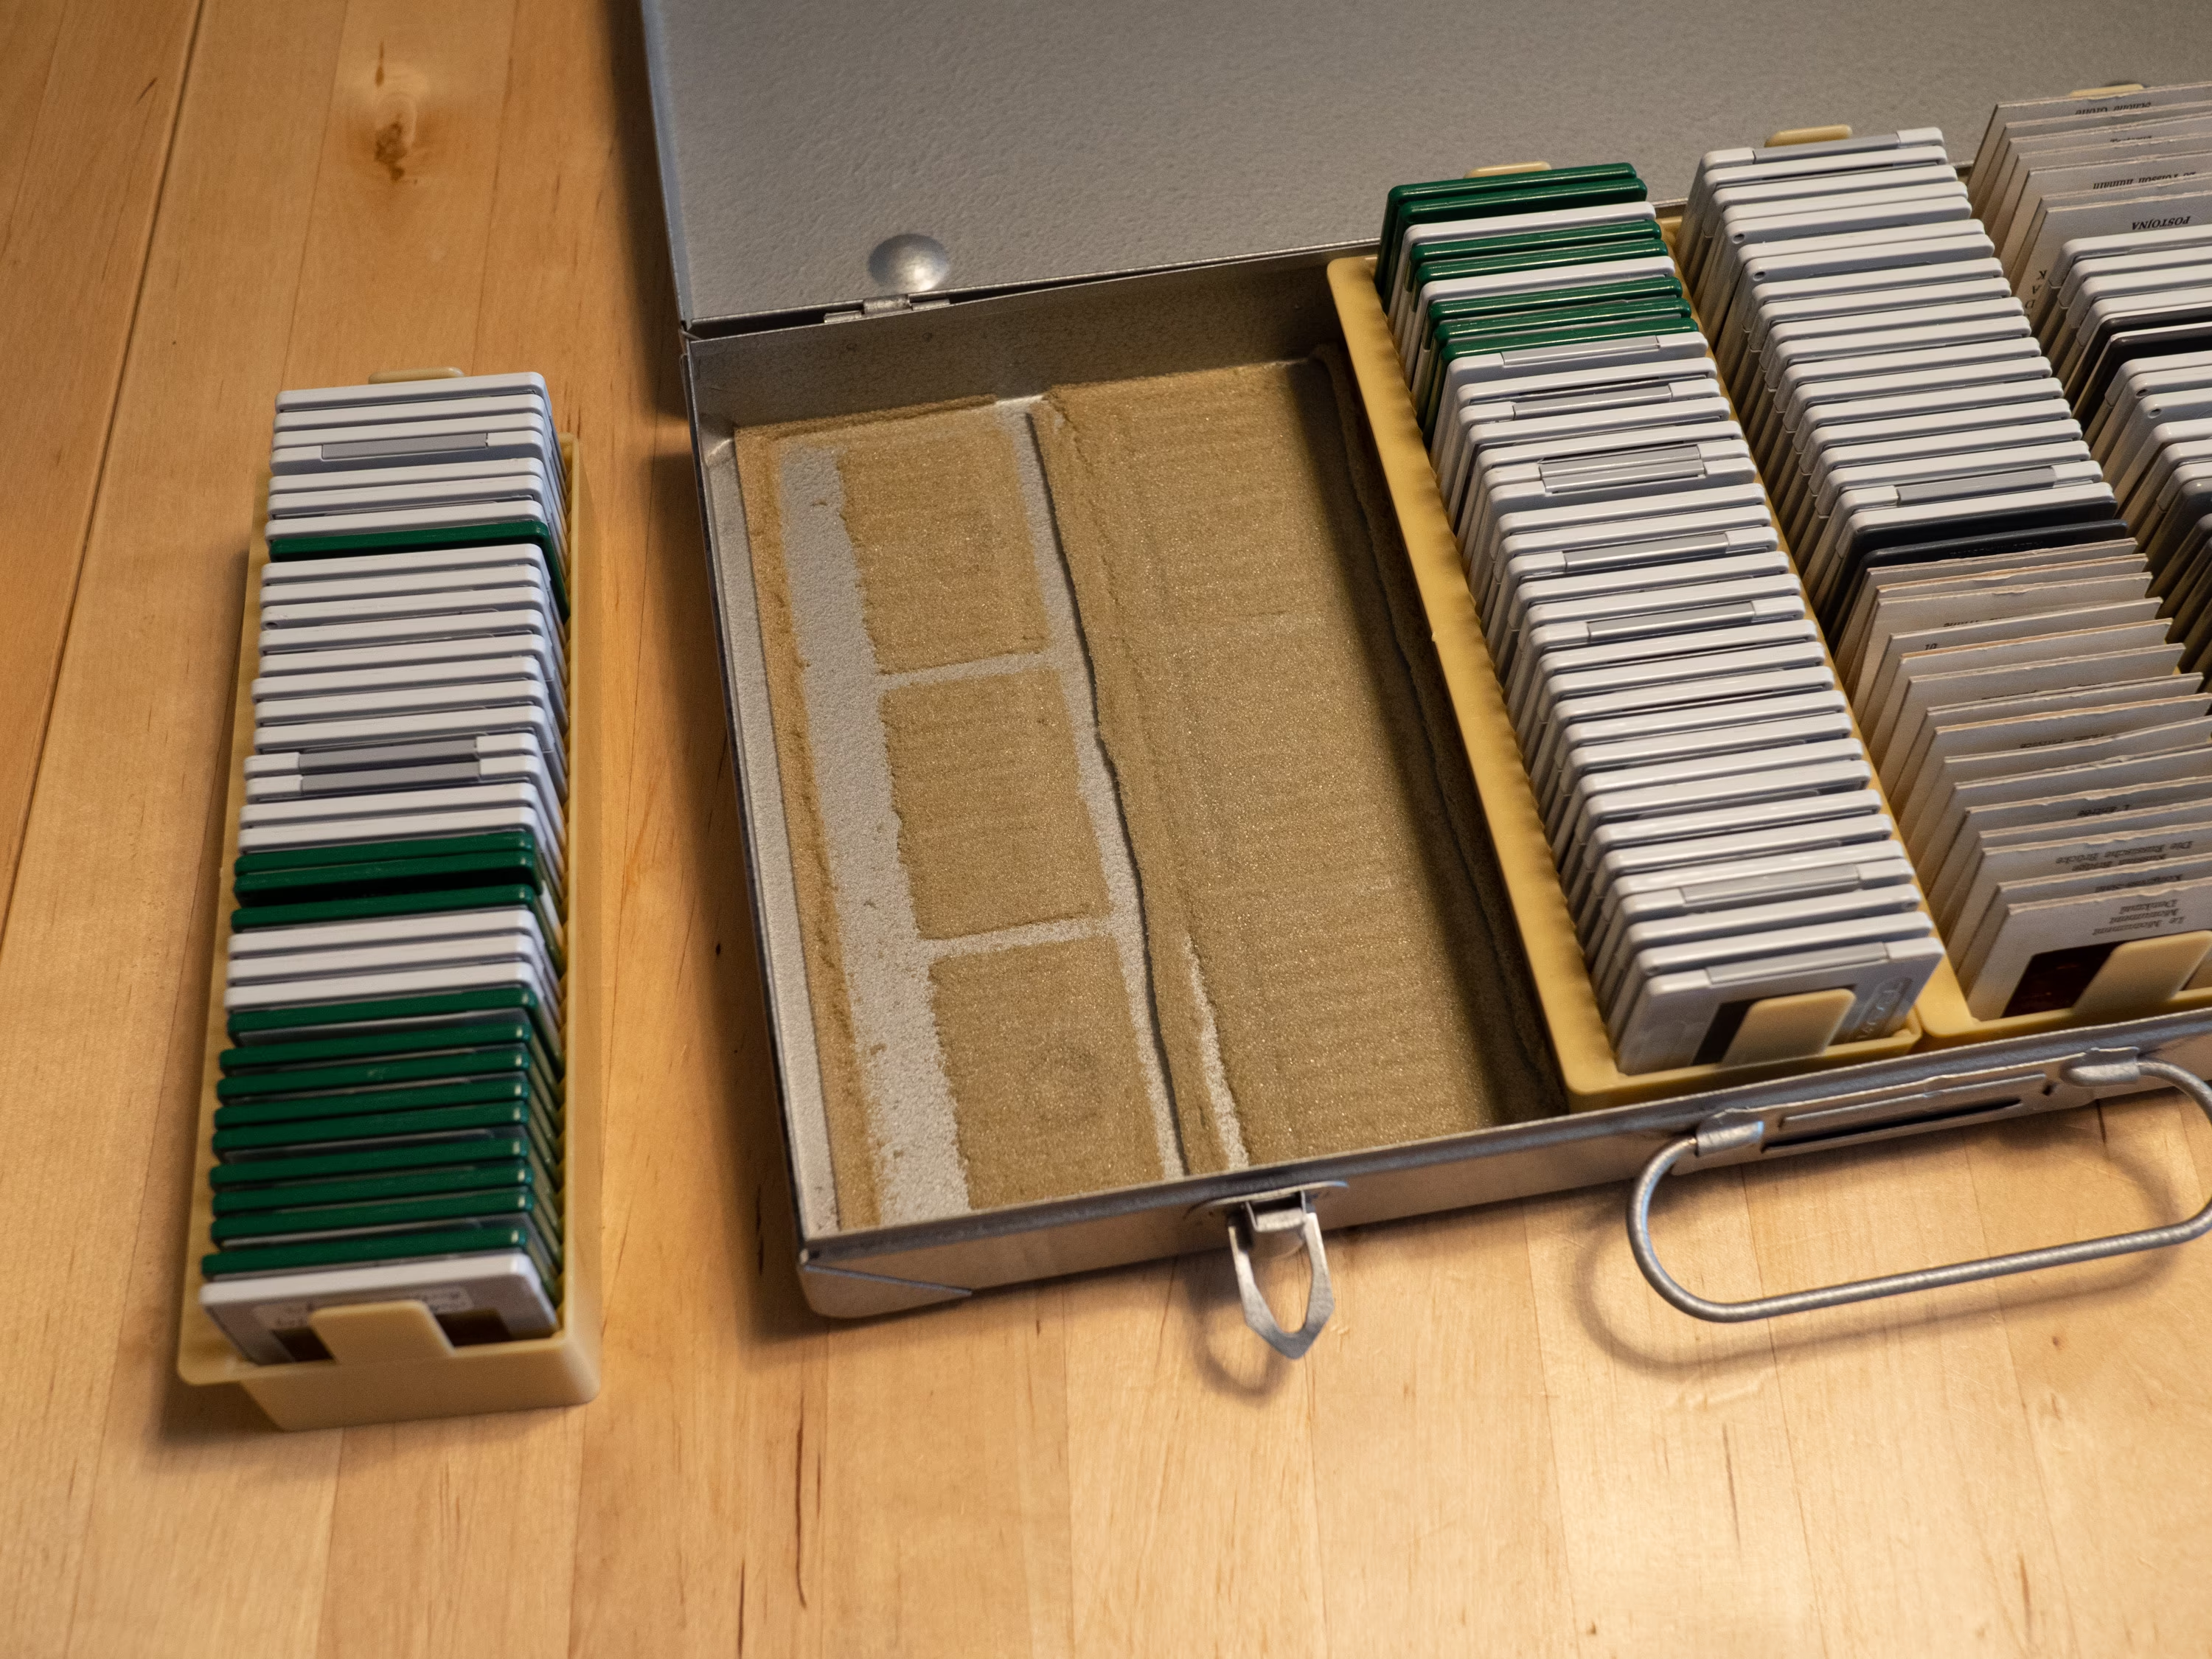
Opening the box up you can see six slide magazine holding about 36 slides each. On top of them there is and index card (typed up on a typewriter) with some annotations at the margins. (As you would expect for something typed up over a period 5 years.)
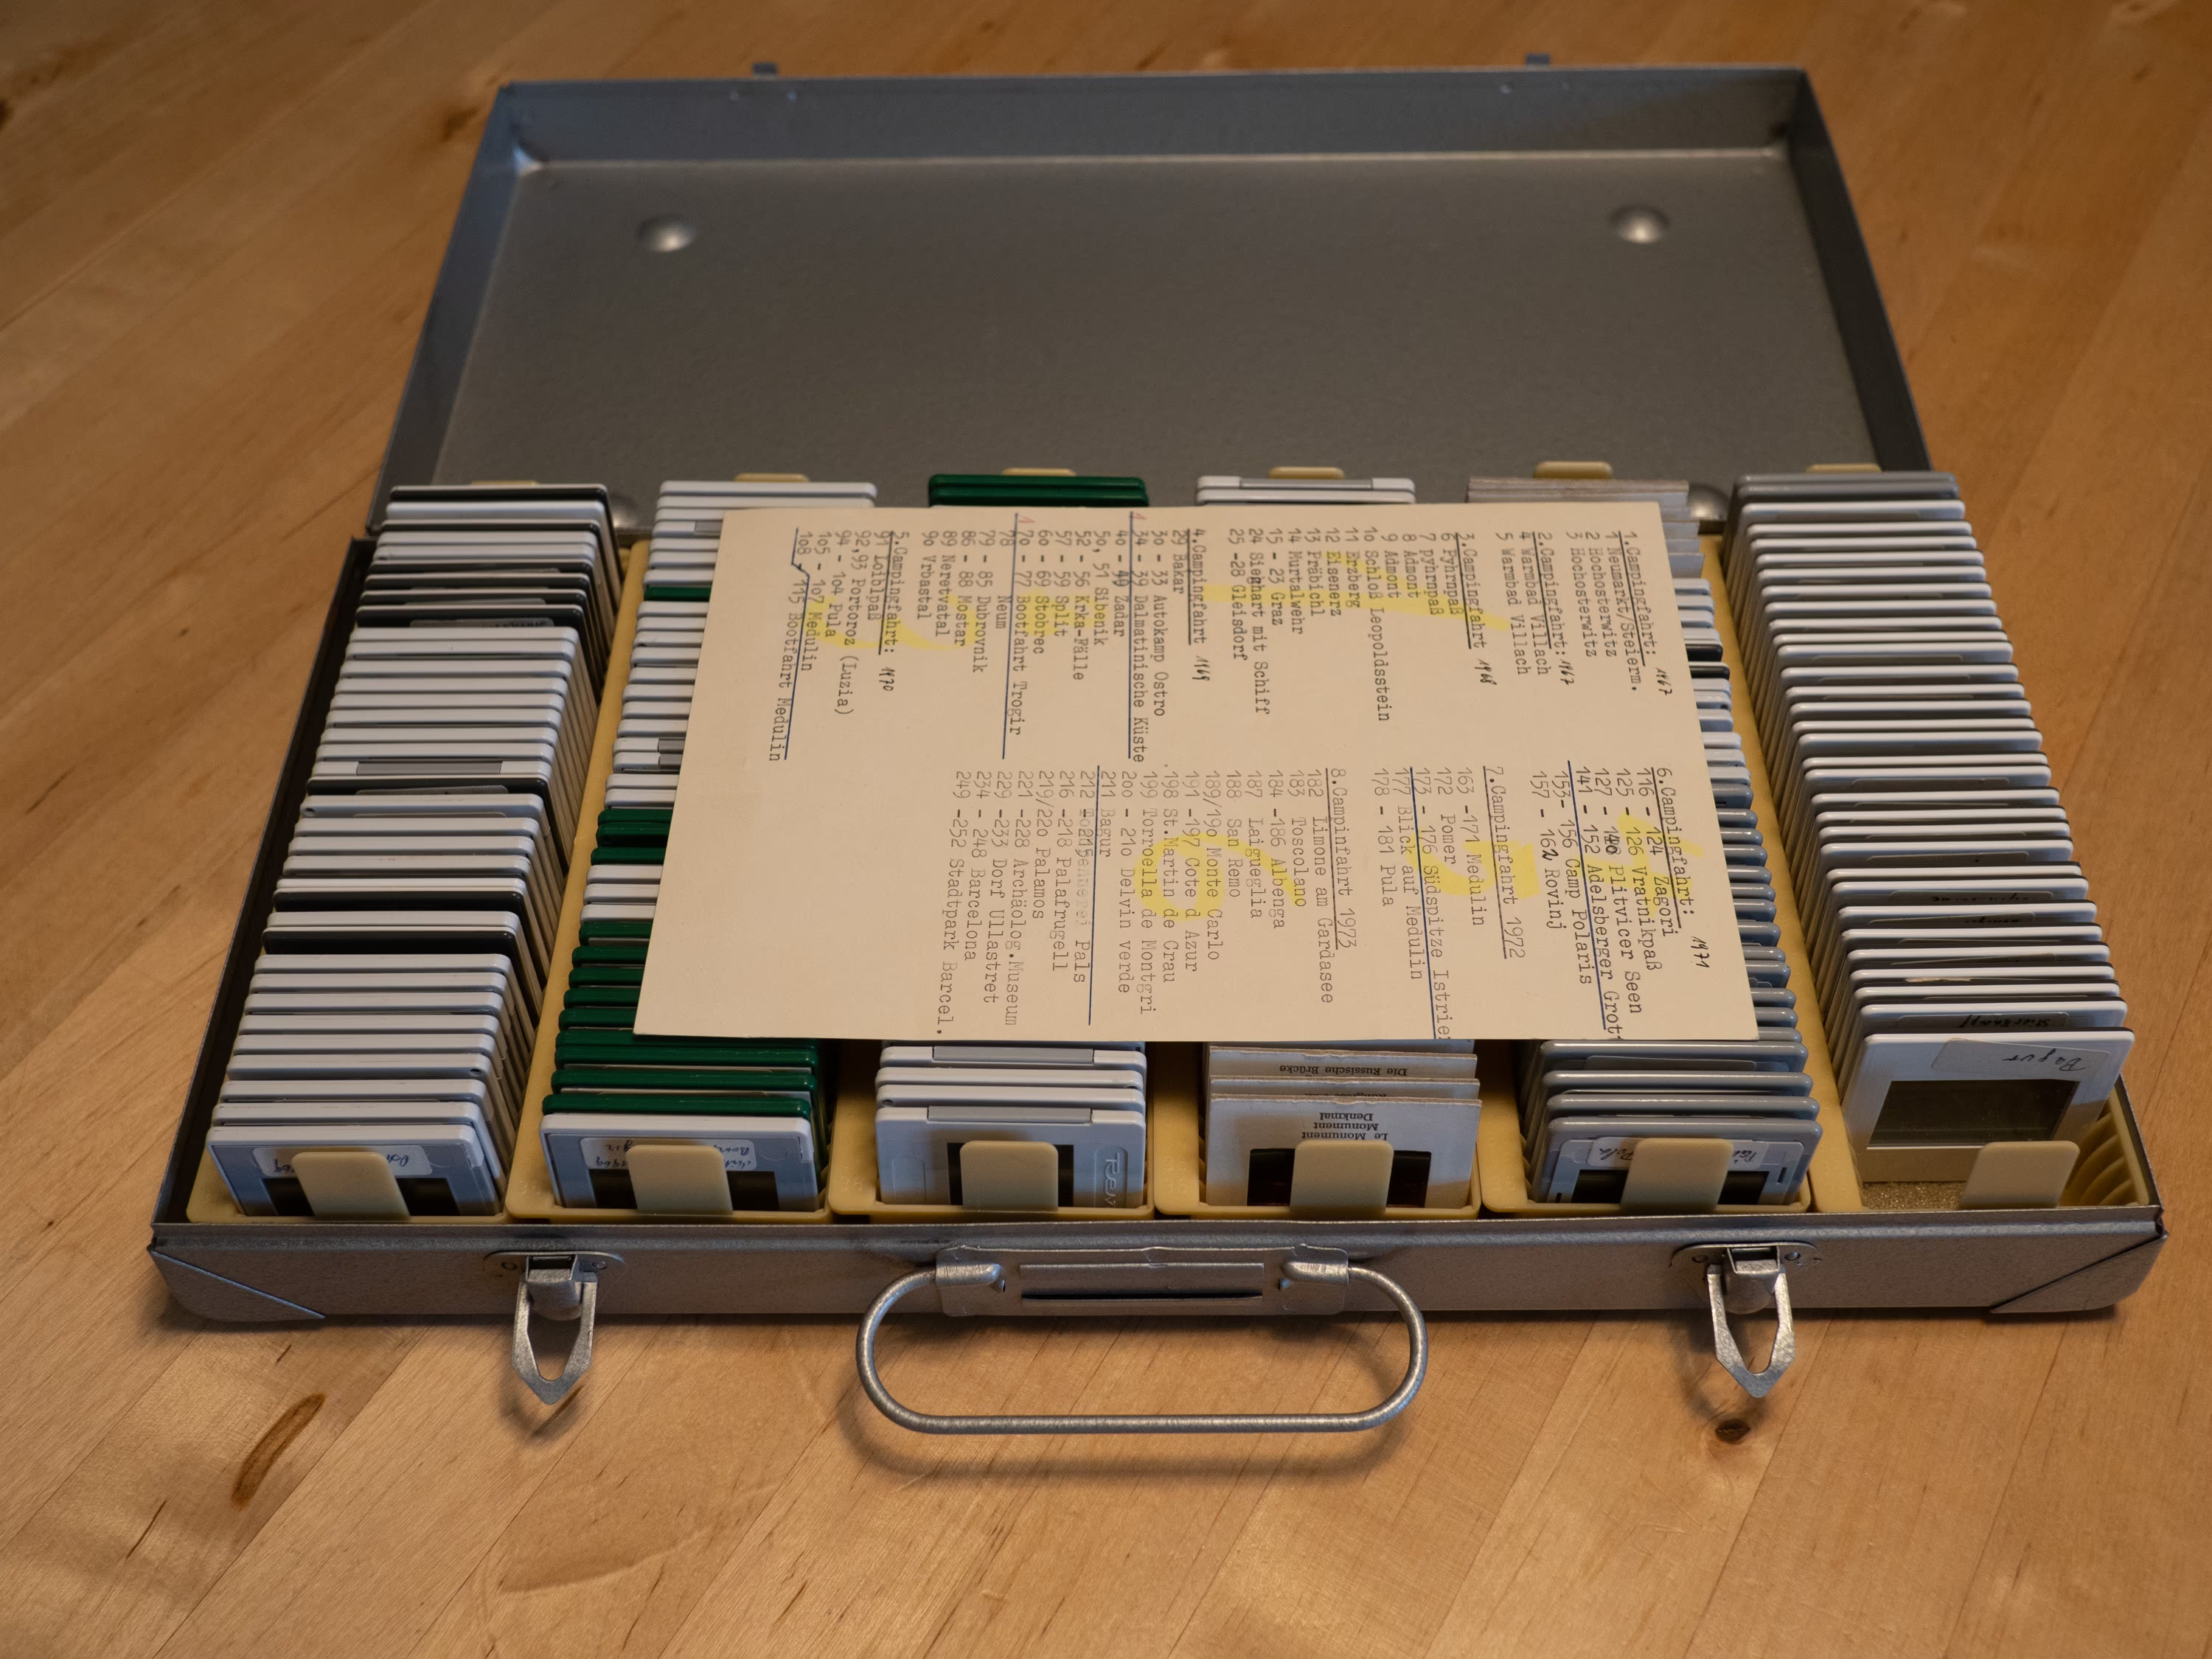
Here you can see the index card in all of its glory:
After removing some of the slide trays I found some remnants of a foam that is probably the source of some of the dust that I found on the slides:
After removing most of that dust I started to dig into the slides and was pleasantly surprised on how well these have held up given that they are more than half a century old at this point! Even the colors of most slides have not faded as far as I can tell.

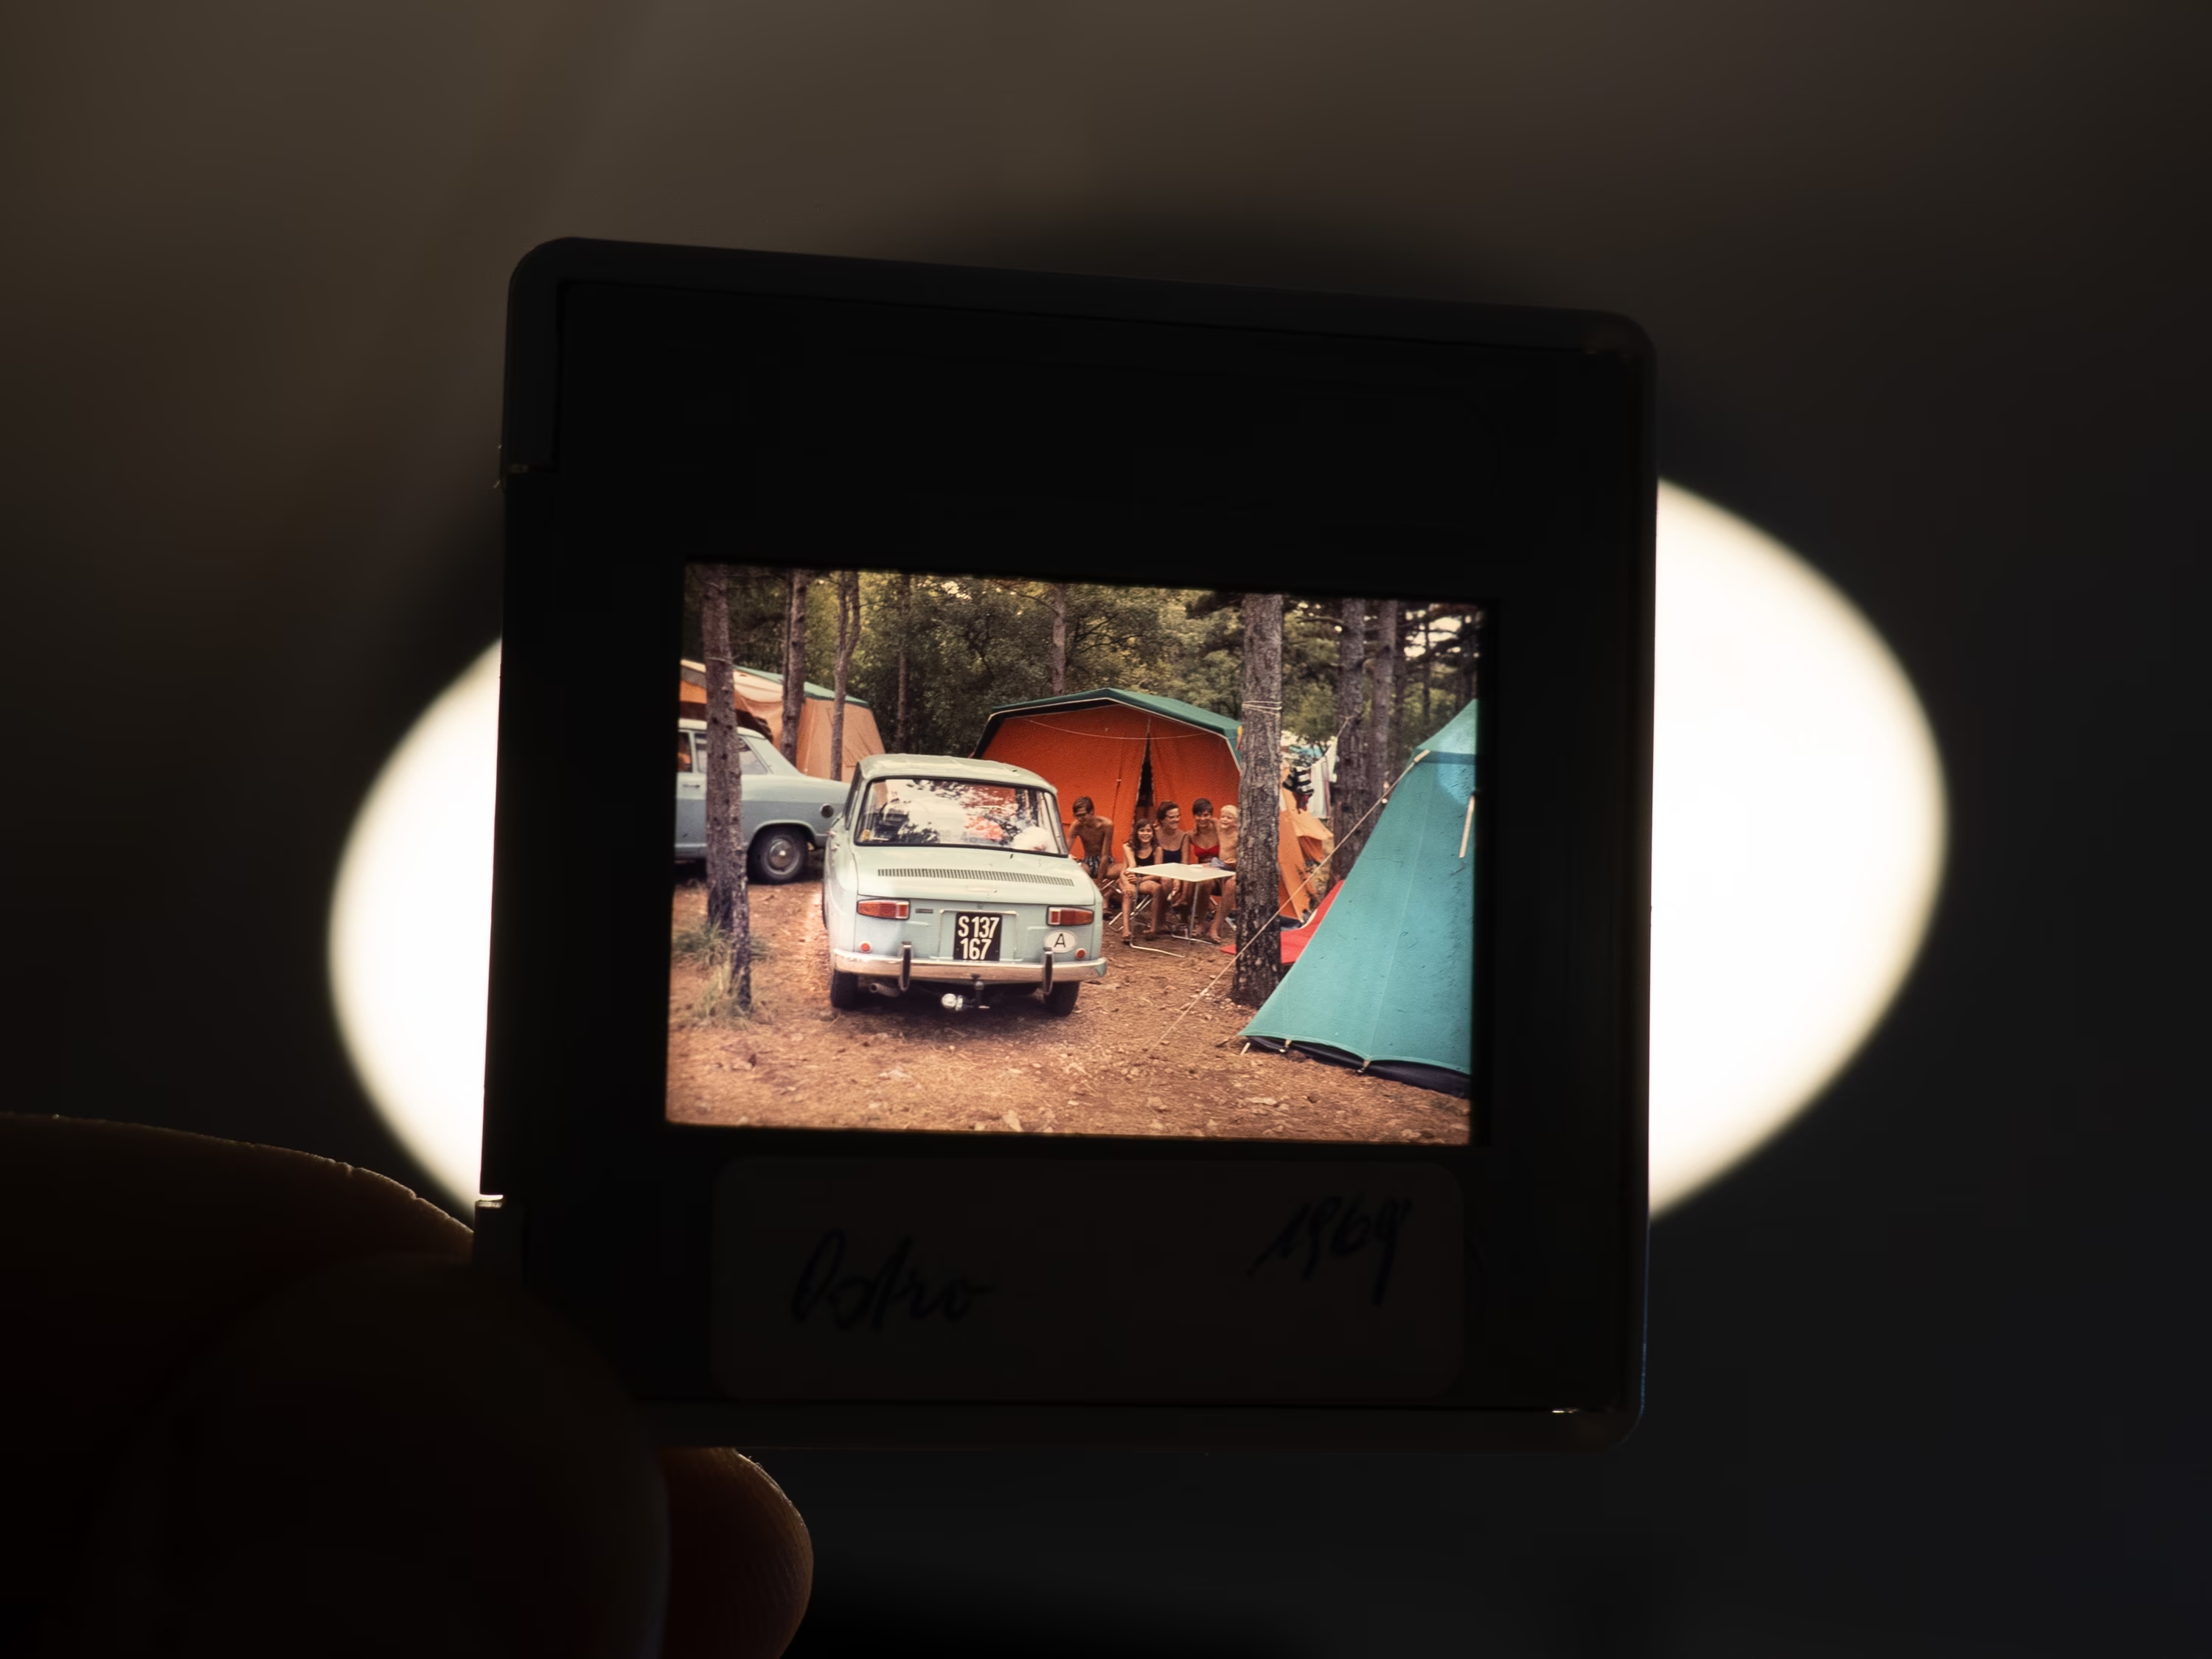
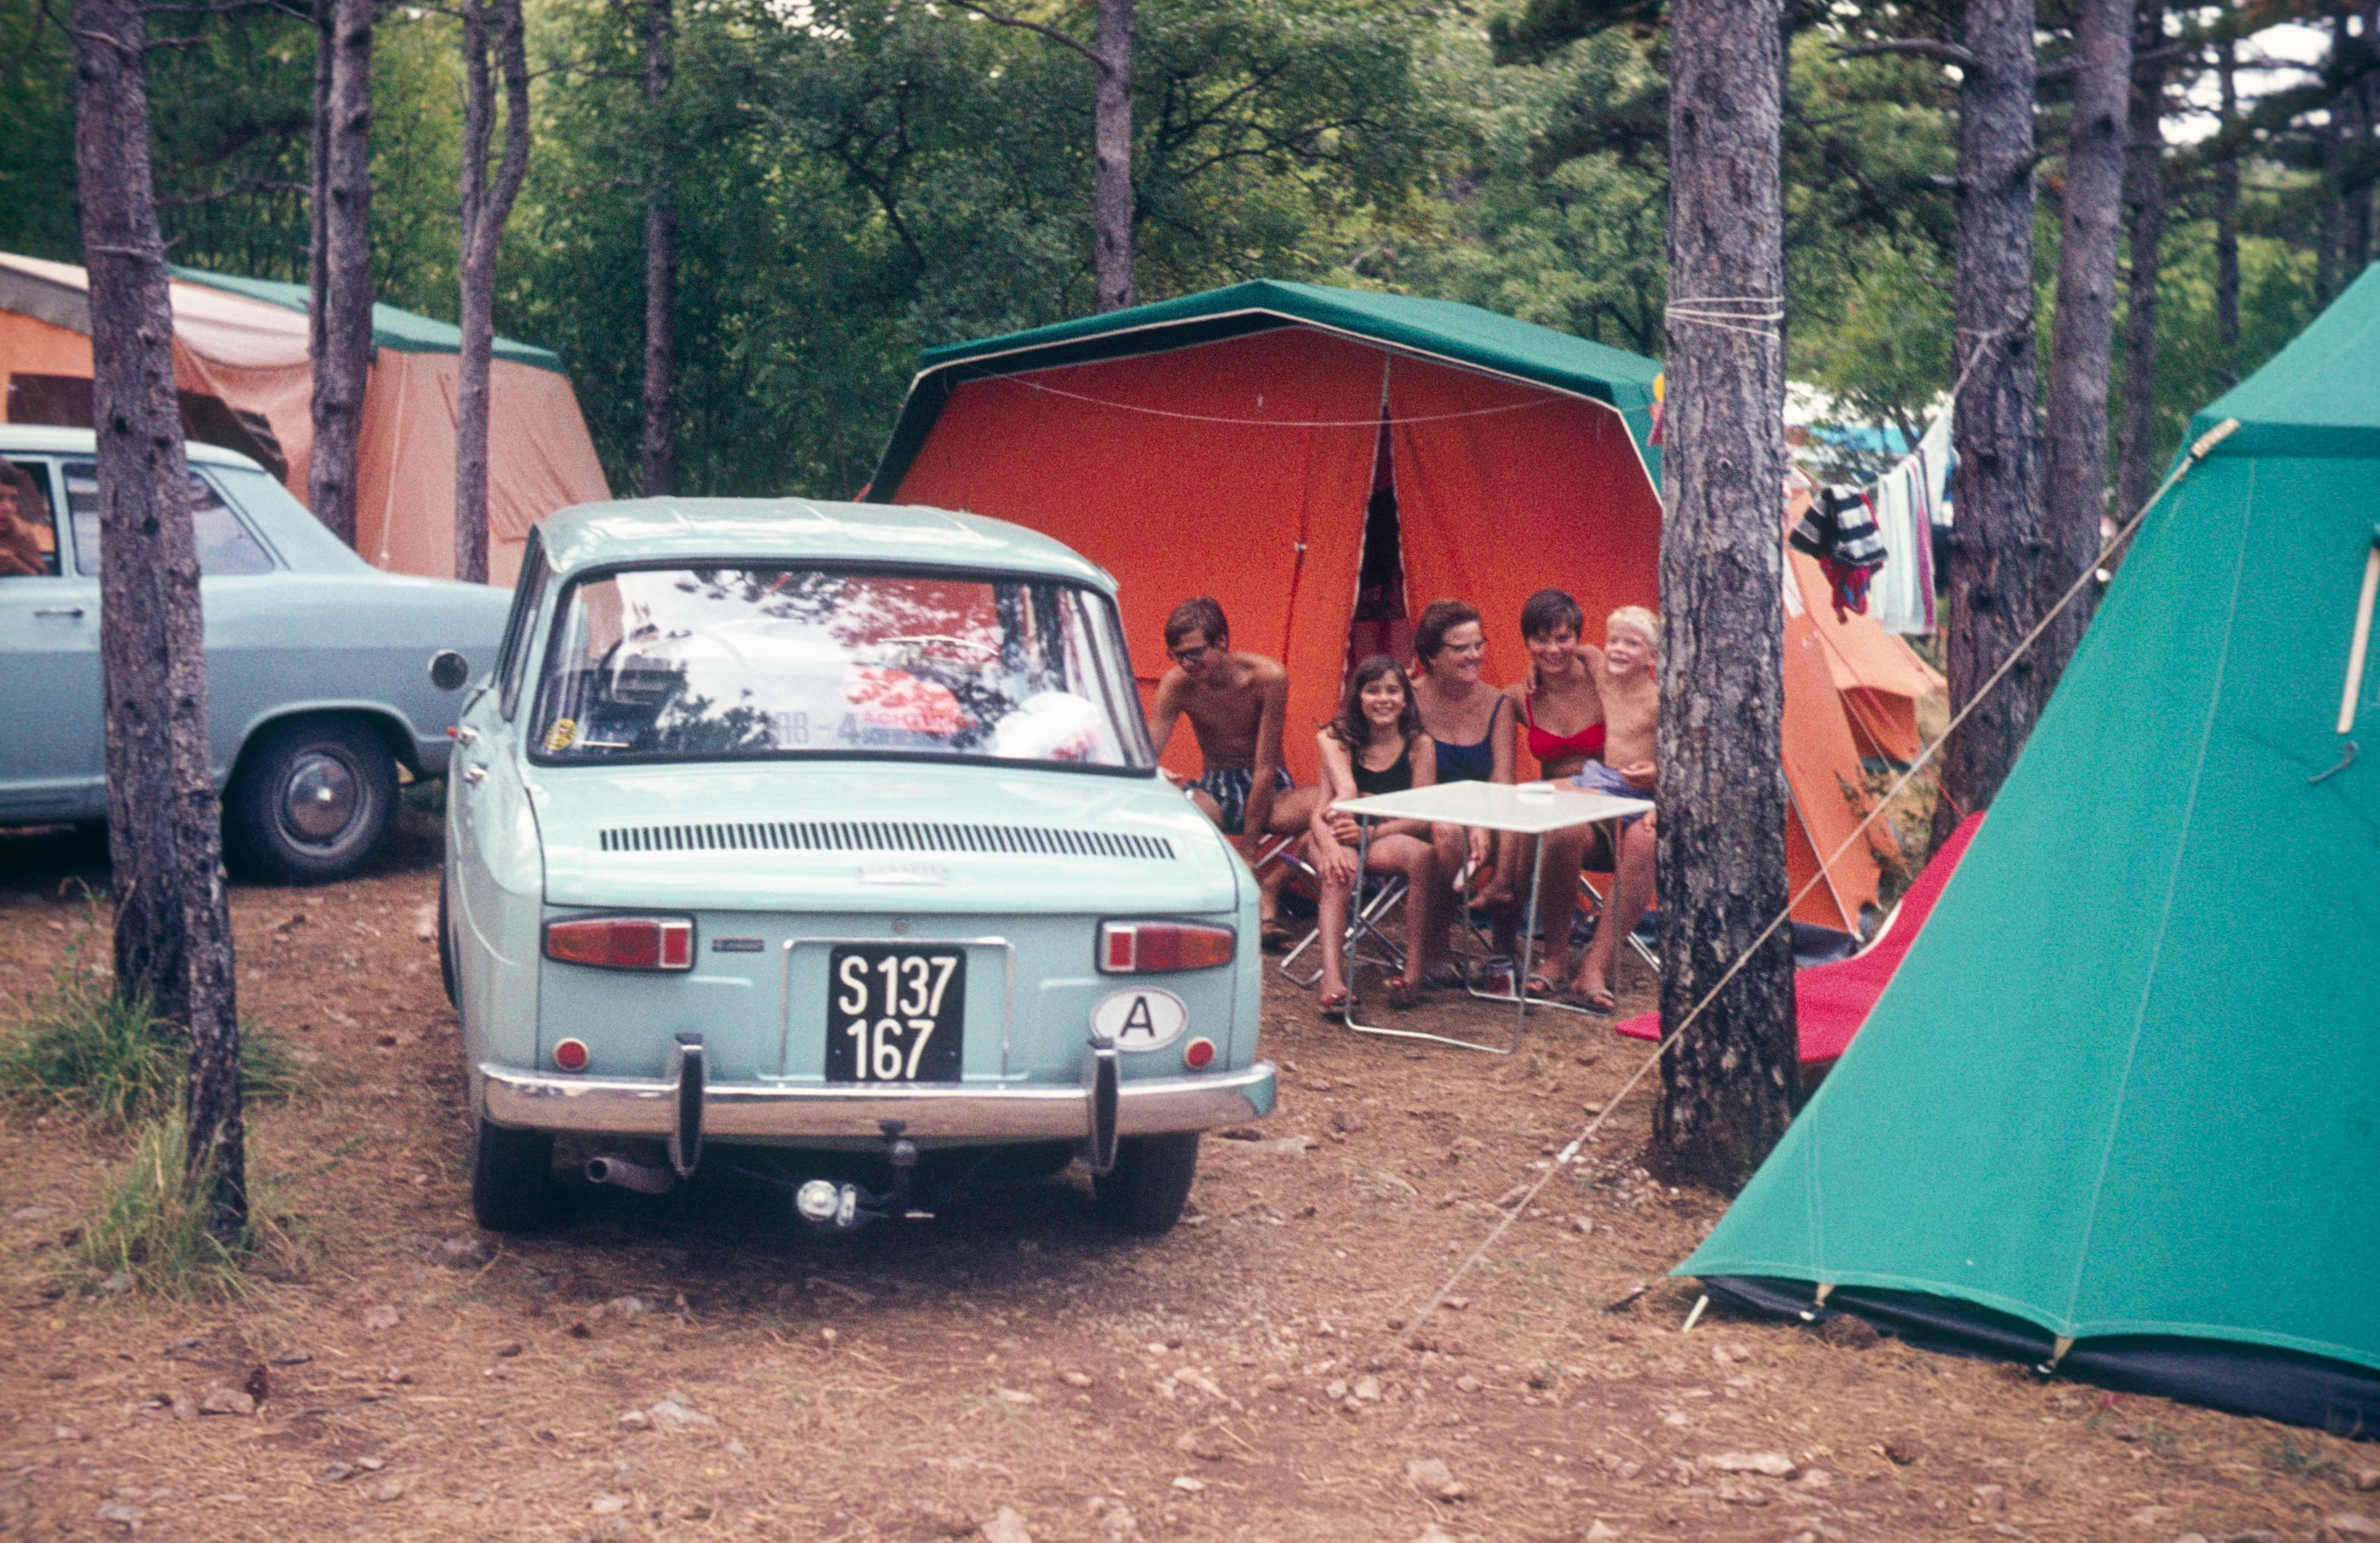
Nevertheless the slides needed some care. They are all mounted in frames with glass on both sides and there were some streaks on the inside. I ended up removing the glass for each one of them, cleaning it and the slide itself and remounting it before scanning. A lot of work per slide but the results are actually very decent! Here you can see the scan of the slide I was holding up to the light in the other picture:
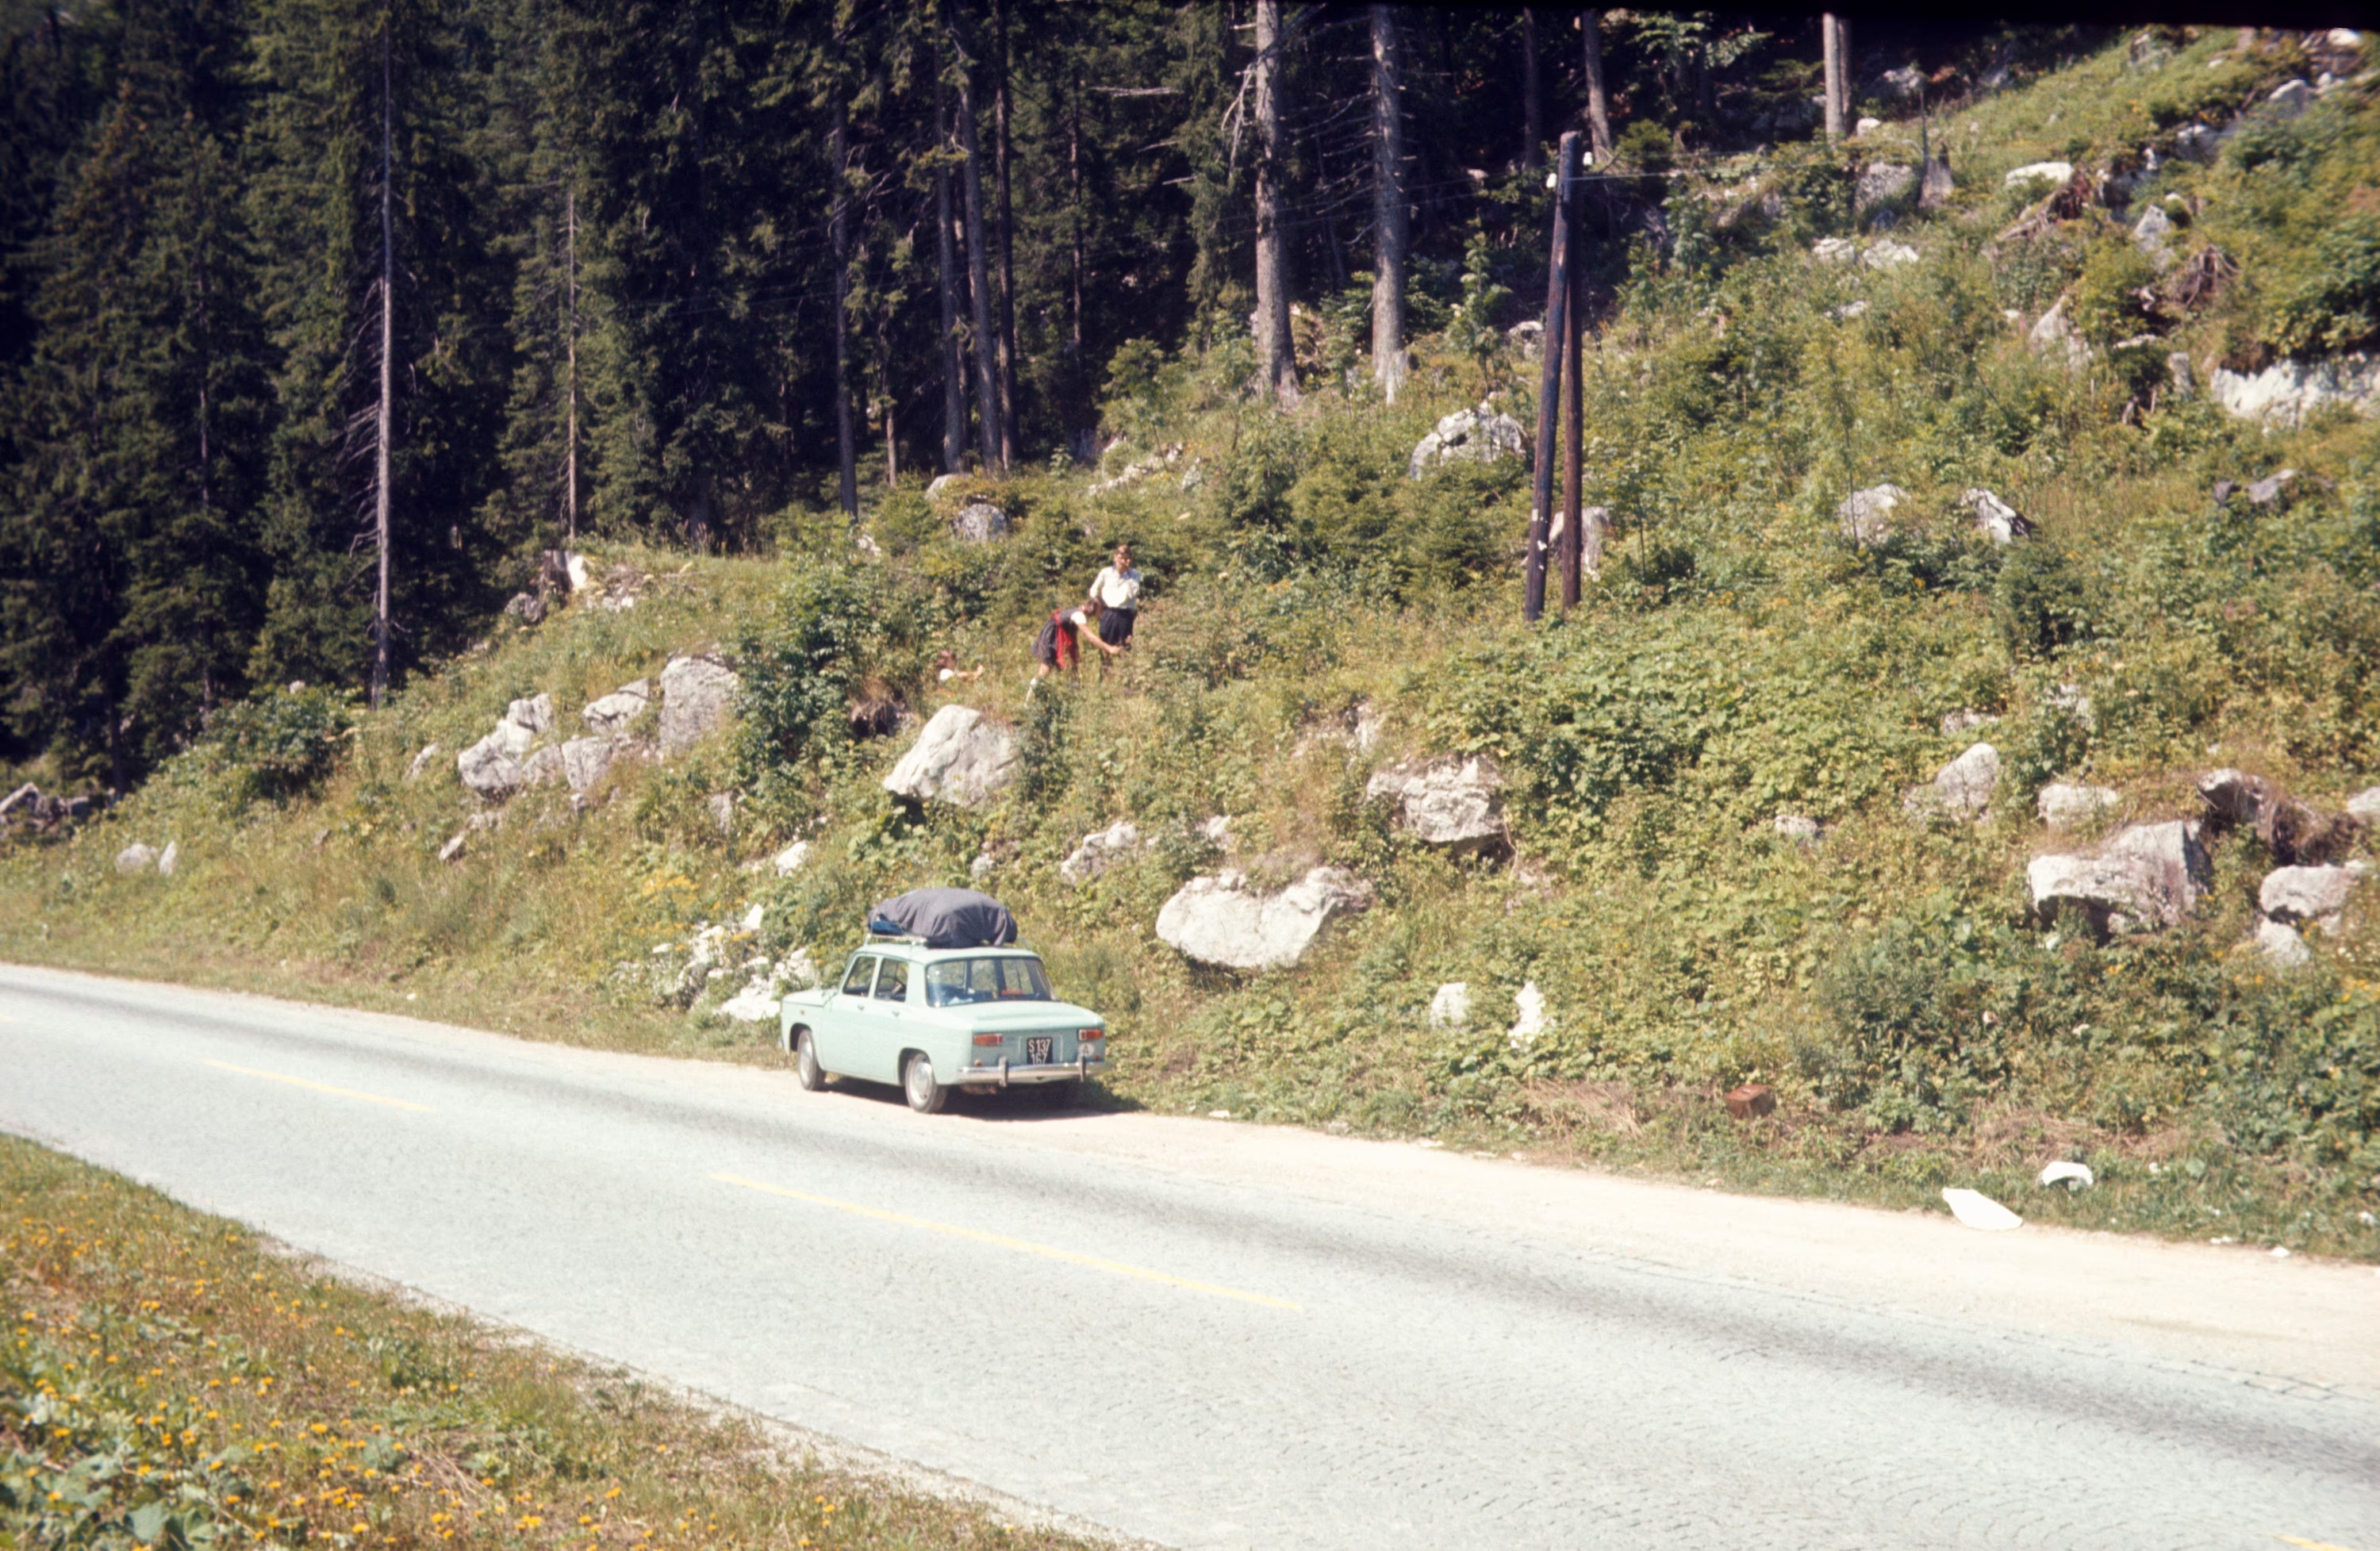
And here are my grandparents and family crossing the Alps with the same small pale blue car, which apparently was large enough to get six people from Salzburg, Austria (where they lived) to Croatia (back then a part of Yugoslavia):
Another one of the slides also shows my father as teenager overlooking some ruins:

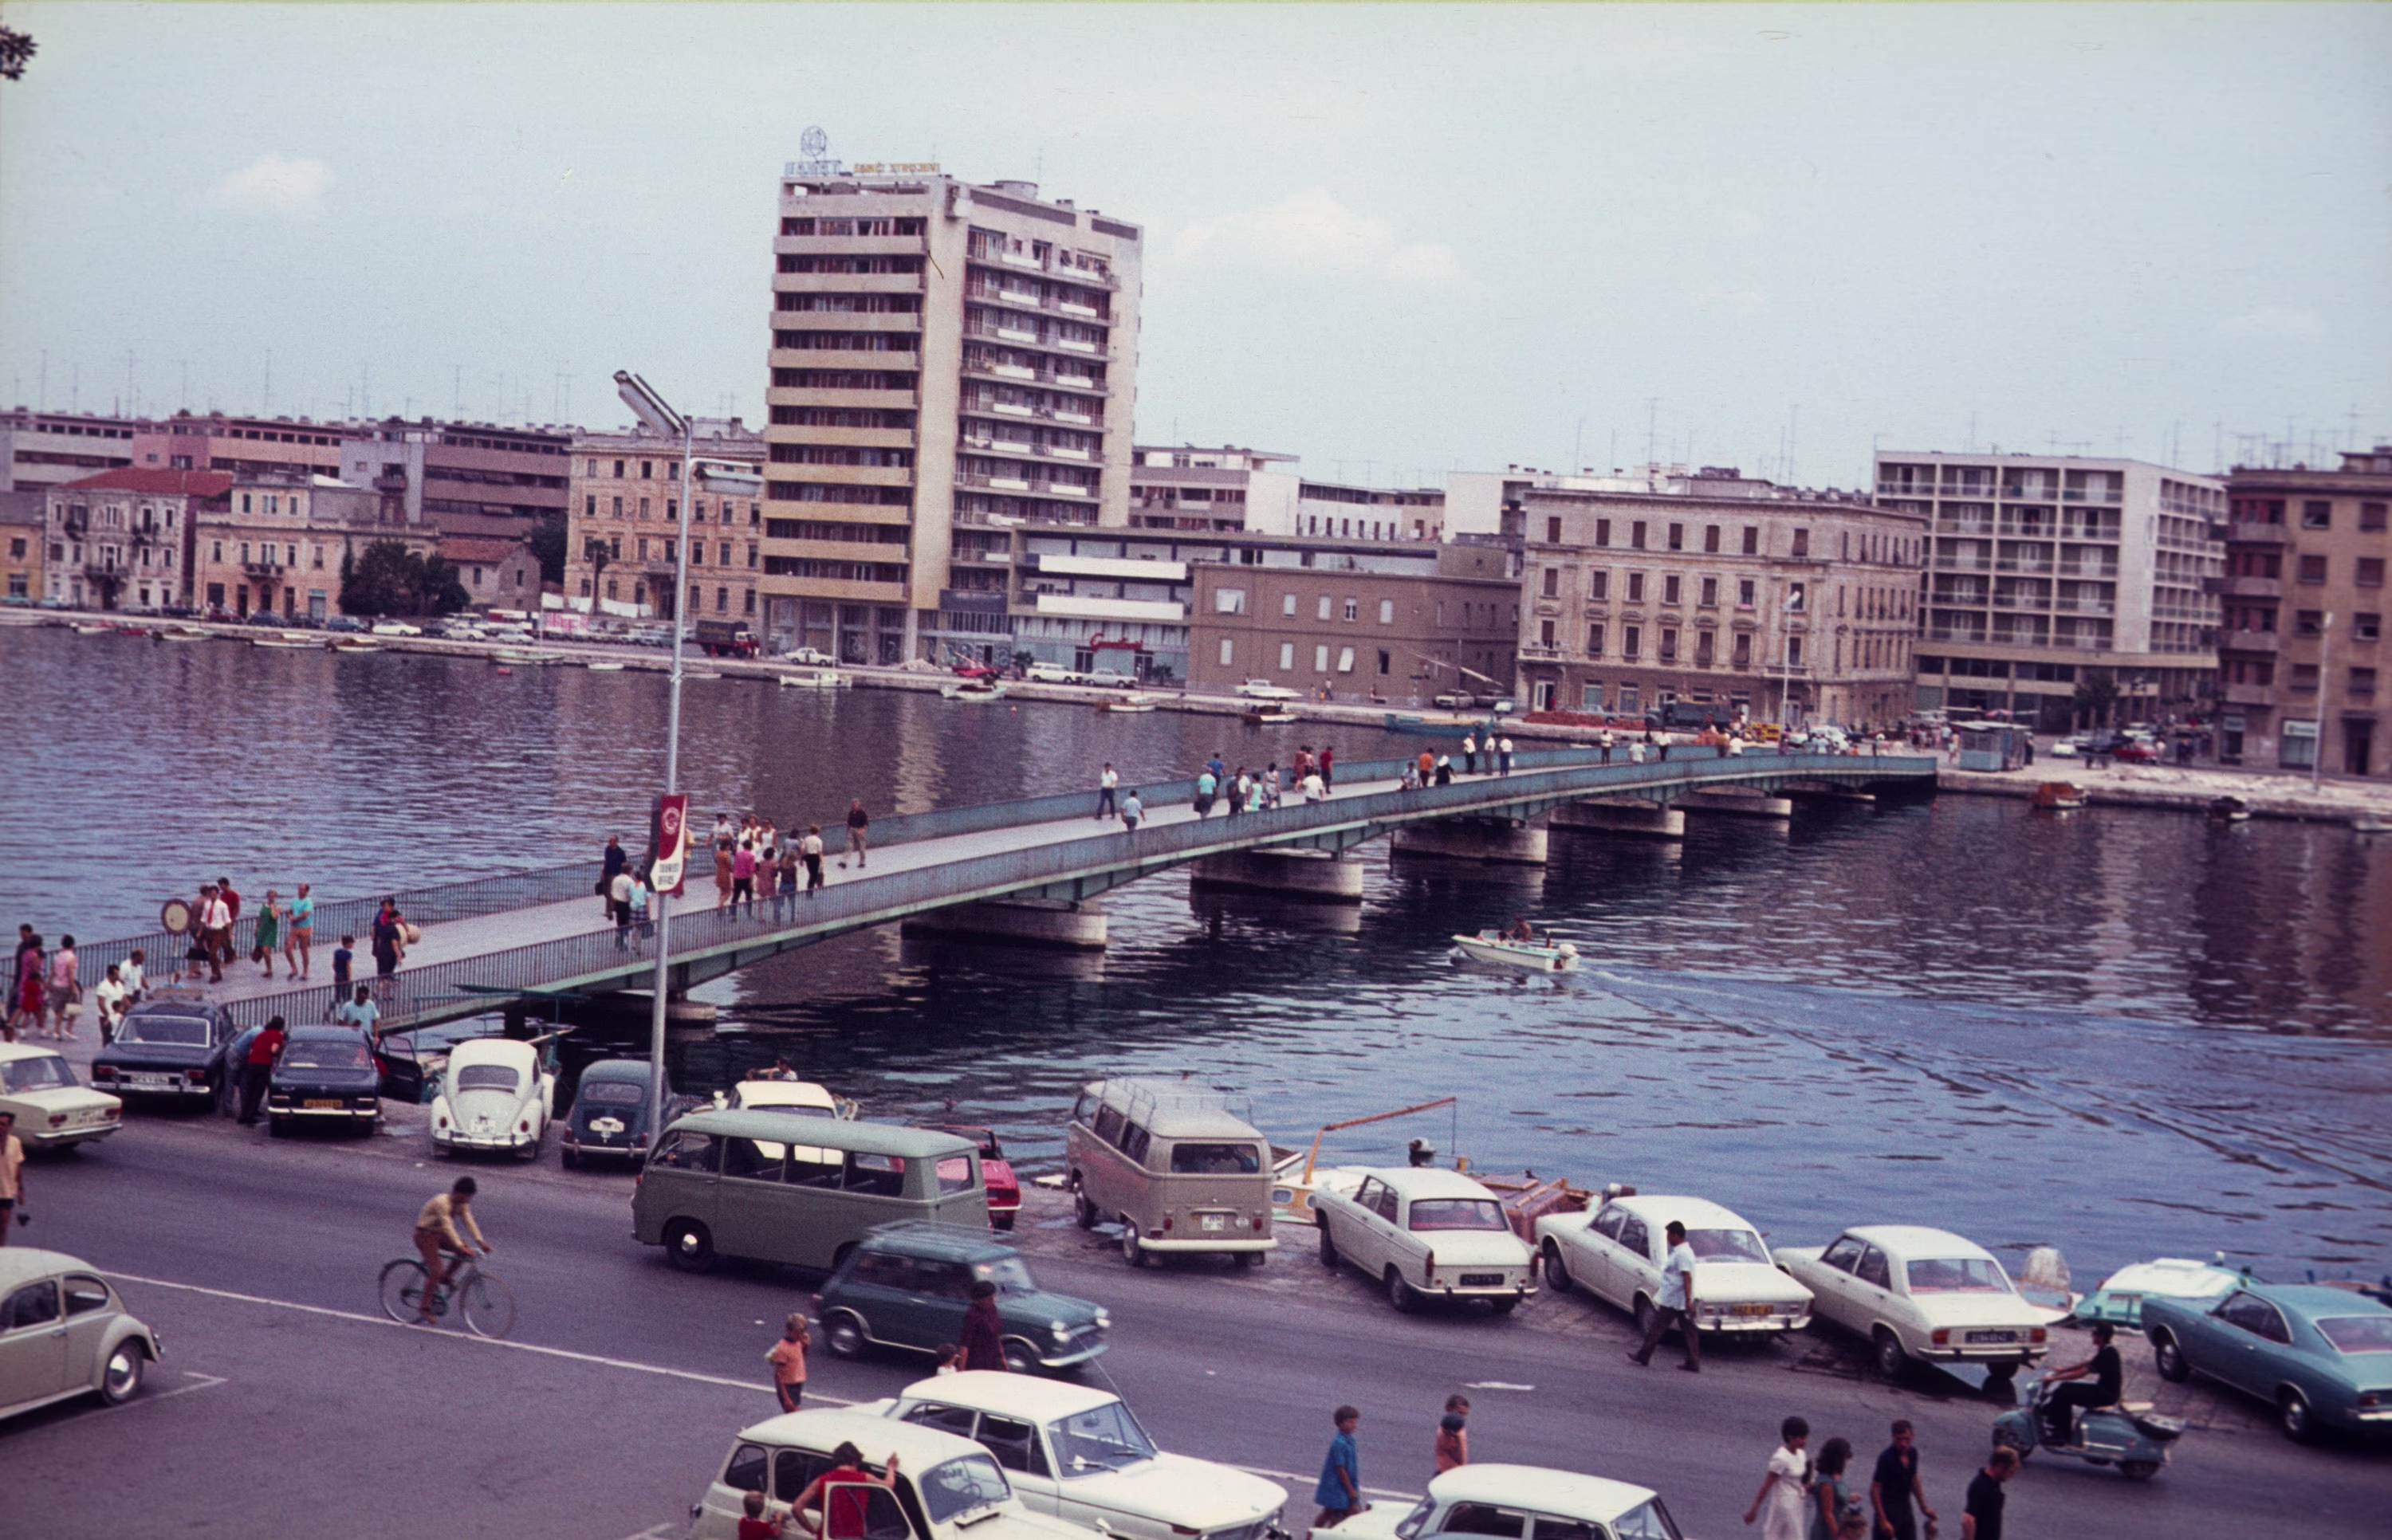
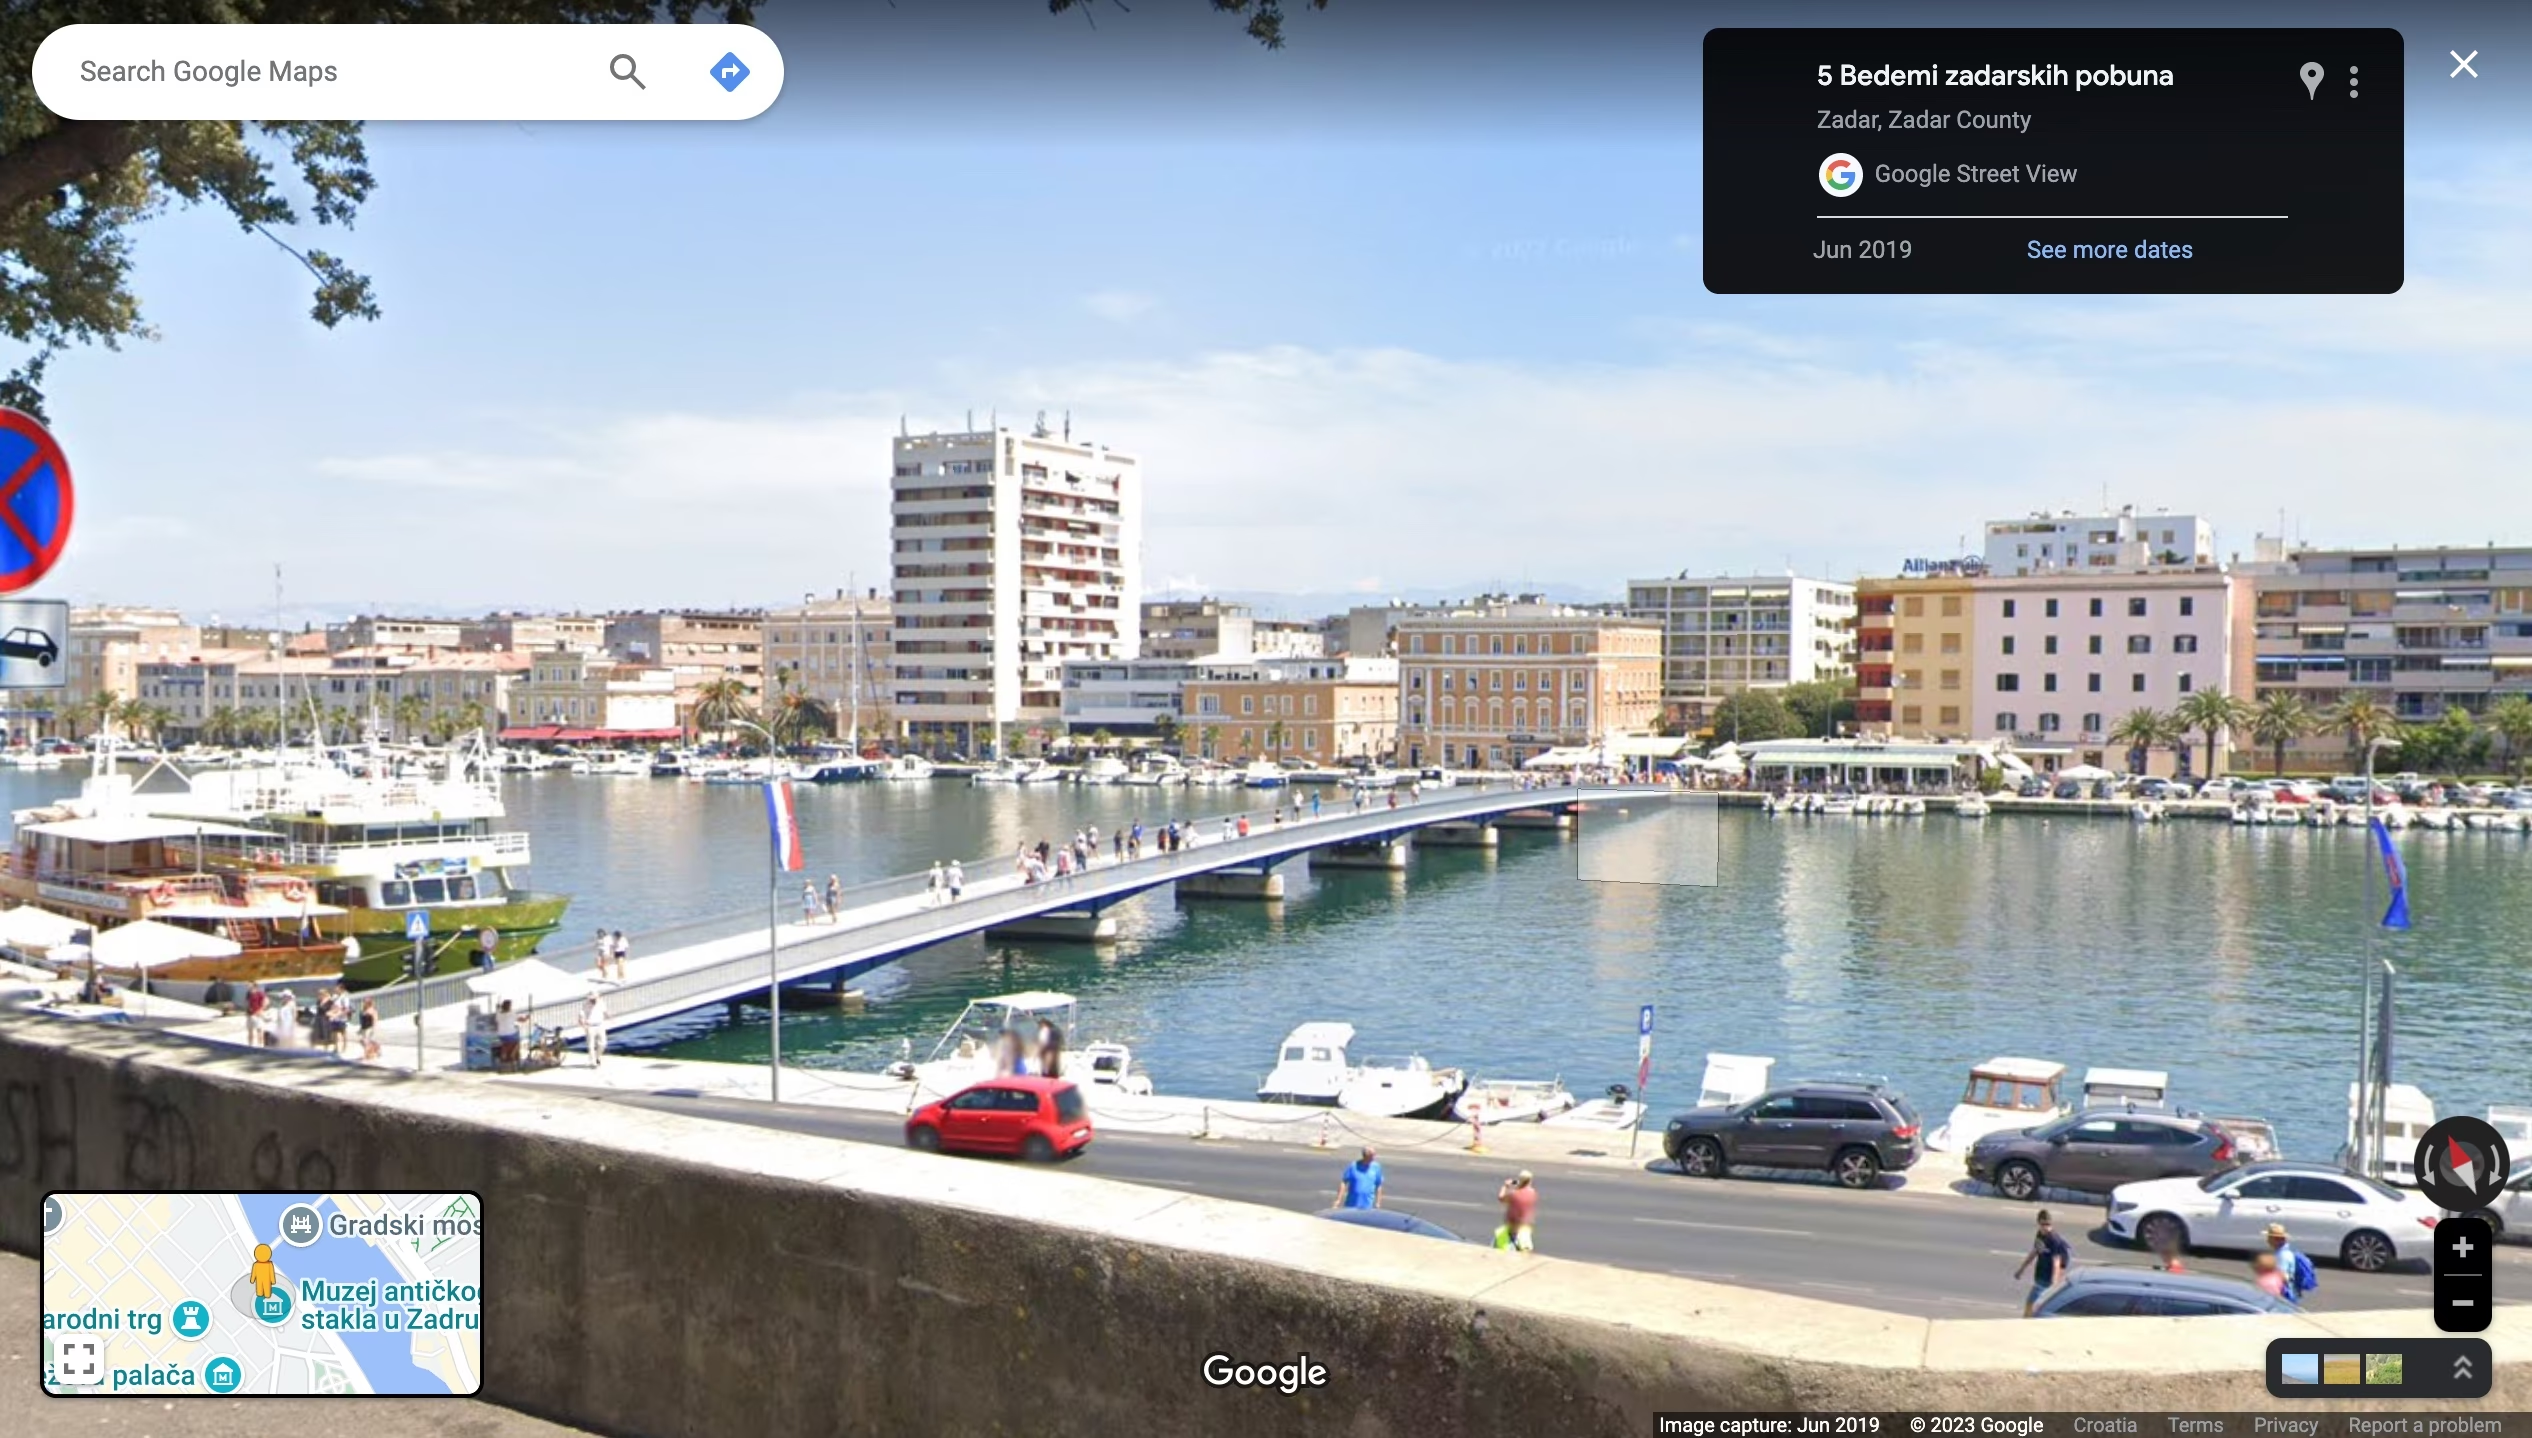
I was able to find the spot that the picture in Zarda was taken on on Google maps and the comparison with the Street View image is really something:
Click the image to jump to the Google Street View location!
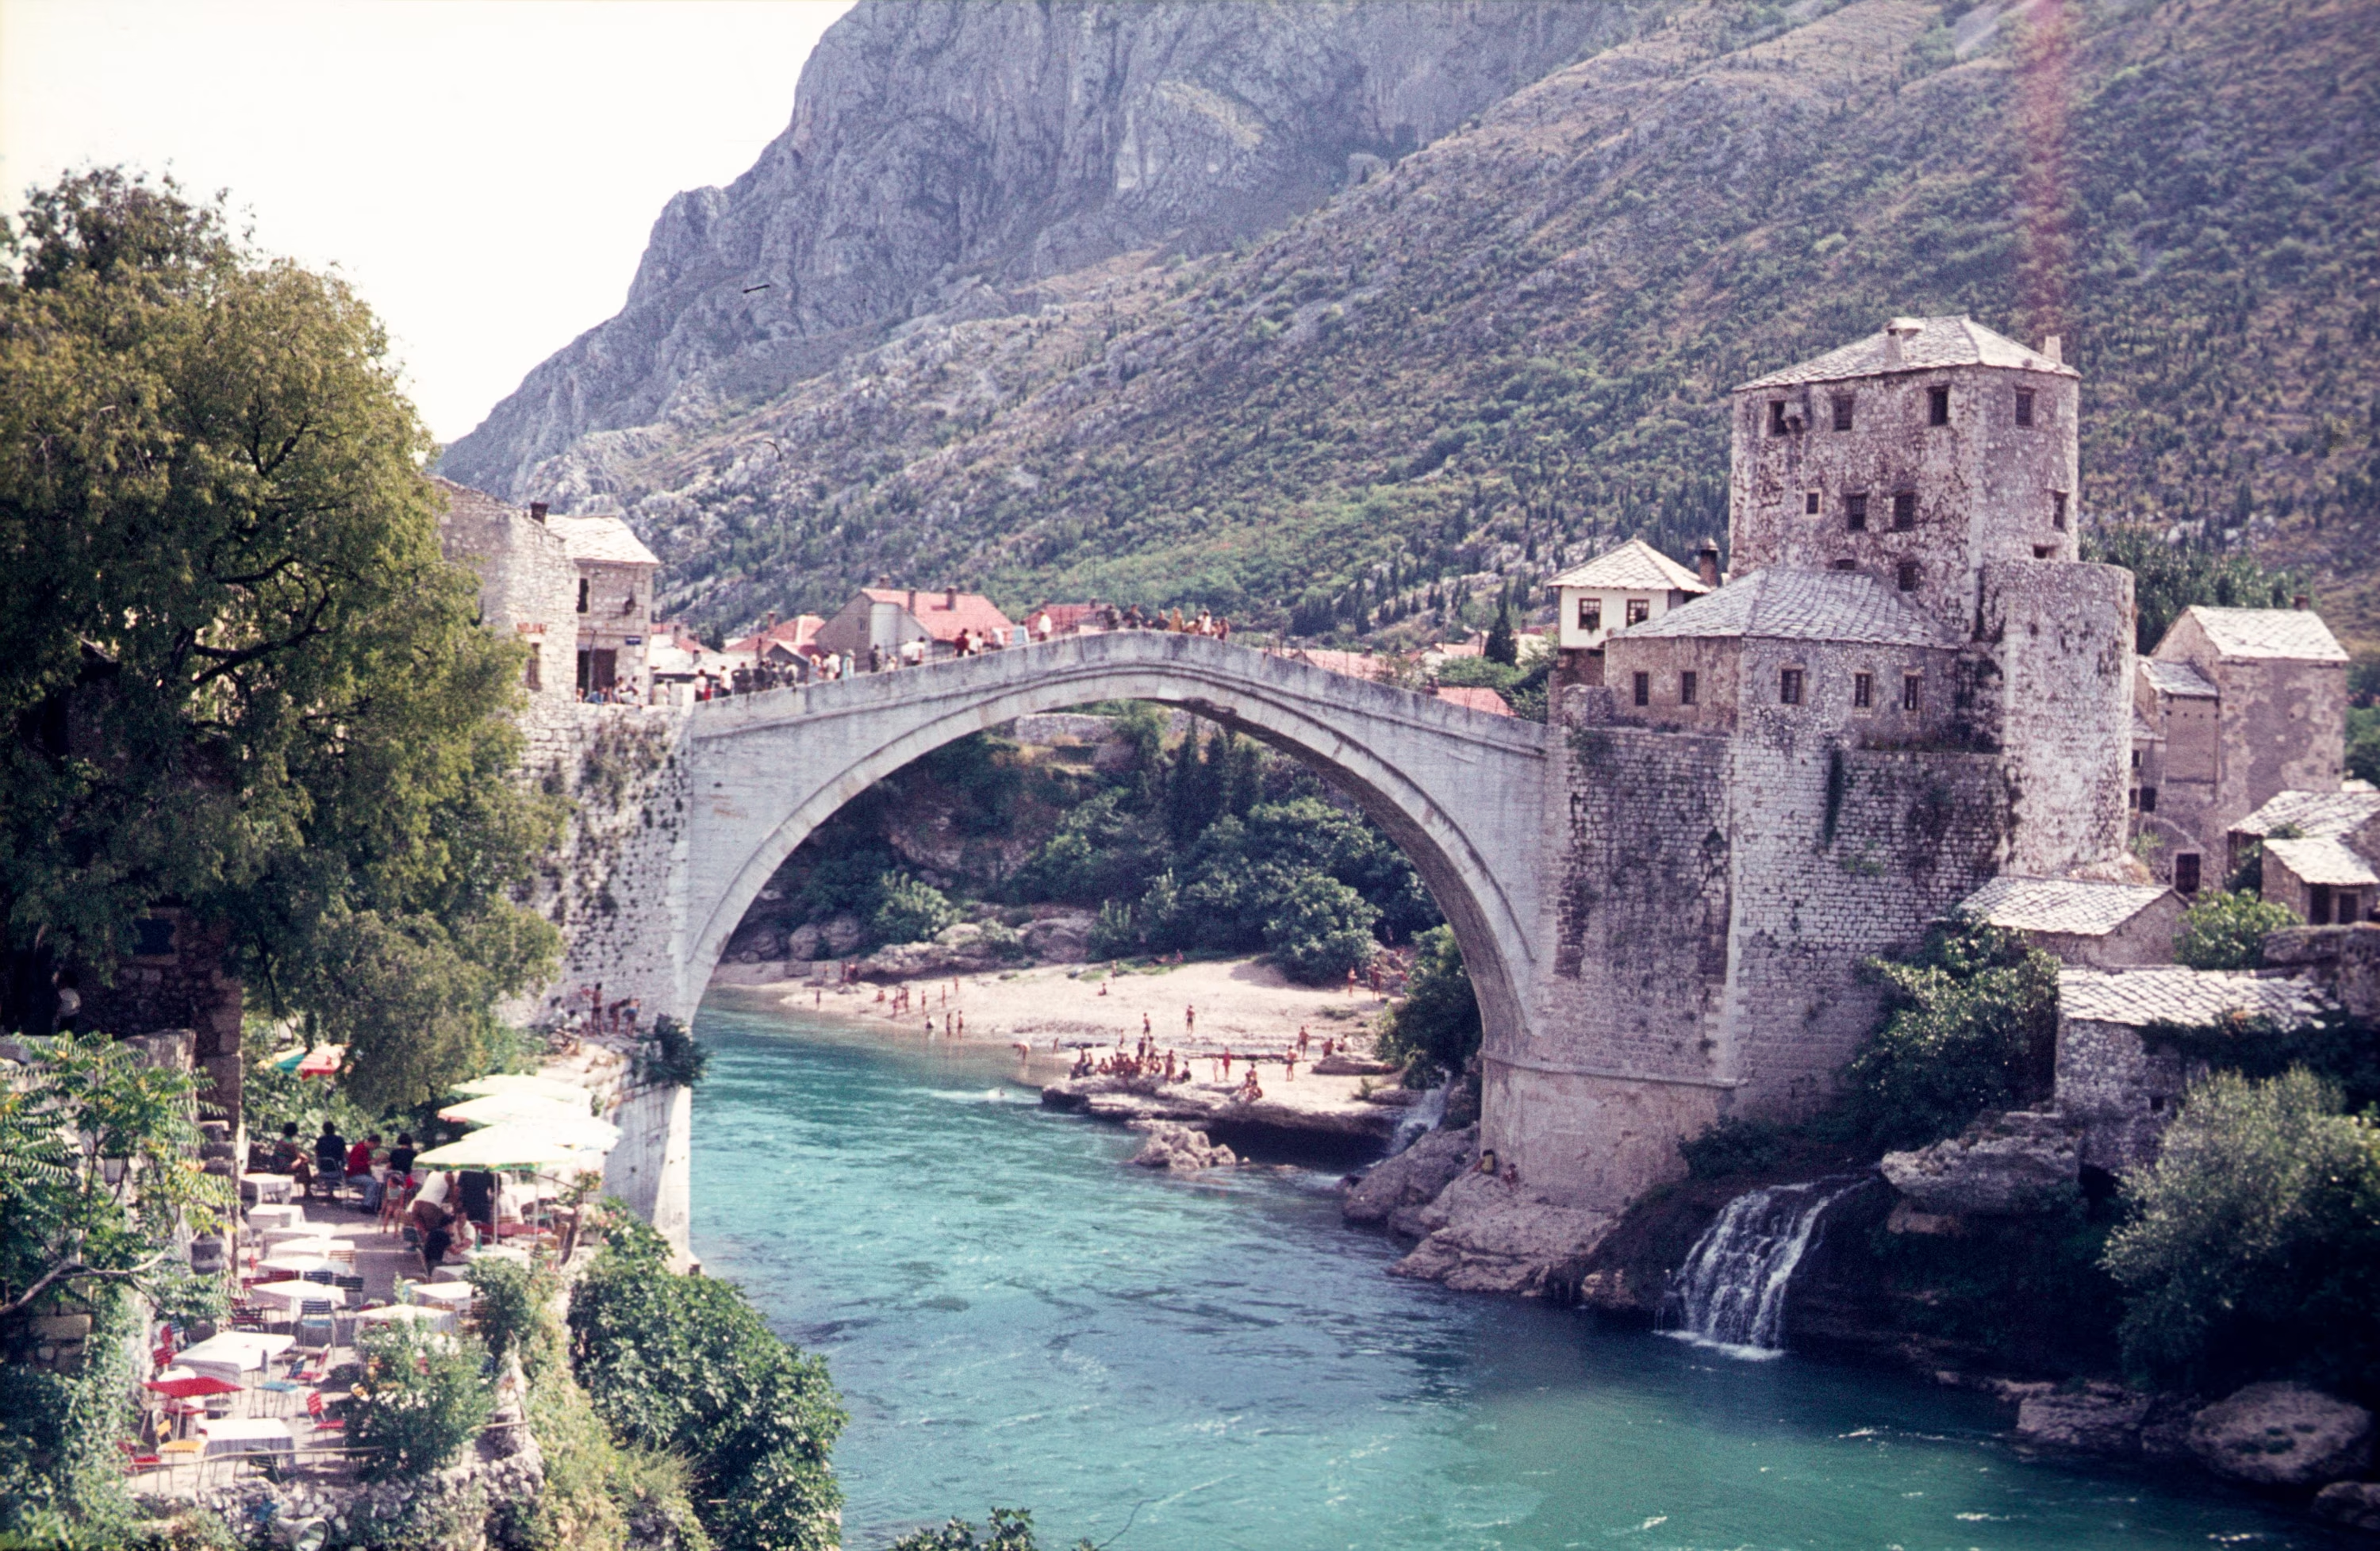
The next slide is the Mostar Bridge. Since my Grandfather took that photo the bridge was destroyed in the Croat–Bosniak War in 1993 and then rebuilt in the 2000s.
And finally here is a camping ground in Rovinj that is still around:
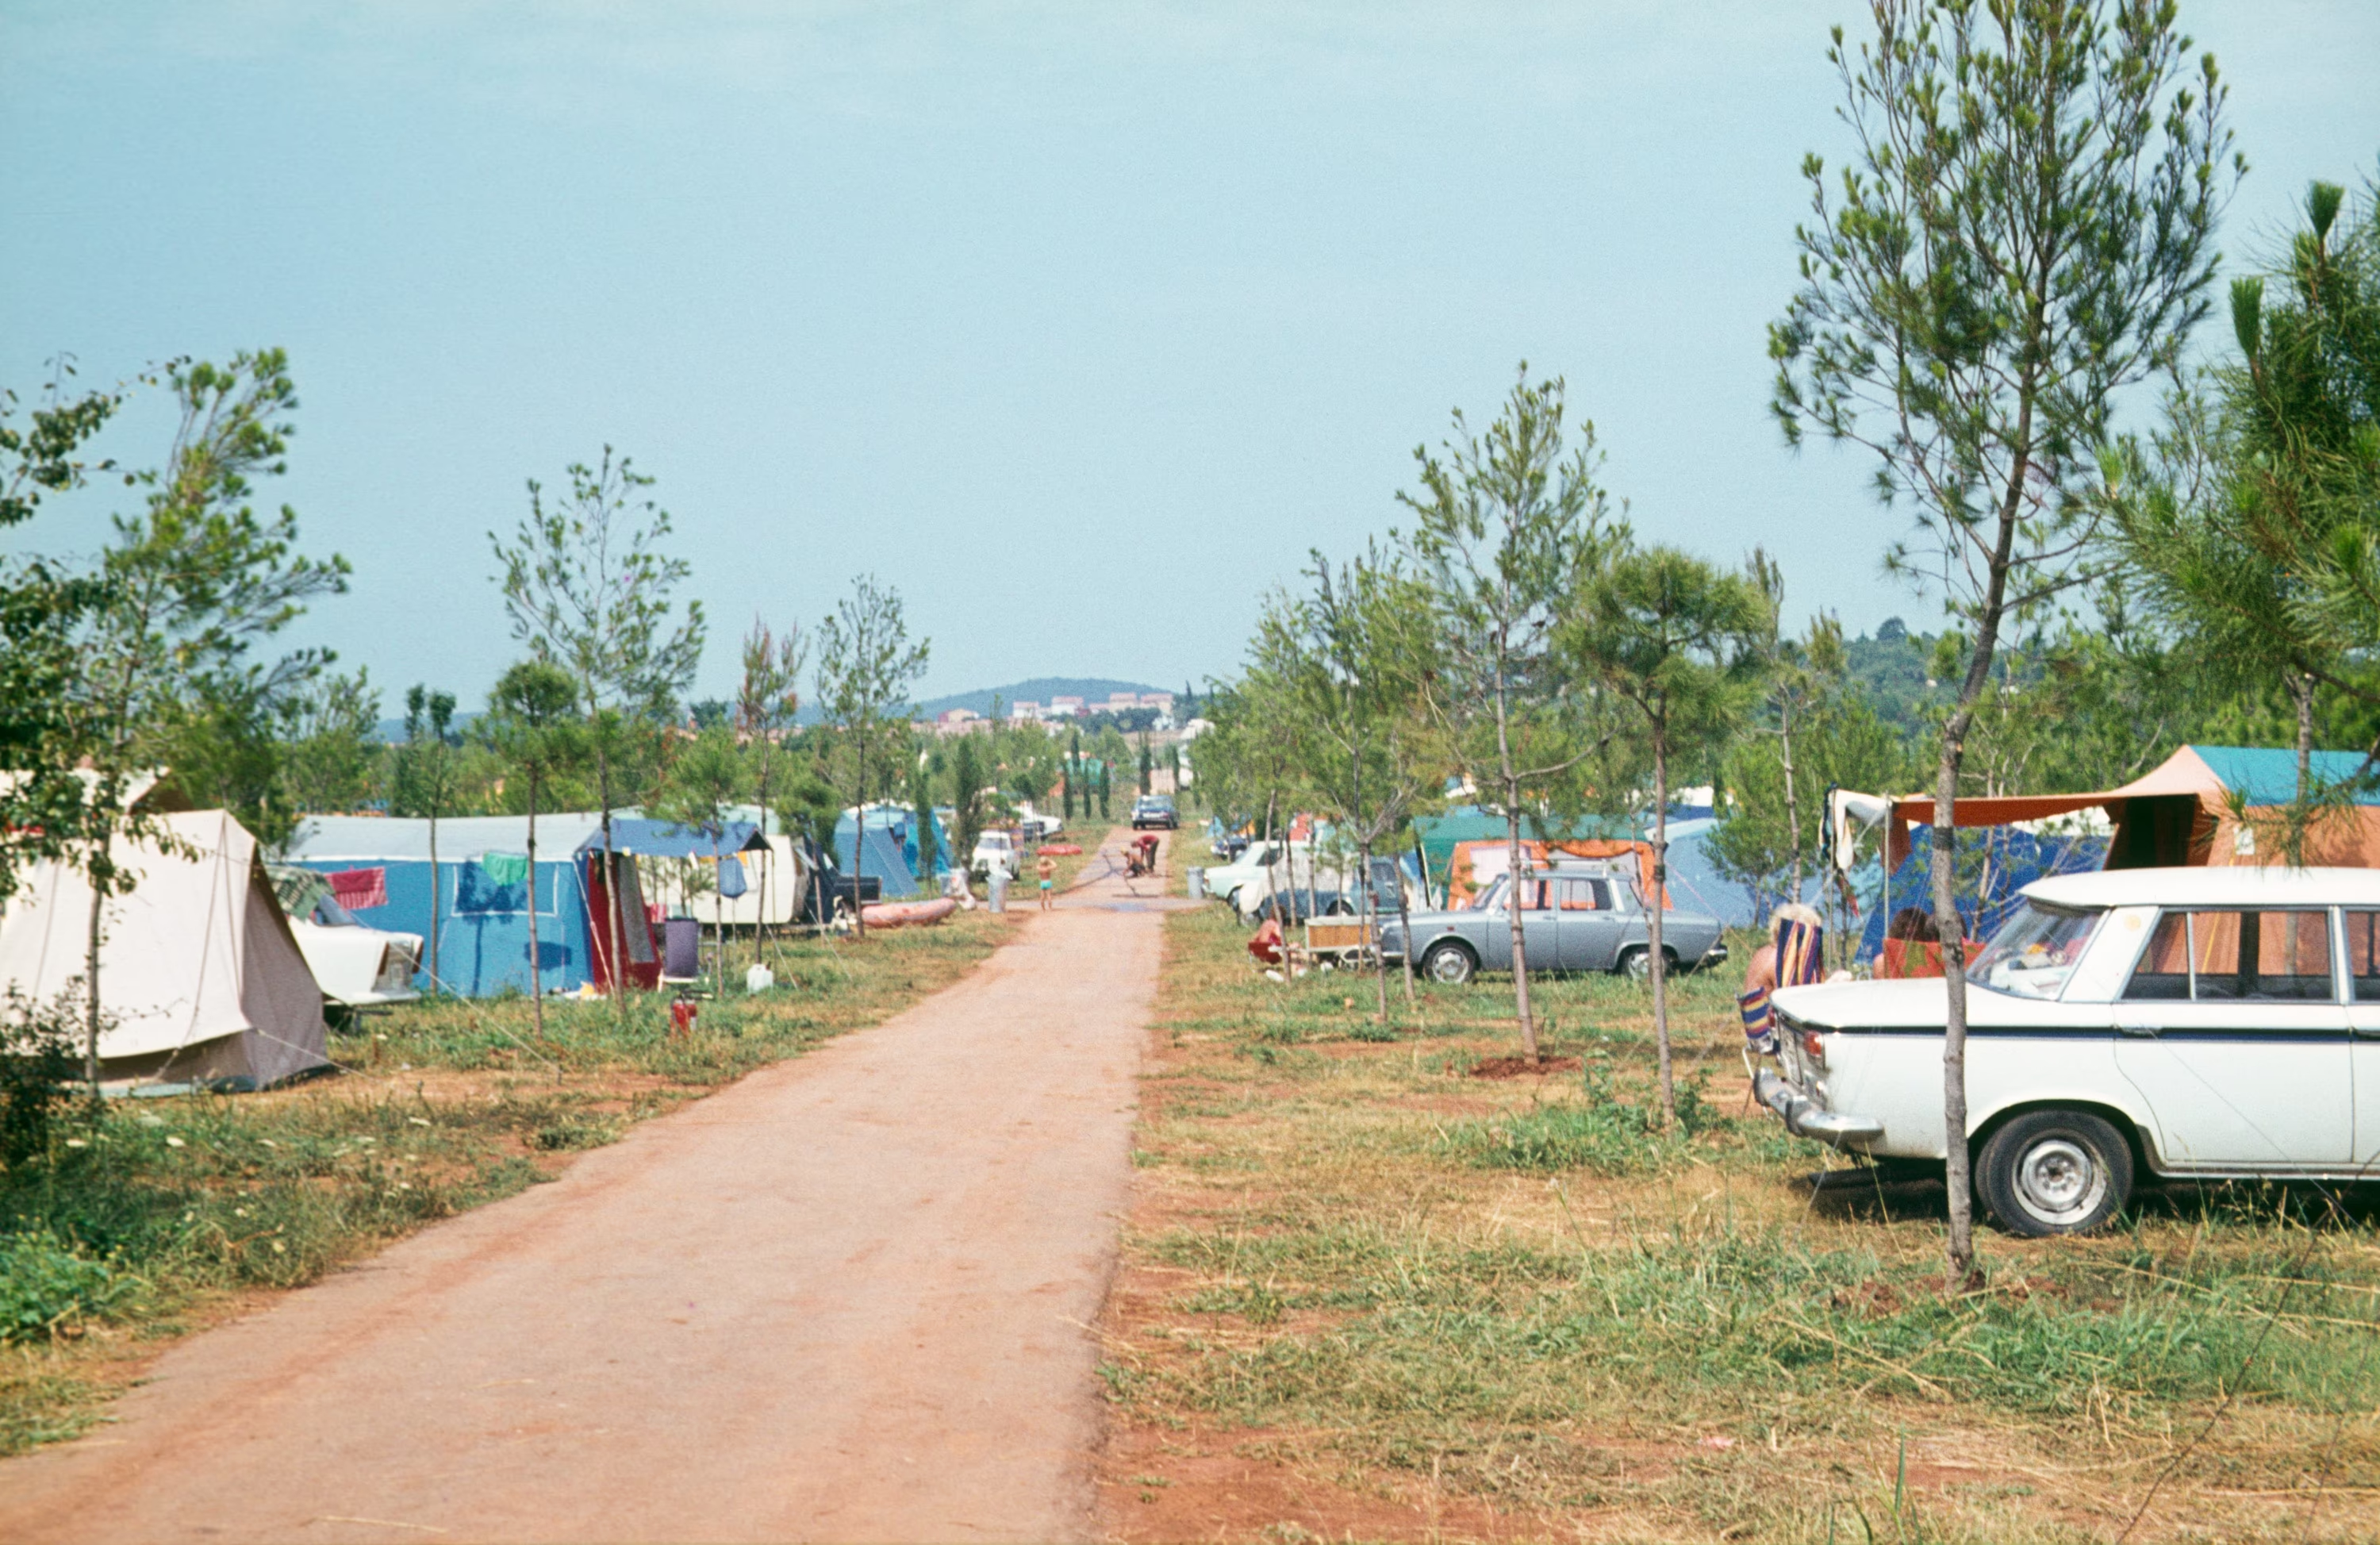
Overall I’m (again) impressed how well these have held up. I found some grime and dirt on them but that was easily removed. Beyond that there seems to be hardly any fading on the pictures that my grandparents took. There are some commercially produced slides of major tourist attractions that were in the box and these have faded much more strongly, I suspect that manufacturing companies cut some corners in processing these. Oh and for those interested: going by edge markings and what was on offer back then most of the slides where on Agfa CT18 and processed AP-41 (Agfachrome Process 41)!
Overall this was a fun experience and maybe next winter I’ll dig up another box and see how it held up.
I recently found myself in the rare circumstance of having four things available to me:
So I went about setting up a little test to compare various filters on a full spectrum camera! I’ve shot two scenes with 10 different filters each while putting the camera on a tripod to not move around too much (I still shifted the camera a bit but I think overall this still works). To illustrate the results this post contains four sets of images:
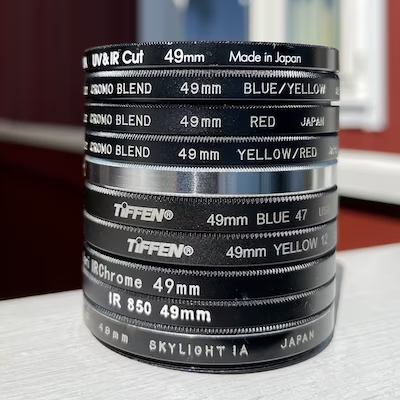
The filters I had with me where the following ones:
I use the numbering same scheme in all four image sets, so for if you want to view the B+W ES Orange filter it will always be the 5th image. As the 11th image I’ve added a shot with no filter at all. The first filter I used (the Hoya UV&IR Cut) is equivalent to using a ‘normal’ visible camera. (Practically all cameras have a similar filter built in, unless they are modified as full spectrum cameras.)
Some notes on the other filters used:
This was a fun experiment! The Vivitar Cromo Blend Blue/Yellow filter gave quite fun colors and an interesting sky that reminds me of the sky colors that expired Polaroid 669 film used to give. I also quite liked the otherworldly orange with white foliage that I got from the B+W ES Orange filter. To get the closest to what EIR/Aerochrome looked like the Kolari IRChrome clearly is the best option (apart form taking a separate infrared exposure). It’s much easier to separate the infrared reds from the ‘normal’ reds (for example the roof of the house). The IR850 filter removes a lot of light and as a result can be hard to handhold, but I do like the black and white results that I get from it.
And now, without further adu, here are the results:

This June one of my partners took me along to a small convention called Pfingstakademie. There I attended a workshop on building browser based games, which was quite fun. Given the remote location (and thus slow internet) the facilitators decided to not use many libraries or frameworks. We rather used pretty plain TypeScript and the HTML canvas API. (The package.json.lock ‘only’ has 1700 lines 🙀.) The game I wrote is heavily inspired by a mid-2000s GameBoy Advance game from the Bit Generations series called Dotstream.
You can try it in your browser and the source code is on GitHub. Also you can try the other participants games in your browser as well!
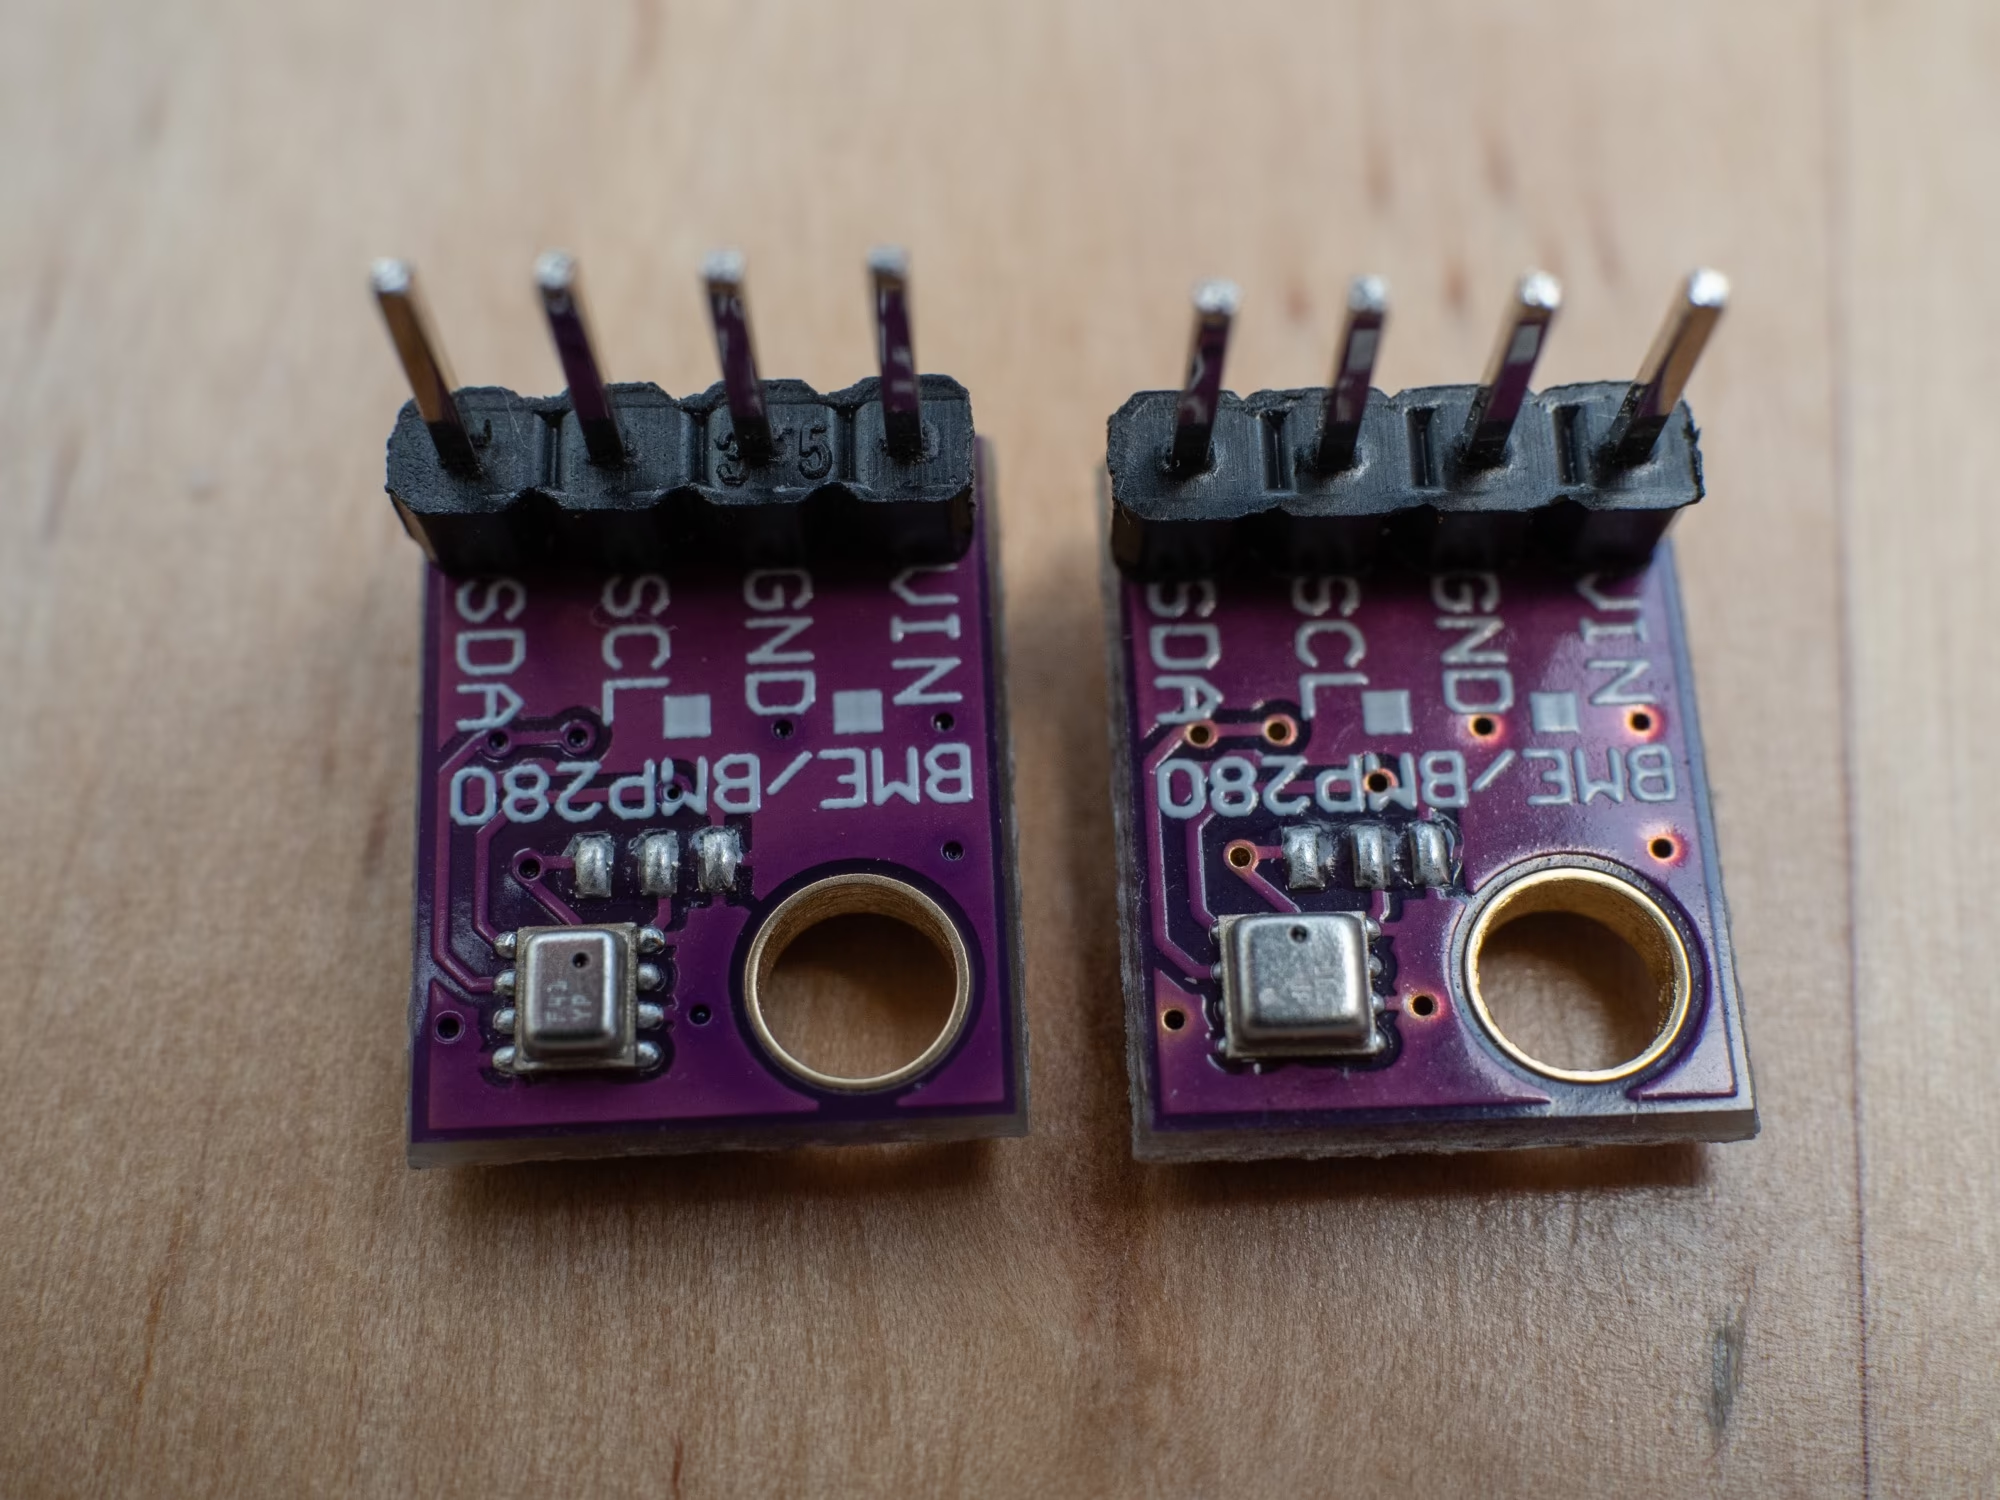
This is the story of three batches of sensors on breakout boards that I ordered over the last few years from AliExpress. All three batches where marketed as BMP280 chips on breakout boards.
The first and third batch worked fine, but the second batch appears to be fake, non-functioning sensors. Judging from a few internet searches there seems to be a fairly common issue of sellers trying to essentially re-label cheaper BME280 sensors as BMP280 since they look similar.
However in my case the sensors did not work and I wasted a lot of time figuring out that the sensors, not the other components in my project where the issue.
So, to hopefully safe someone else some debugging time I’ve added a closeup picture comparison of the fake and of the working sensors below of this post.
The fake sensor (that looks more like a BME280) would just respond to all i2c addresses and then behave badly enough that both micro controllers that I tried ended up crashing upon readout. (Which made debugging harder.)
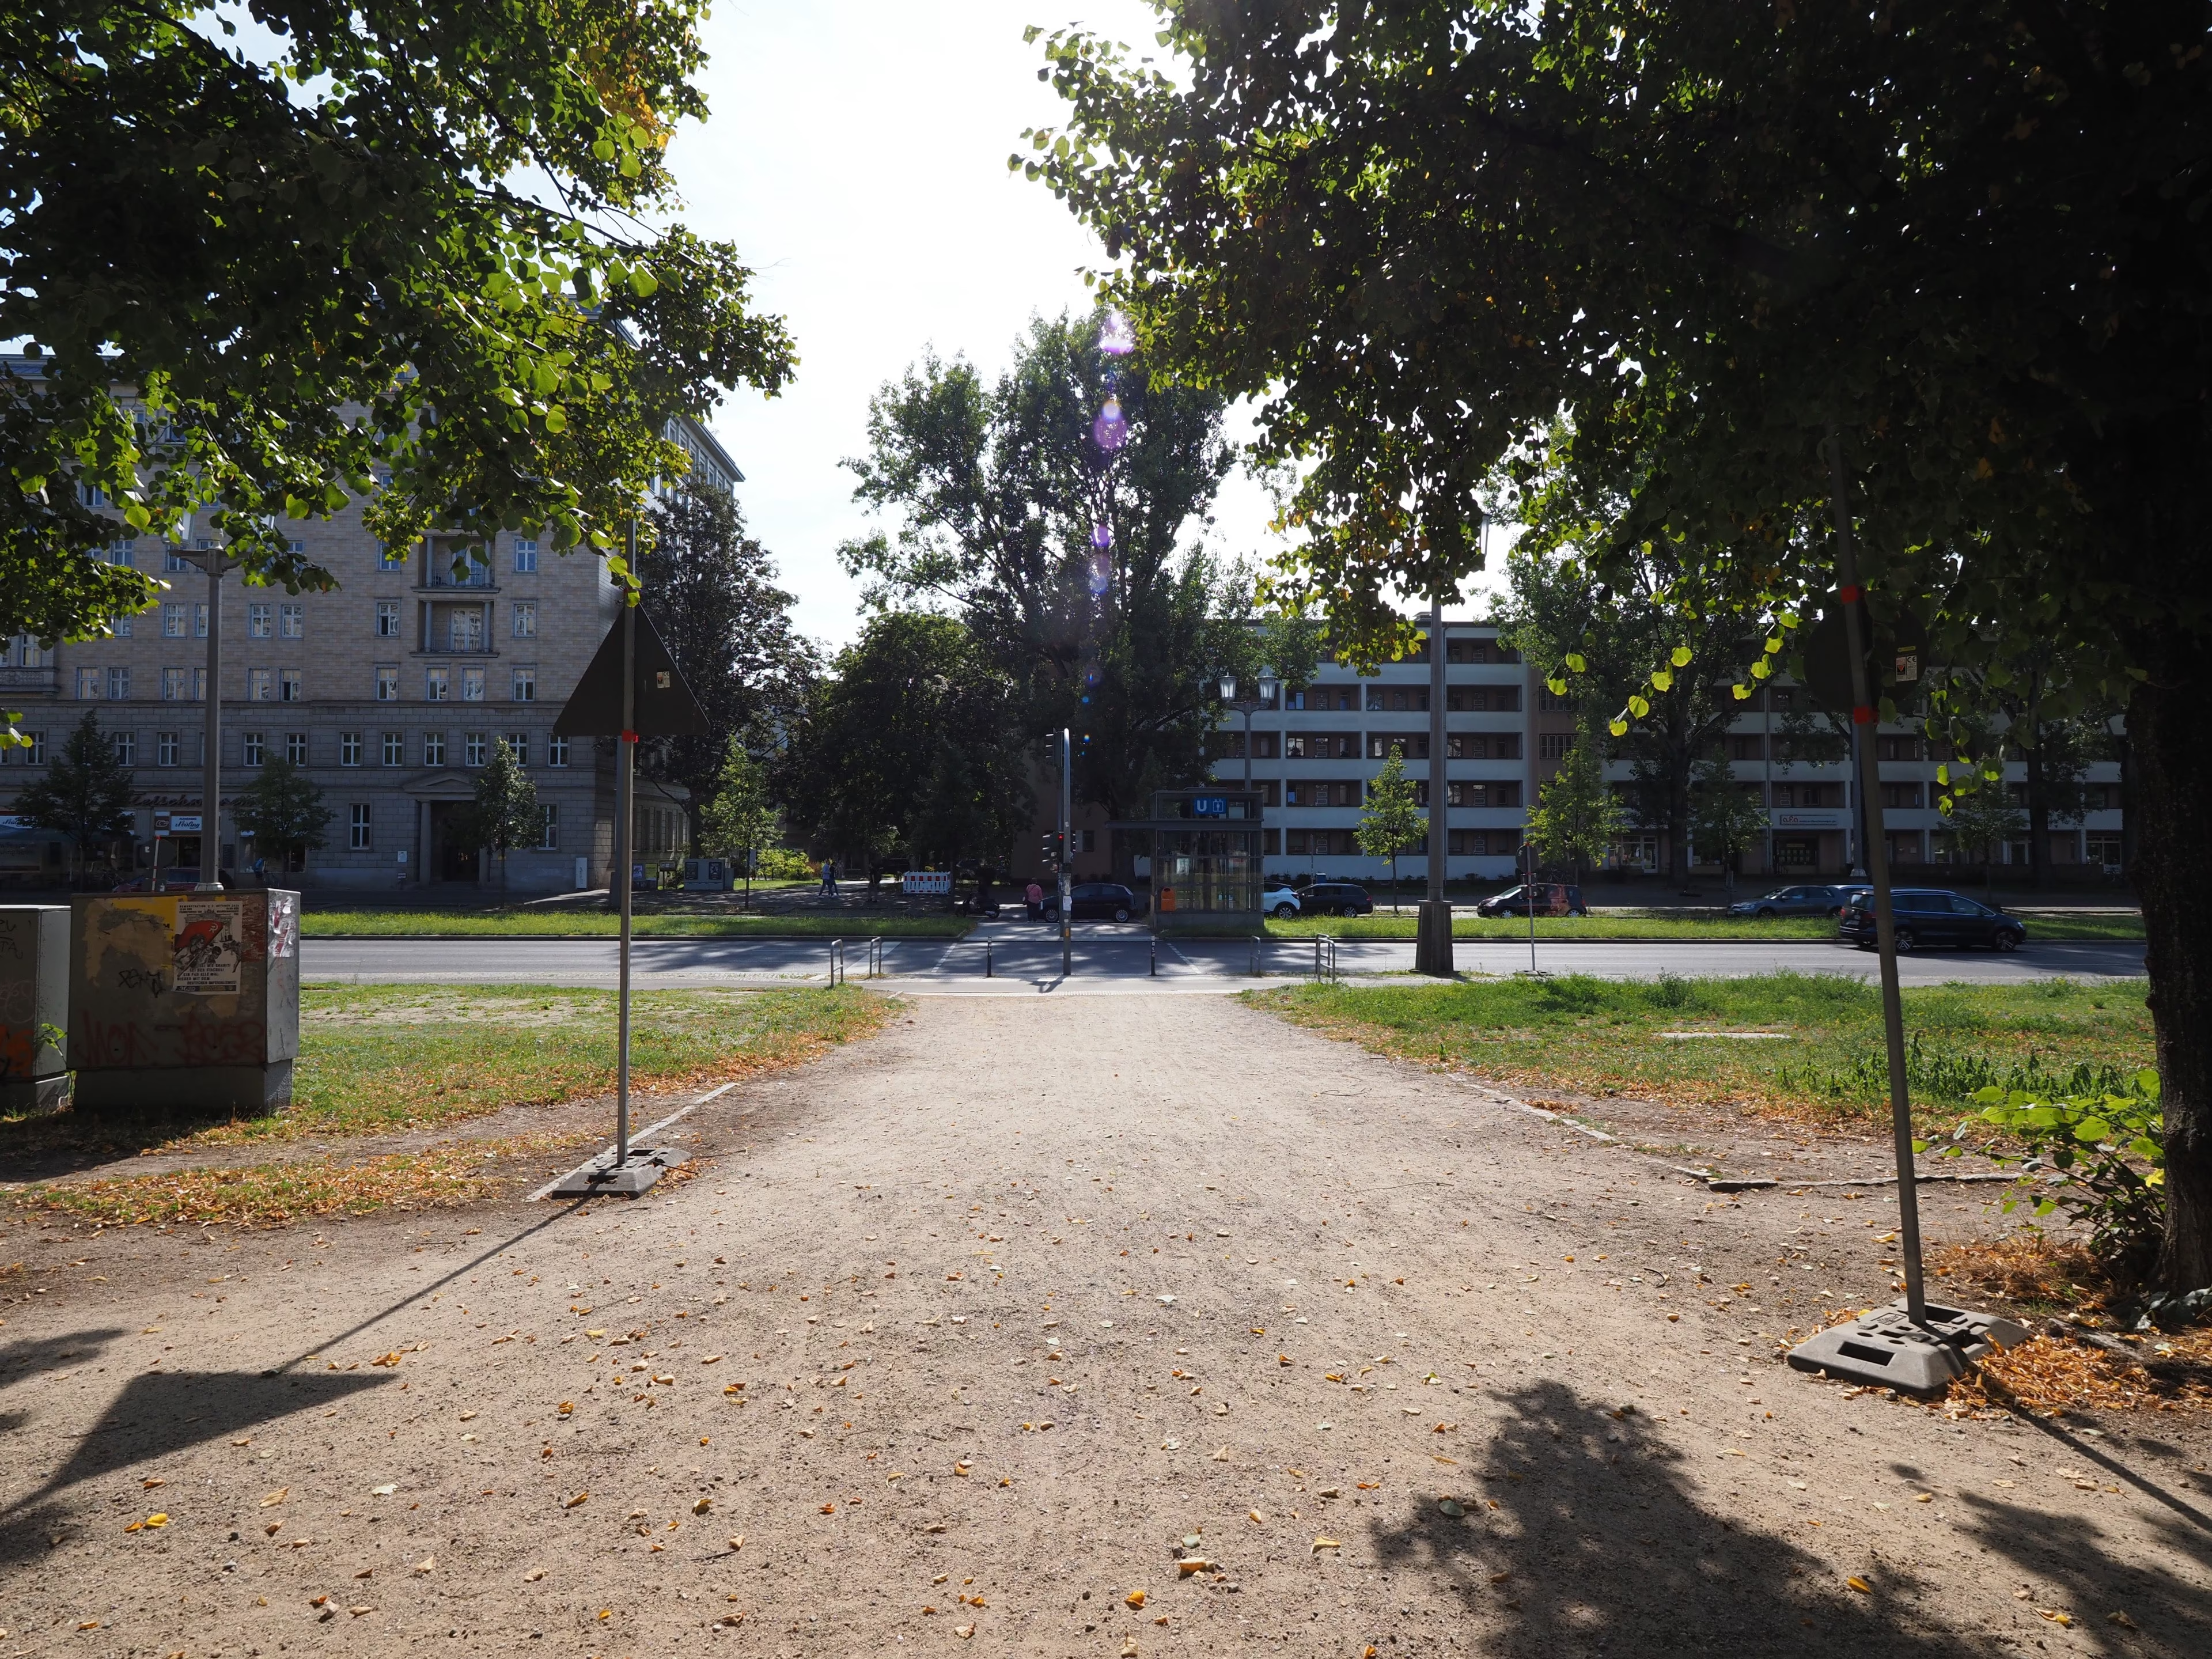
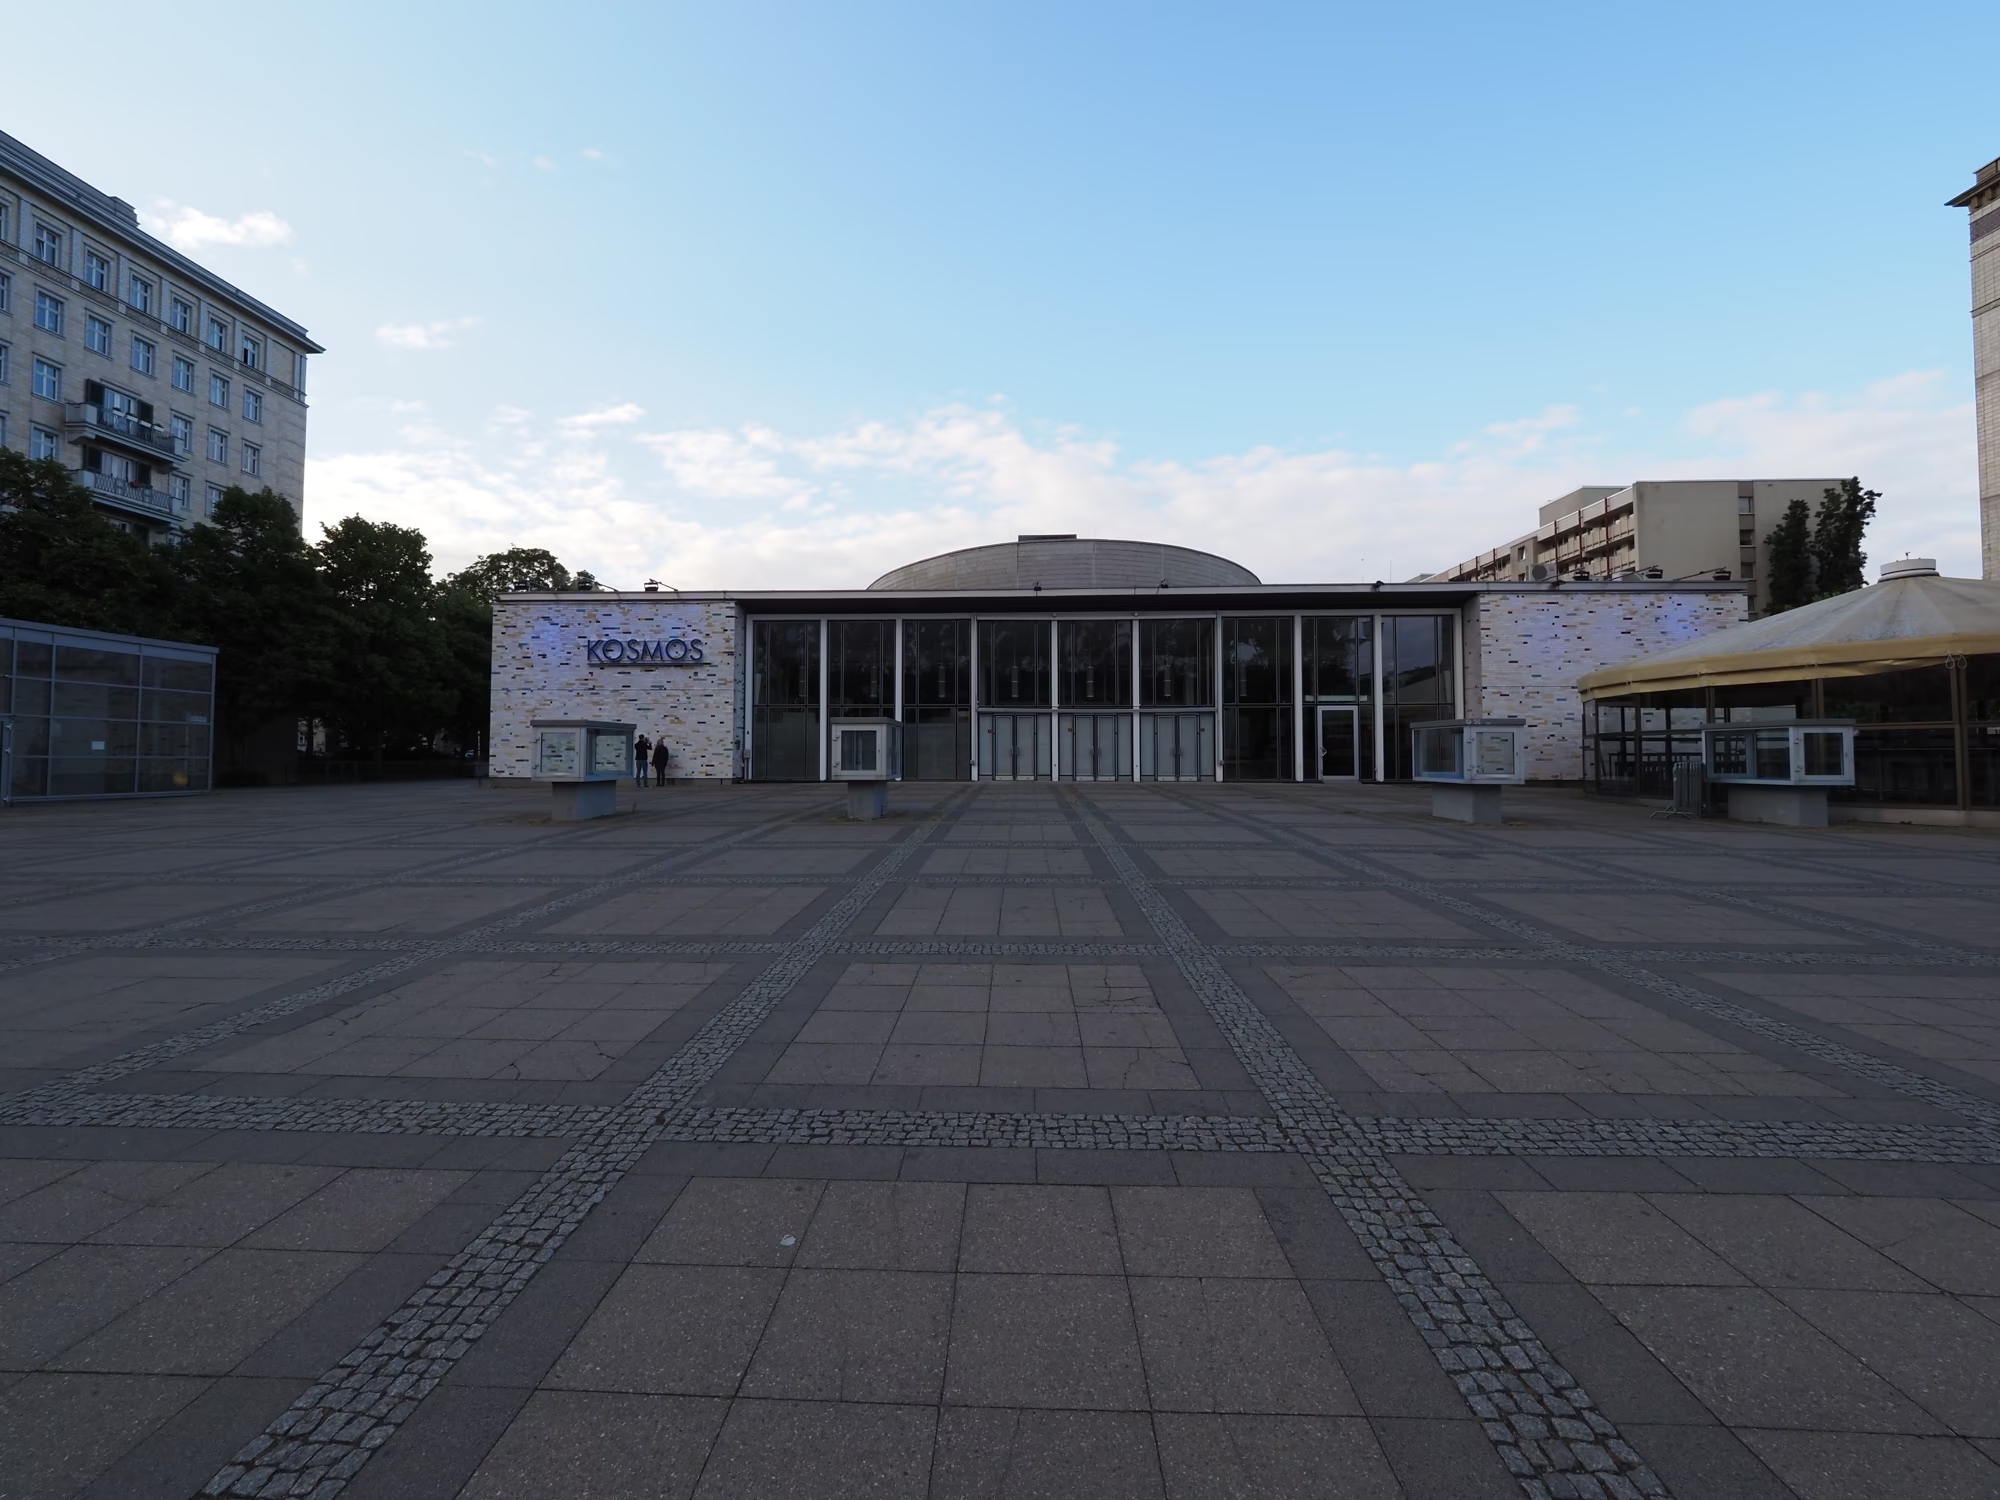
After I creating a very (very) small photo tour in front of Kosmos last year I still liked this odd little concept and have decided to expand the tour somewhat! It now allows
This project is very much still a result of the ongoing pandemic for witch it seemed a manageable, if somewhat tedious, thing to build.
If a small virtual neighbourhood walk sounds like a fun thing to explore just press this button here:
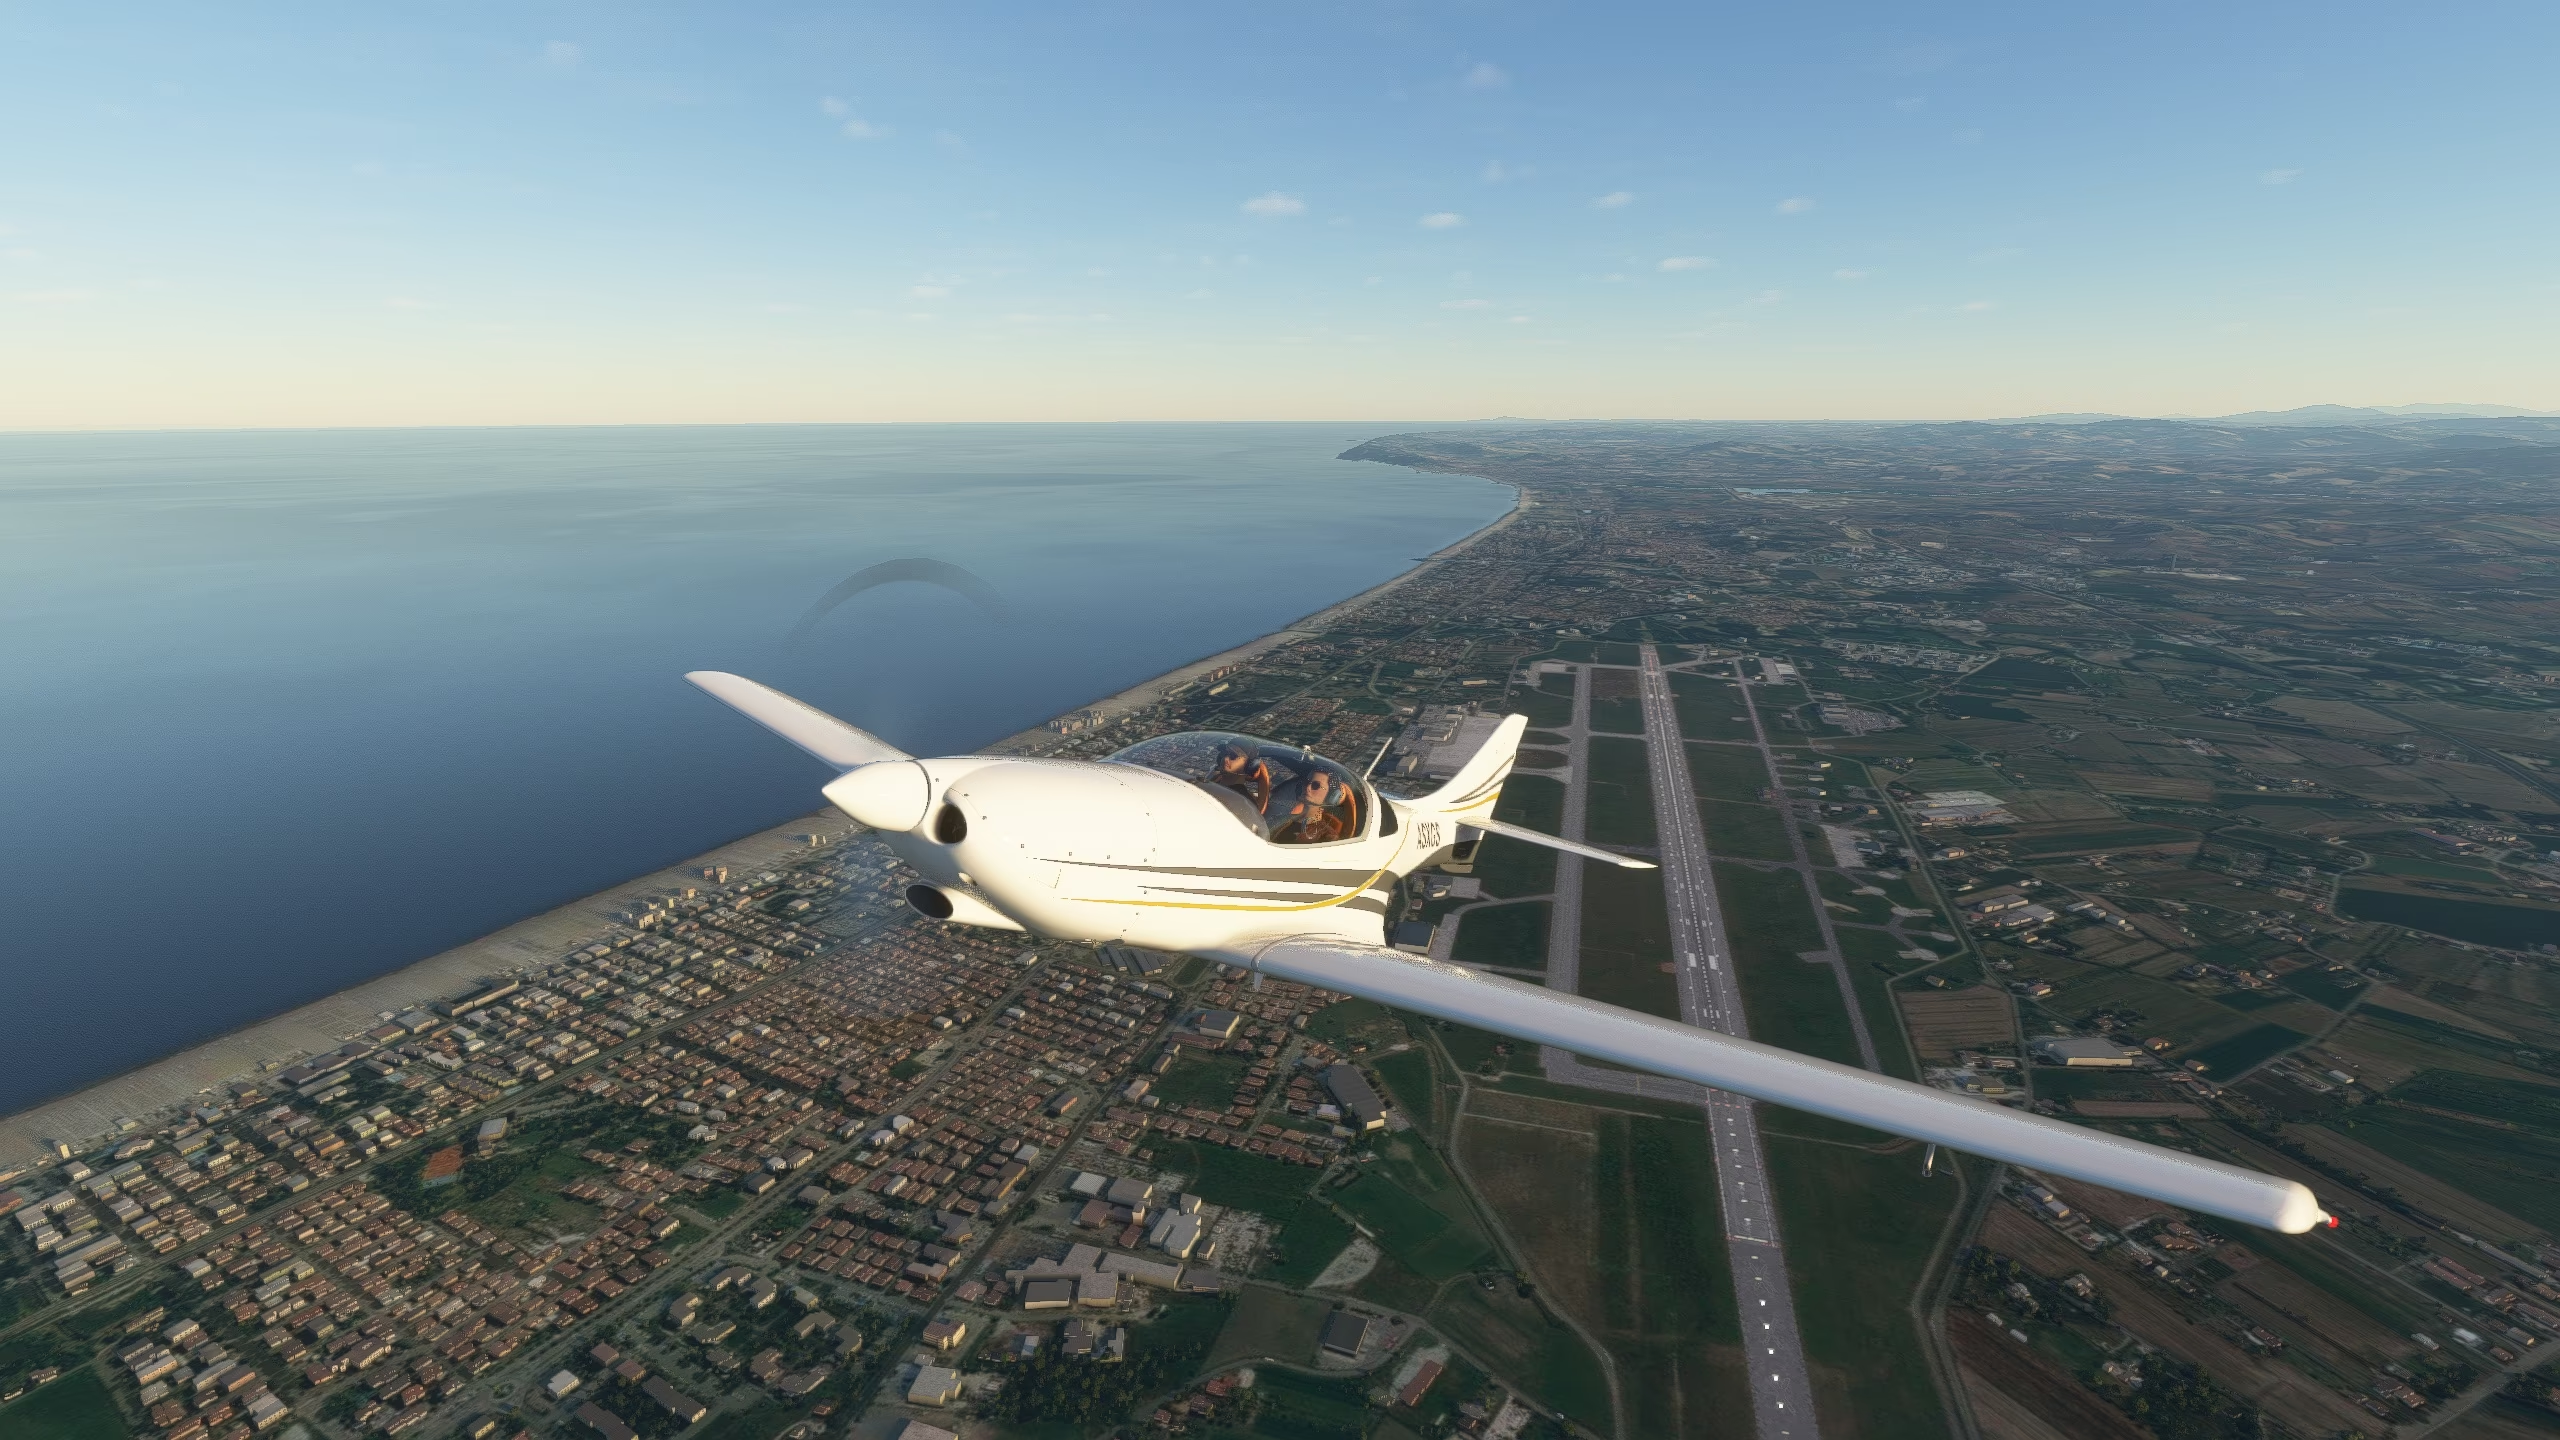
I’ve acquired a bit of a nerdy pandemic project: I’m playing Microsoft Flight Simulator 2020 trying to make it from Berlin Tegel to Singapore in a very small plane.
This started out in November (right before the actual Tegel airport closed down) after getting a bit of inspiration from a colleague. At the time of writing this I have flown 8 short legs and made it to Rimini. I have put together a small site where you can track my progress, you can find it over here.
I recently stumbled across the Roof Tour on elliott.computer. The the very simple, streetview-esque experience (and a lot of the other projects there) reminded me of the early web that I sometimes miss. (Remember when QuickTime VR tours were an exiting new thing?)
It also seemed so very approachable to make, inspiring me to copy the idea make my on version. You can find the result over here. So far it has just two 360-degree locations but I’m planning on adding a few more points to the tour soon.
(Oh, and I even added the 10 lines of Javascript so you can move with the arrow keys, just be aware that it’s all regular links and they will be in your browser history afterwards 😇)
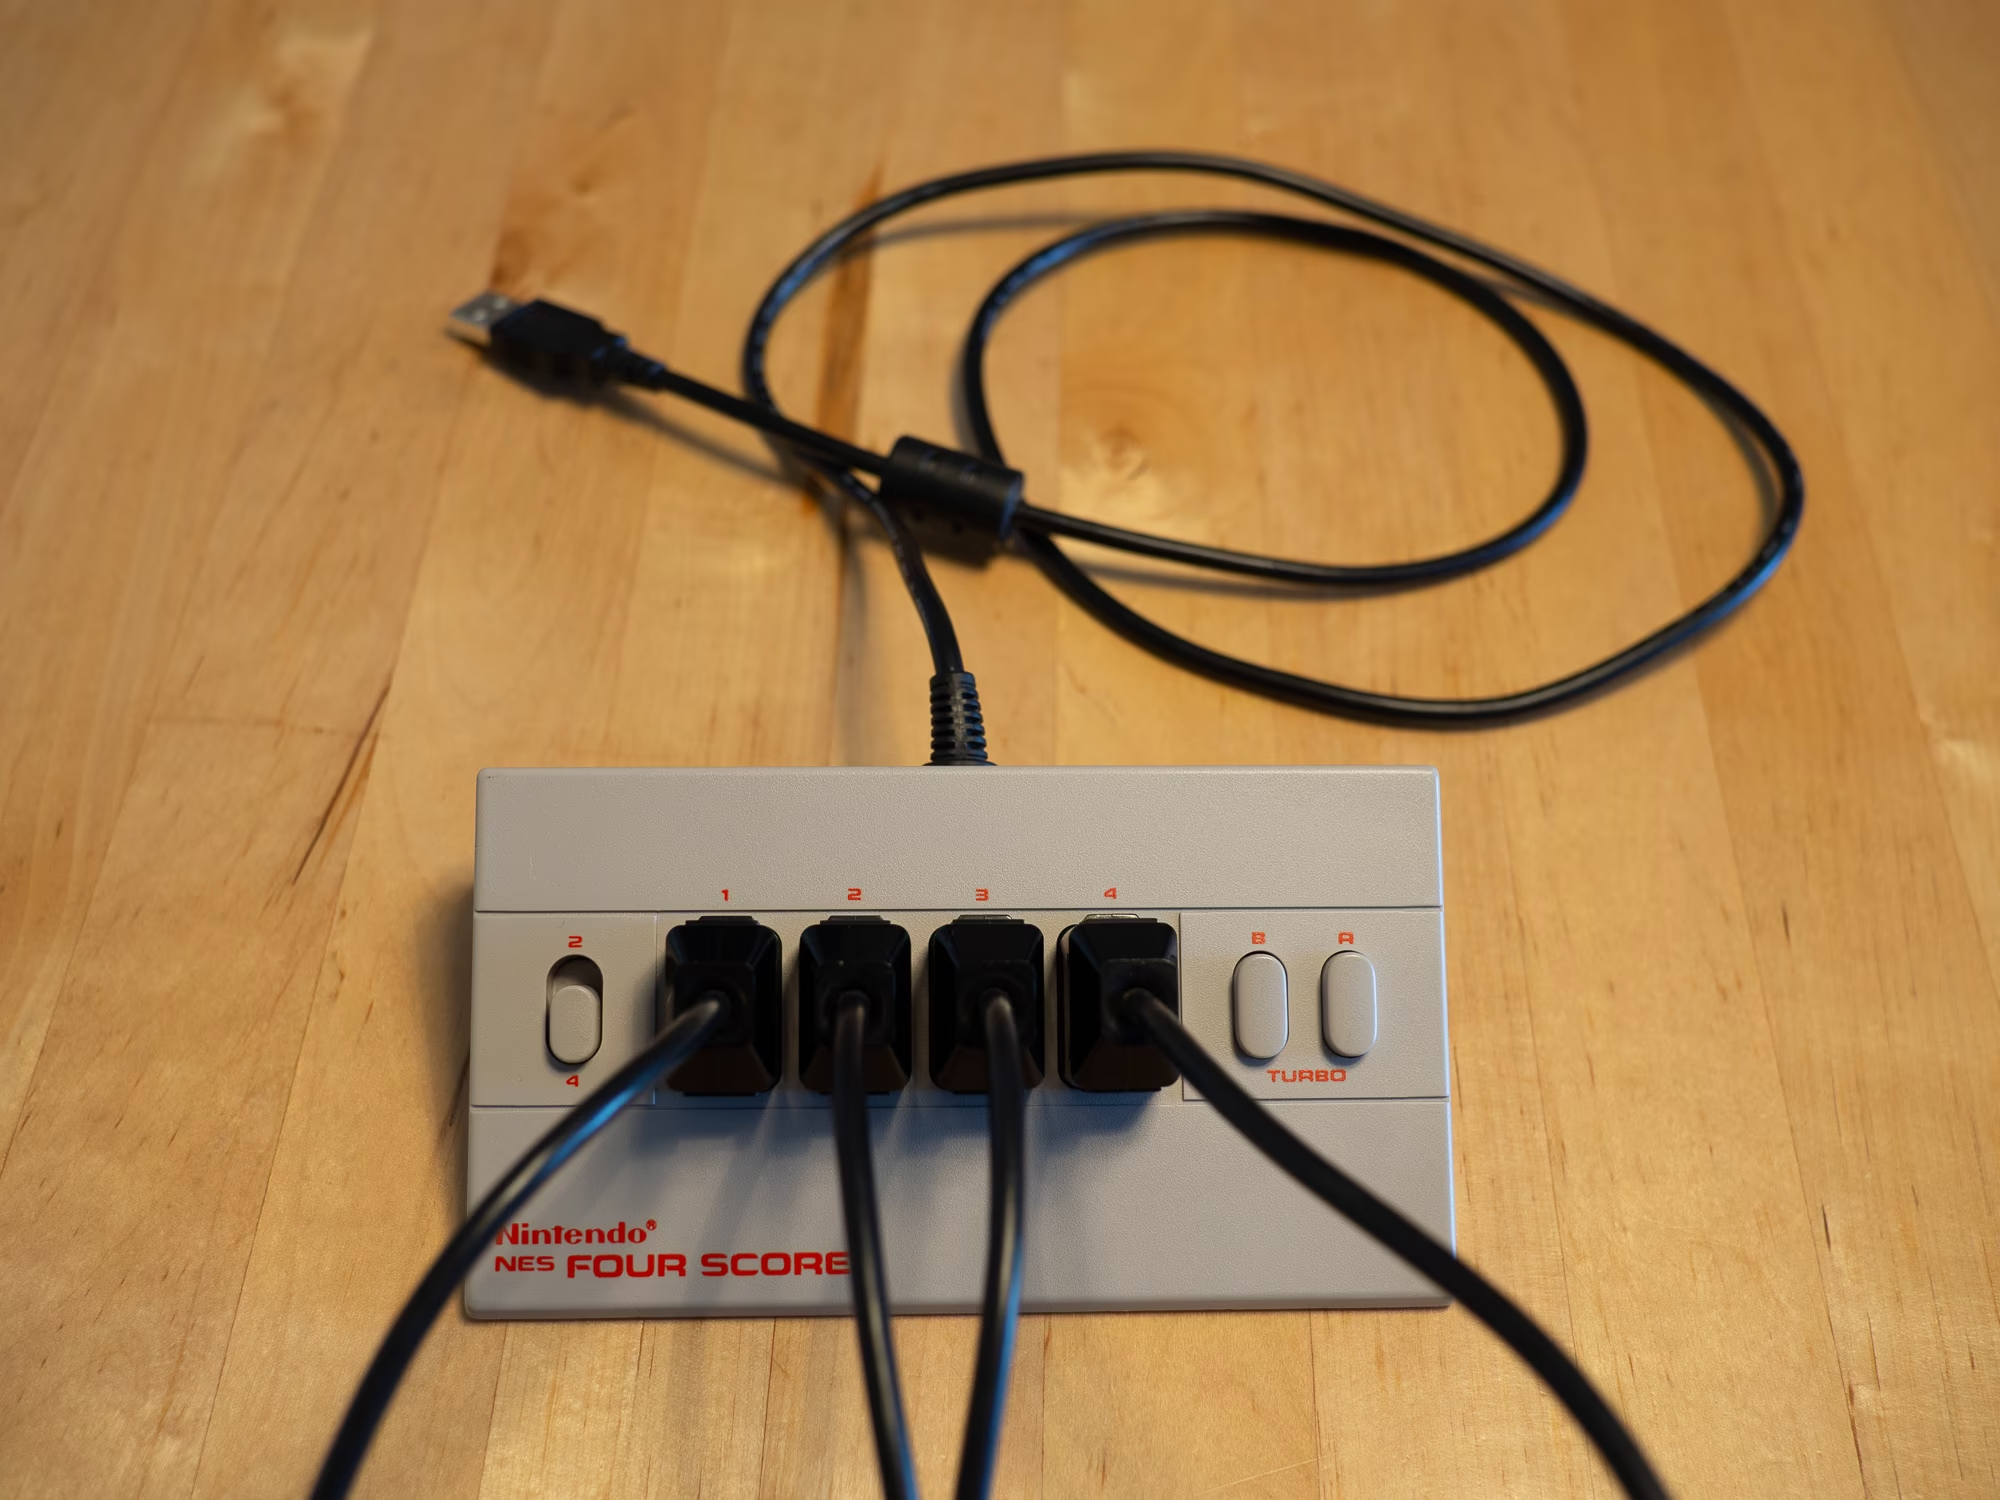
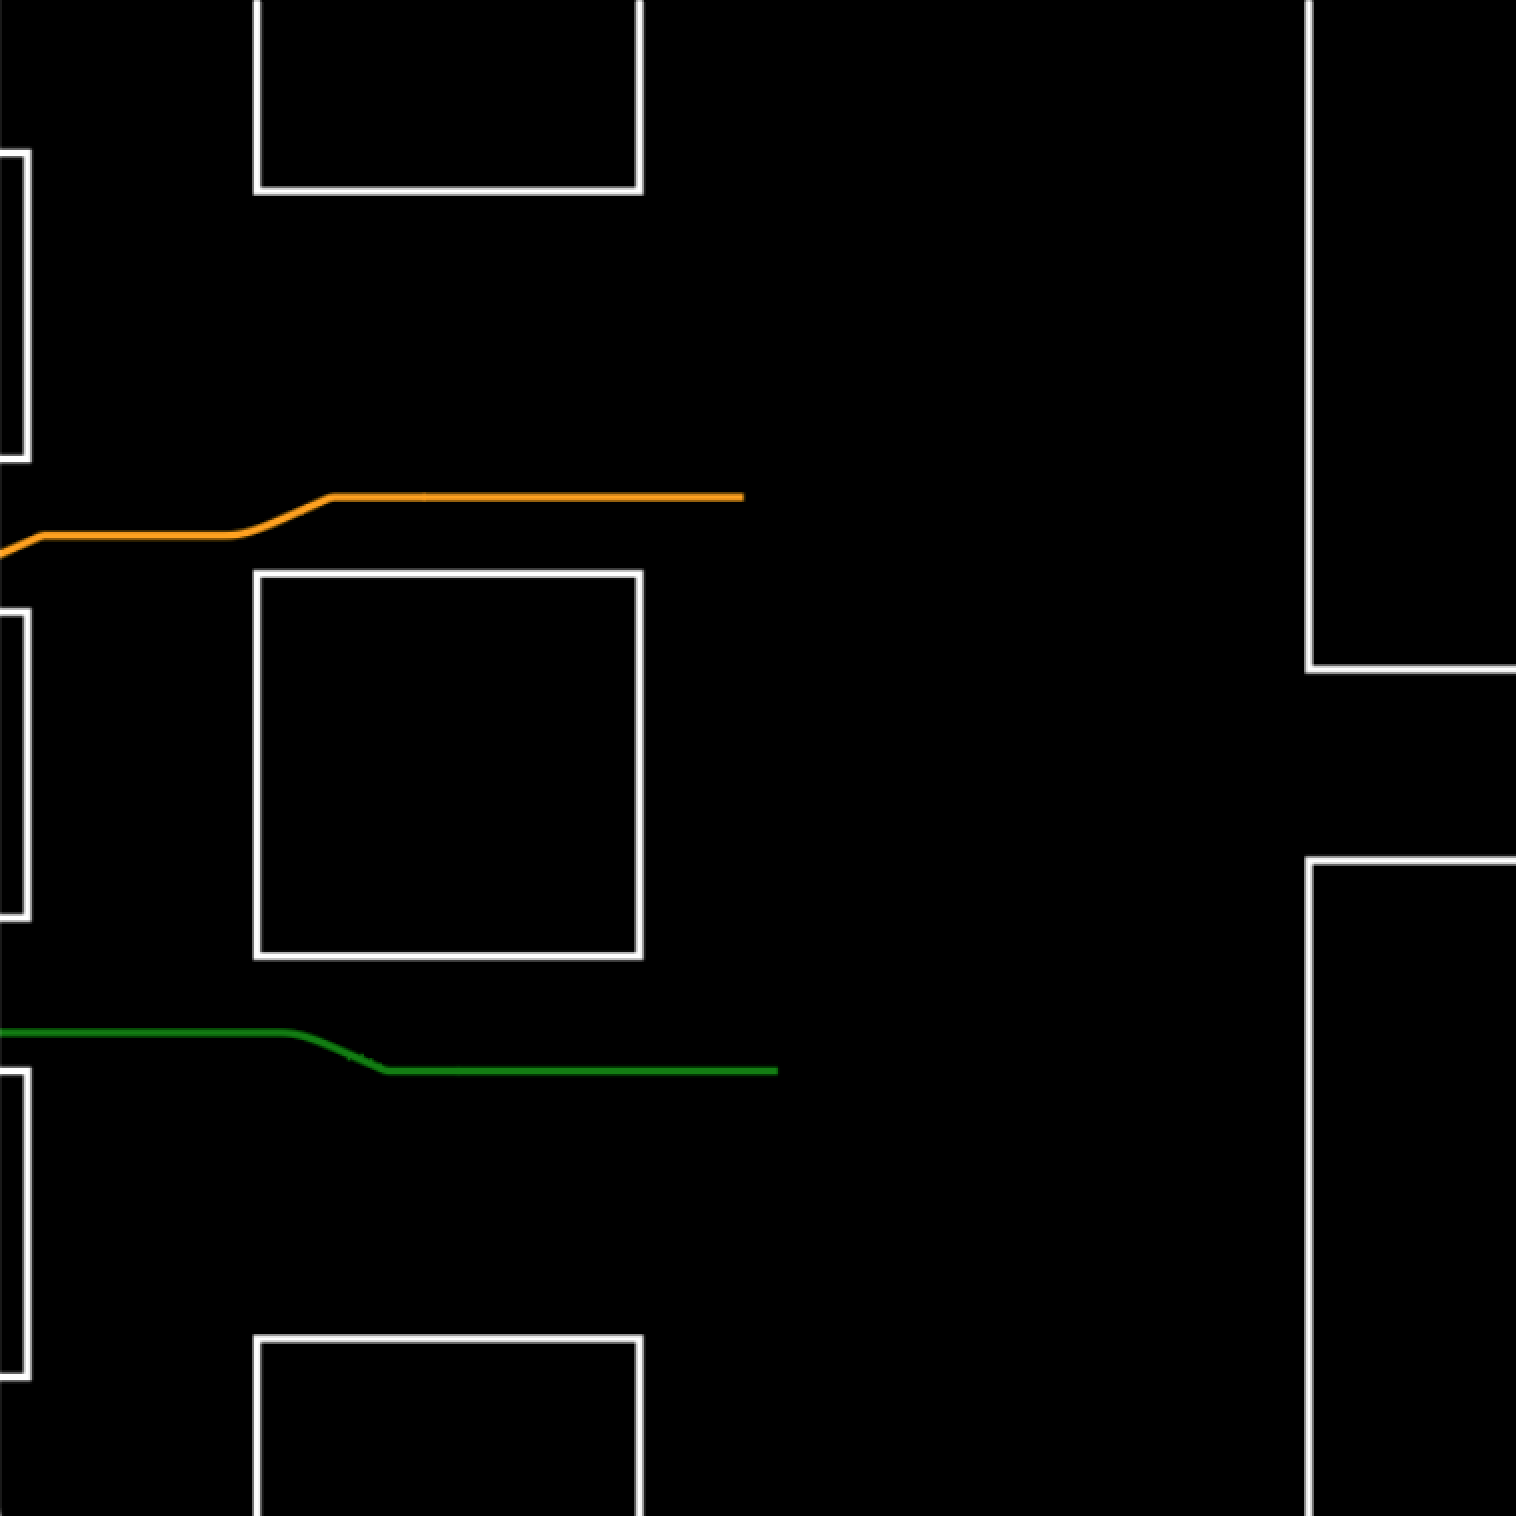
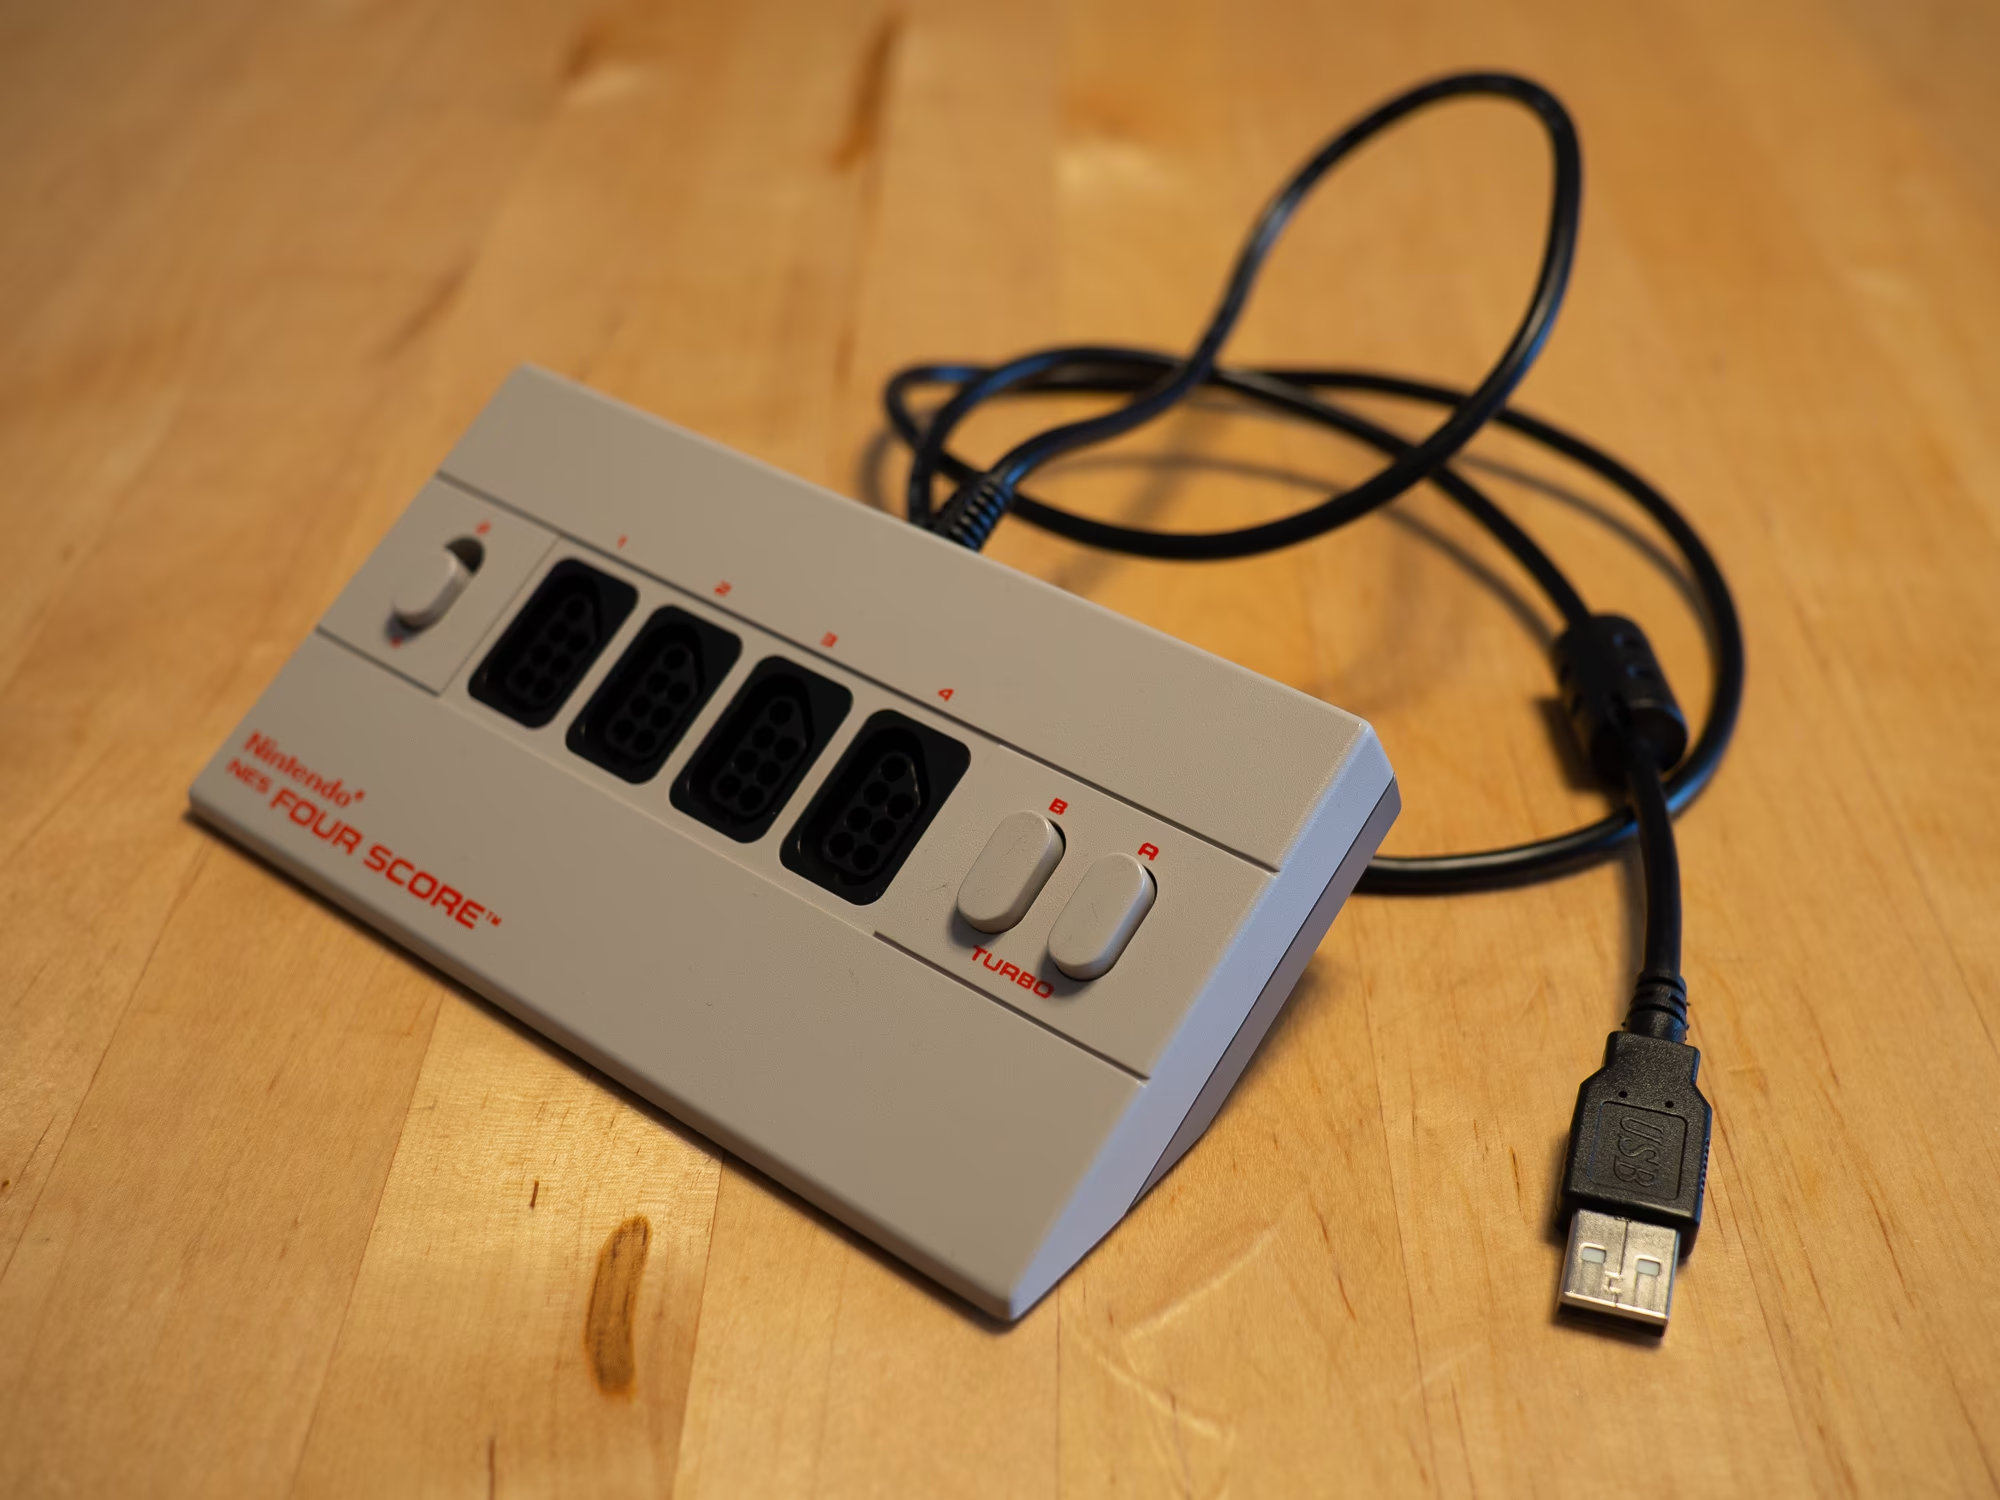
I’ve recently finished converting a NES Four Score to USB. Overall I think it’s a neat way to adapt up to 4 NES controllers to USB without modifying the controllers themselves. I used a pre-assembled board from raphnet. The result looks pretty neat:
In the process I had to figure out the pinout of an internal connector (CN5). Pinouts for the the standard NES controller plugs are pretty easy to come by, but I guess not that many people build adapters into Four Scores.
I do not think that the Four Score models differed significantly but for completeness sake, here is the board from the model (PAL Ver 1.1 / FPA-PAL-S01) that I converted:
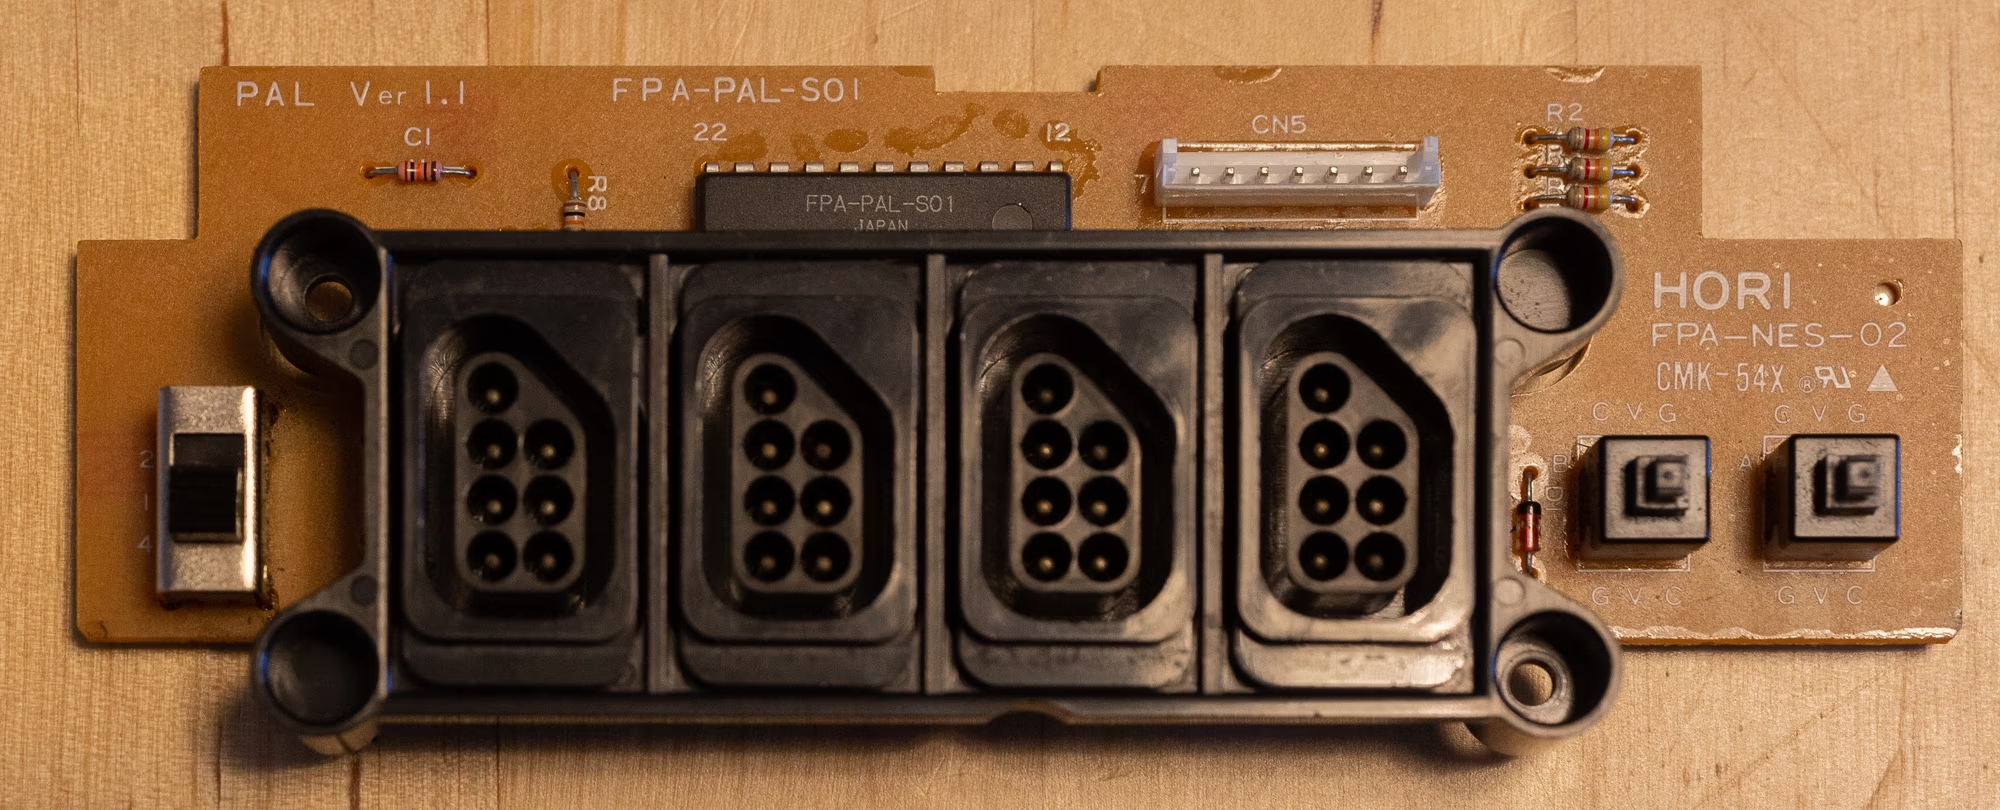
The connector that terminates the cable that goes to the NES is labeled CN5. I ended up cutting the cable and using the header and some of the original wires in order to hook up my USB adapter board. You can see the connector with the original plug in place here:
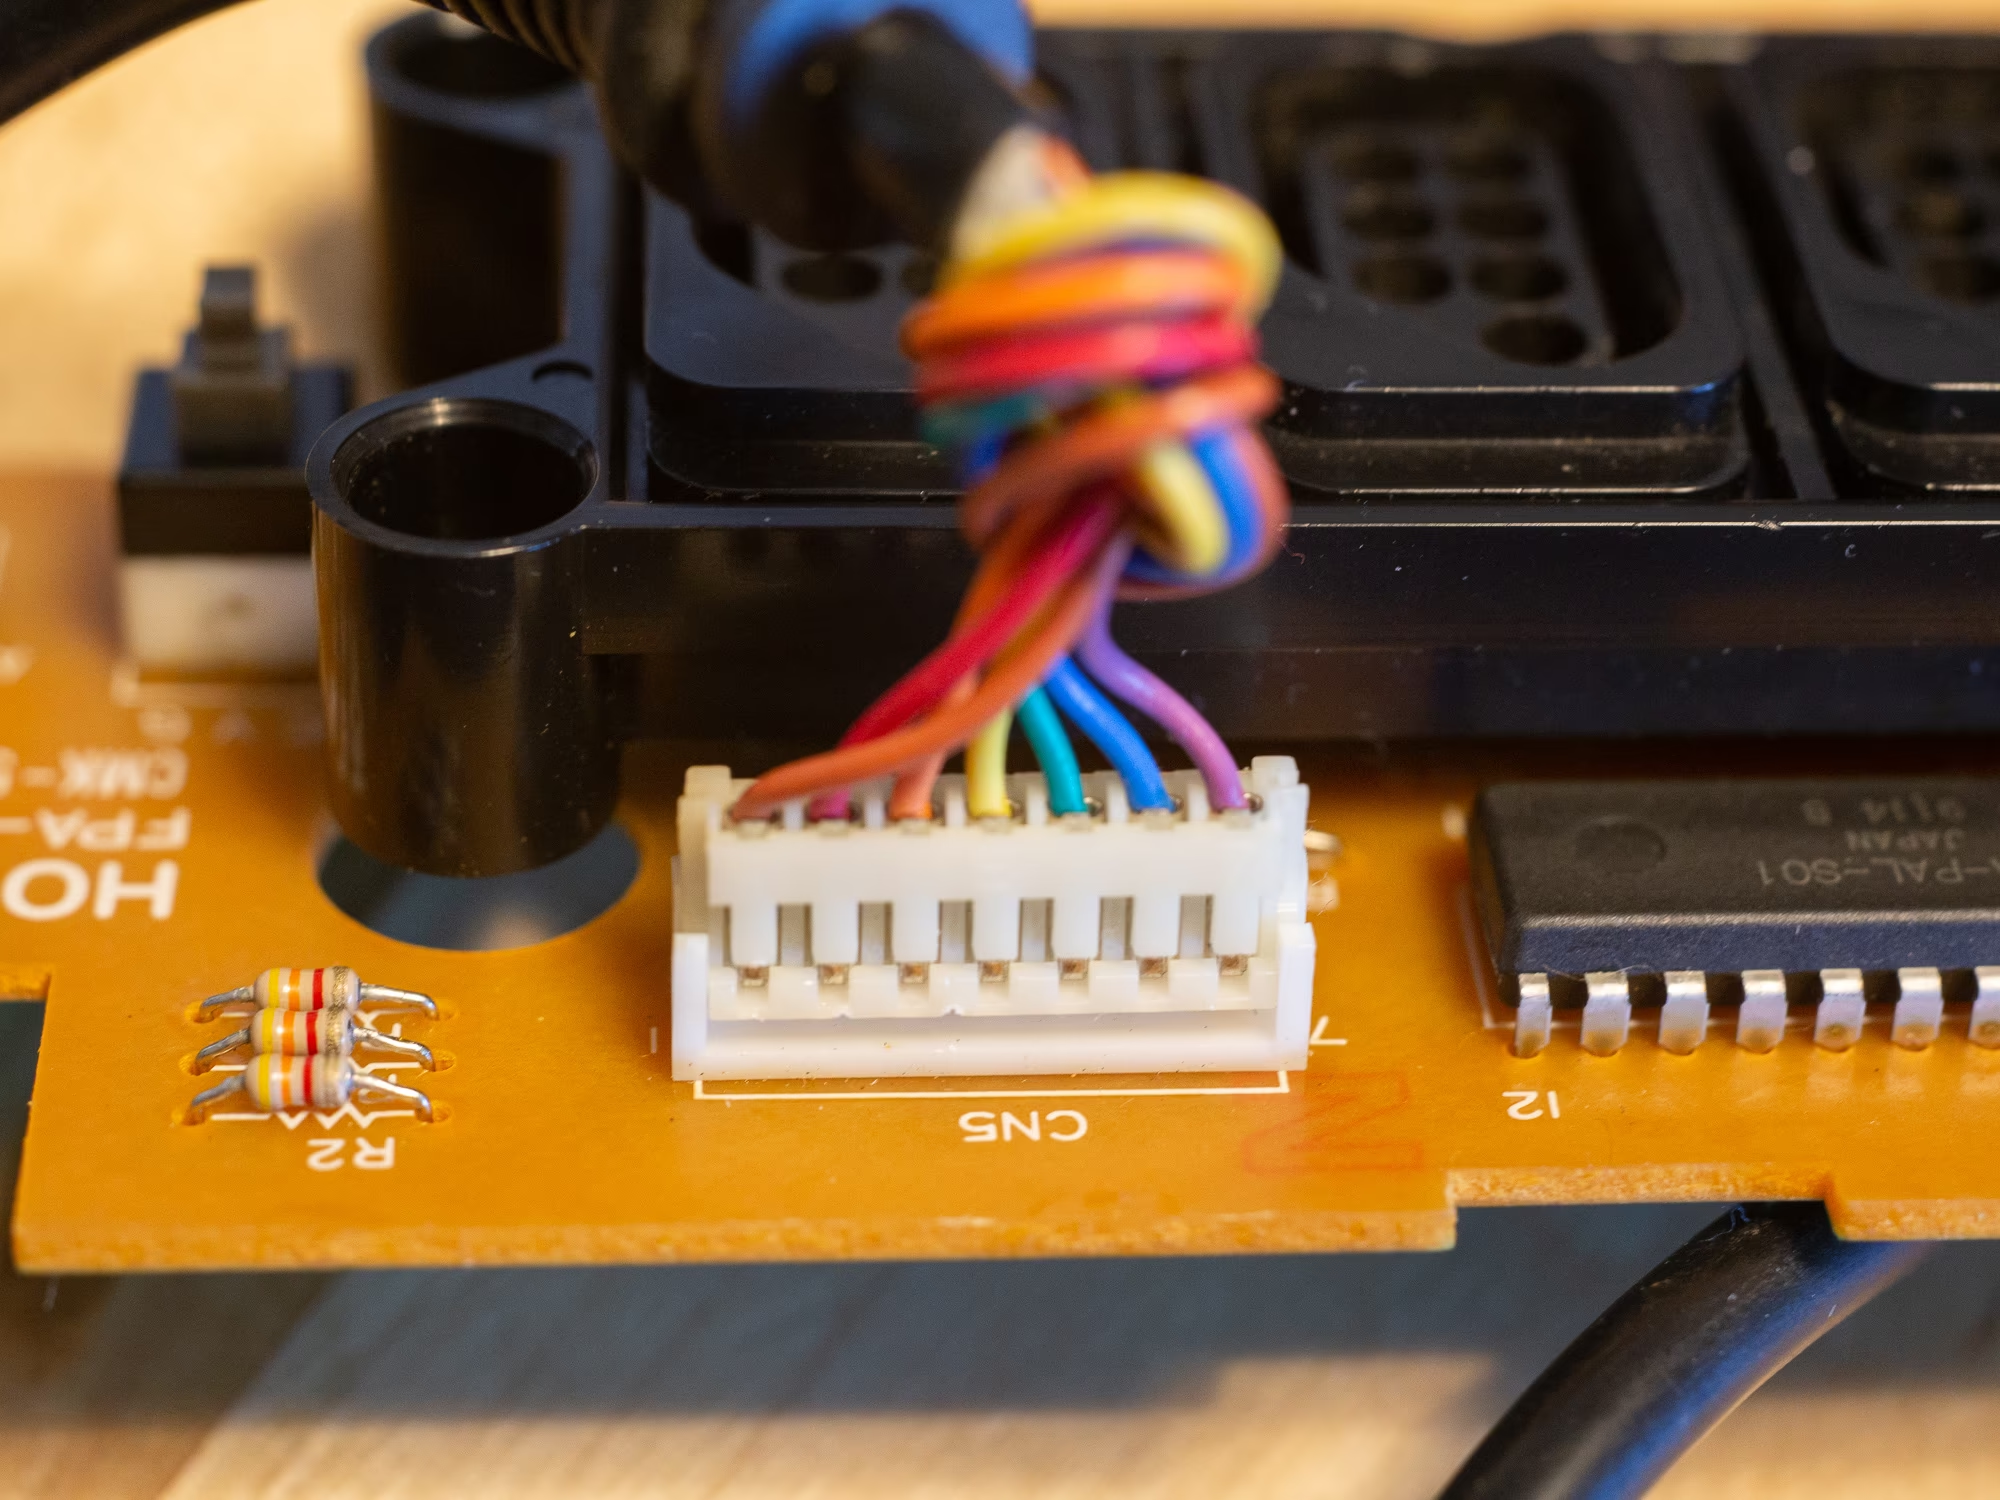
The following table shows the pinout. I got it by testing each pin on the original cable while assuming that the pinout on the controller port side would be the same as a regular controller. Additionally I’ve noted the names of the pins they need to hook up to on the specific adapter that I used.
| pin | wire color | purpose | pin on 4snes |
|---|---|---|---|
| 1 | brown | latch | PC 4 |
| 2 | red | player 1 data | PC 3 |
| 3 | orange | player 1 clock | PC 5 |
| 4 | yellow | player 2 data | PC 2 |
| 5 | green | player 2 clock | PC 5 |
| 6 | blue | GND | - |
| 7 | violet | VCC | + |
Finally I had find a spot to mount the PCB of the adapter in the housing somewhere. It’s actually quite small (yay for SMD parts) so that was fairly easy. The biggest change I had to make was to run the USB wire under the original board to my adapter and do the same with the wires from CN5. I was even able to re-use the cable guard form the original. You can see the sticky-tape-mounted PCB inside my Four Score here:
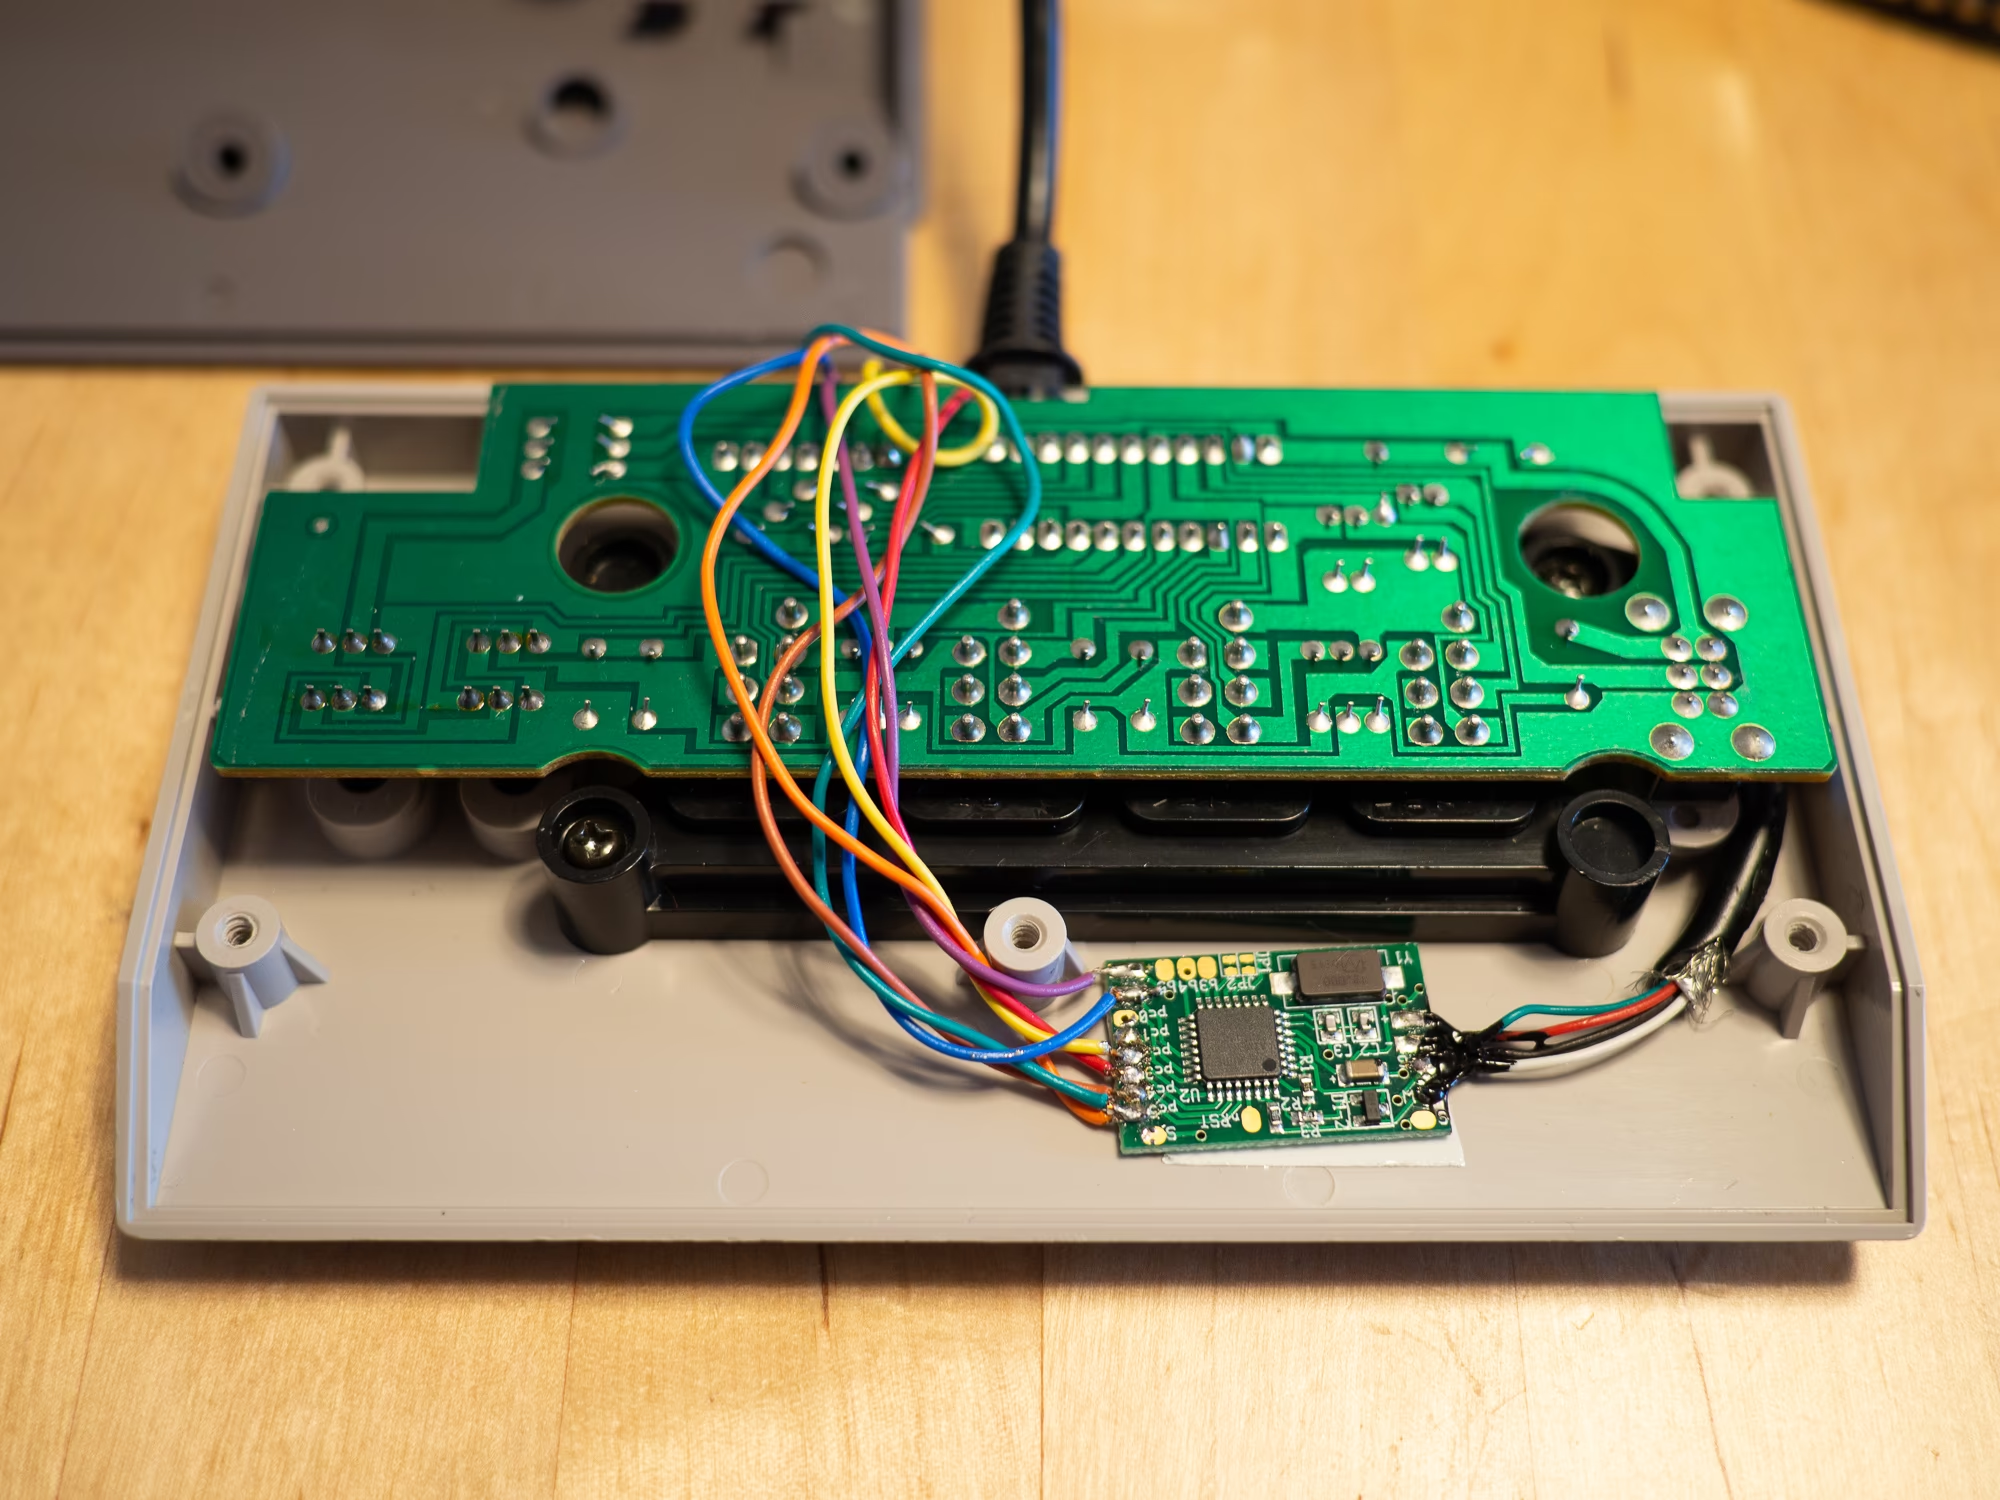
And here is the re-assembled adapter with 4 controllers plugged in for testing: